How to Screen Record on Windows 11 and 10 With Audio: Game Bar, Snipping Tool or a Real Recorder
You can record your screen on Windows 11 and Windows 10 without installing anything, but the built-in tools have limits that show up the moment you try to record a real tutorial. Here are the options, what each can and cannot do, and how to record the screen with sound using Easy Screen Recorder.
Option 1: Xbox Game Bar (built in)
Press Win + G to open the Game Bar, or Win + Alt + R to start and stop recording straight away. It was made for games, so it records one app window. It cannot record File Explorer or the desktop, and it stops capturing if you switch to a different app. That is fine for a game clip and awkward for a tutorial that moves between programs.
Option 2: Snipping Tool (Windows 11)
Recent versions of the Windows 11 Snipping Tool can record a rectangular area of the screen (Win + Shift + R). It is quick for a short clip of one region. It offers few controls, so for webcam overlays, drawing on screen or scheduled recording you will want a dedicated recorder.
Option 3: Easy Screen Recorder
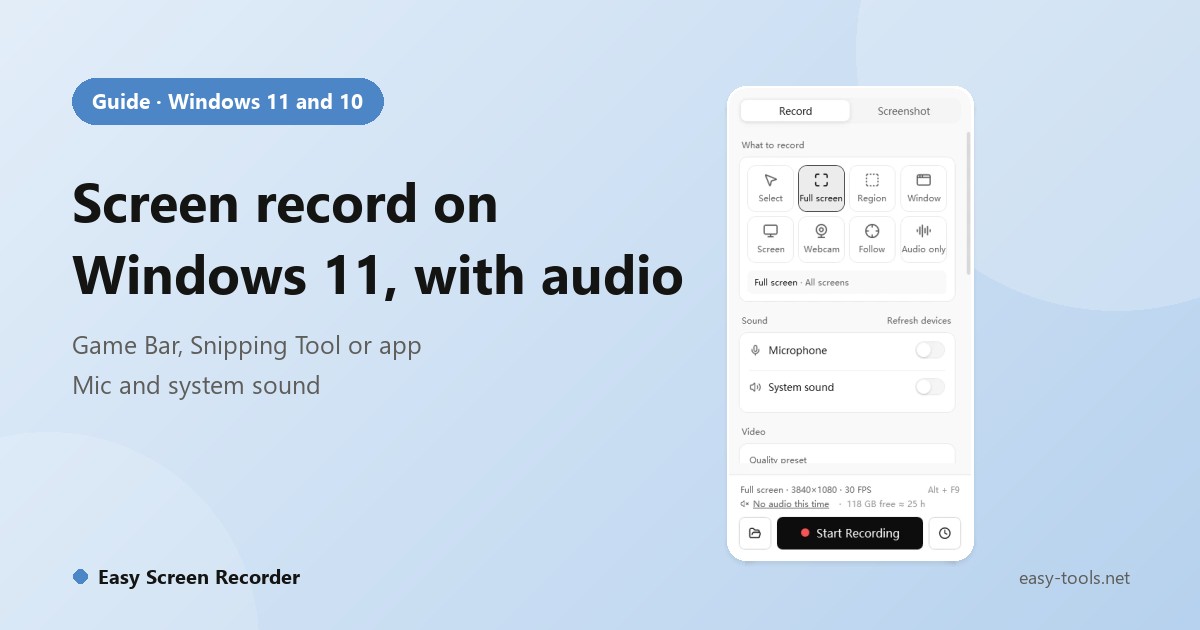
Easy Screen Recorder records the whole screen, a region, a window, one monitor, the webcam, or follows the mouse, with sound.
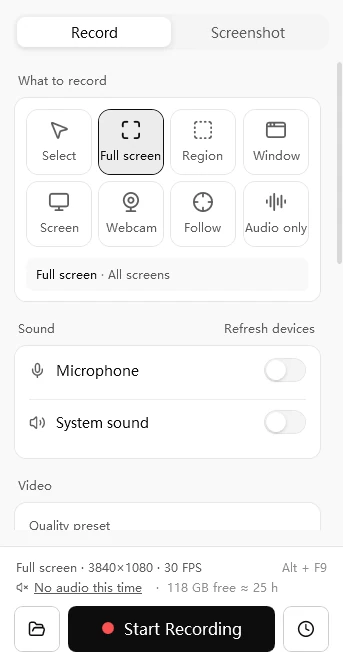
- Pick what to record. For tutorials, Region or Window keeps the picture focused and the file smaller. Common sizes include 1920 x 1080 and 1280 x 720.
- Turn on sound. Switch on Microphone to narrate and System sound to capture what your PC plays. Both can be recorded together, and the level meters move while you test.
- Start and stop. Alt + F9 starts and stops, Shift + F9 pauses. The floating control bar is never part of the video.
- Make it clear. Under Settings turn on Show mouse clicks and Show keystrokes; press Ctrl + Shift + D to draw on screen while recording.
- Finish. Trim the start and end, convert a clip to GIF, compress it or pull out the audio from the built-in player; FFmpeg is included, so there is nothing else to install.
Recordings are written as fragmented MP4 in small chunks, so a crash or power cut usually costs only the last few seconds. See the full walkthrough in recording a tutorial from first click to finished video.
Which one should you use?
| You want… | Use |
|---|---|
| A quick clip of one app or a game | Xbox Game Bar |
| A short clip of a screen region | Snipping Tool |
| Whole screen or several monitors, sound, webcam, drawing, scheduled or long recordings | Easy Screen Recorder |
If the recording has no sound or comes out black
- No sound: turn on Microphone or System sound before you start and check the device under Settings, Sound; click Refresh devices after plugging in a headset.
- Black video: turn on Compatibility capture mode under Settings, Recording and restart the app. Some protected video players block screen capture by design.