Watermark Product Photos in Bulk: Hundreds of Images in One Afternoon
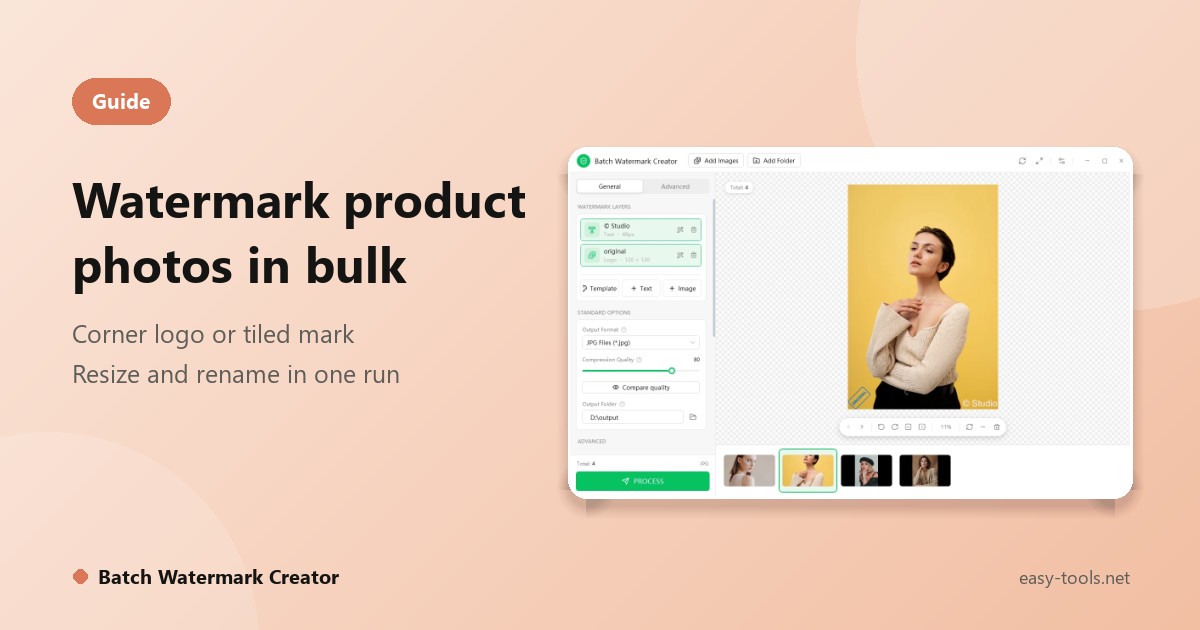
You spend time shooting, retouching and laying out a product photo, and a week later it shows up in another seller's listing. Watermarking is the most direct answer, but nobody wants to add a watermark by hand to hundreds of images. This guide covers how to watermark main listing images and detail images differently, and how to do the watermarking, resizing and renaming in one run with Batch Watermark Creator. It applies whether you sell on Etsy, eBay, Shopify, Amazon or your own site.
A watermark is a deterrent, not a vault
Honestly, no visible watermark makes copying impossible. Given enough time, nearly any mark can be removed. What a good watermark changes is the cost:
- Casual re-posting becomes credited re-posting instead of anonymous.
- Removing the mark cleanly becomes laborious enough that most people will not bother.
- Your name and brand stay attached to every copy that does circulate.
So the workflow has to do two things: make the mark hard to remove cheaply, and make adding it cheap enough that you never skip it.
Main images and detail images need different marks
A main image exists to sell the product, so the watermark must not compete with it. Also check your marketplace's listing rules: some restrict logos or text on the primary image, in which case watermark only your secondary images and your own site.
| Use | Suggested approach | In Batch Watermark Creator |
|---|---|---|
| Main product image | Brand logo in a corner, lower opacity, clear of the product | Image layer, nine-grid alignment, Opacity lowered |
| Detail and lifestyle images | Mark repeated across the whole image so there is no clean corner to crop | Tile alignment, with adjustable spacing |
| Customer photos, supporting material | A single text credit line | Text layer, for example a copyright sign and your shop name |
Step 1: design the mark
Open Batch Watermark Creator and click Add Images, or Add Folder to take in a whole directory including its subfolders. Then add layers with Text and Image, drag them into place on the canvas, or use the nine-grid buttons to snap them to a position.
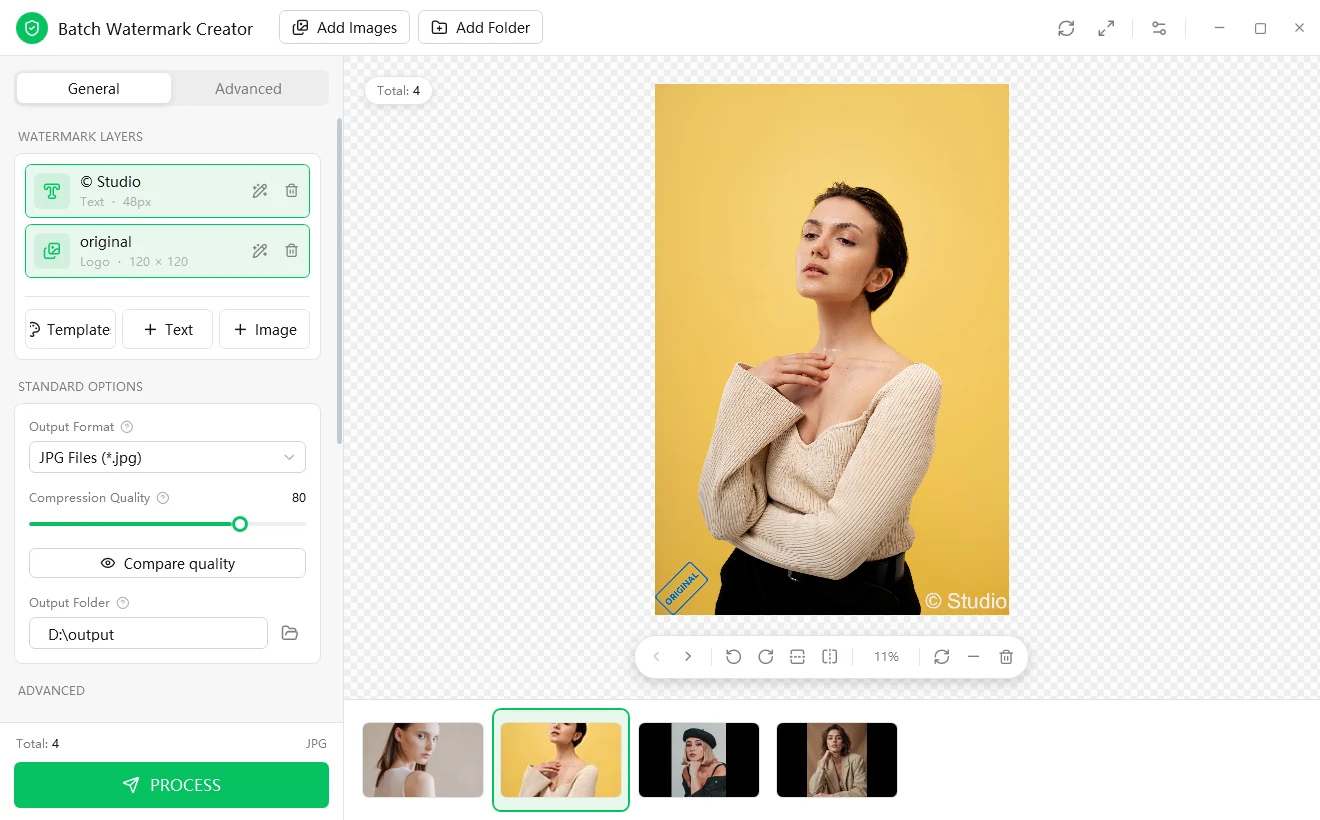
A PNG logo with a transparent background works best. Lower its opacity, and consider Drop Shadow or Outer glow so it reads on both dark and light products without overpowering them.
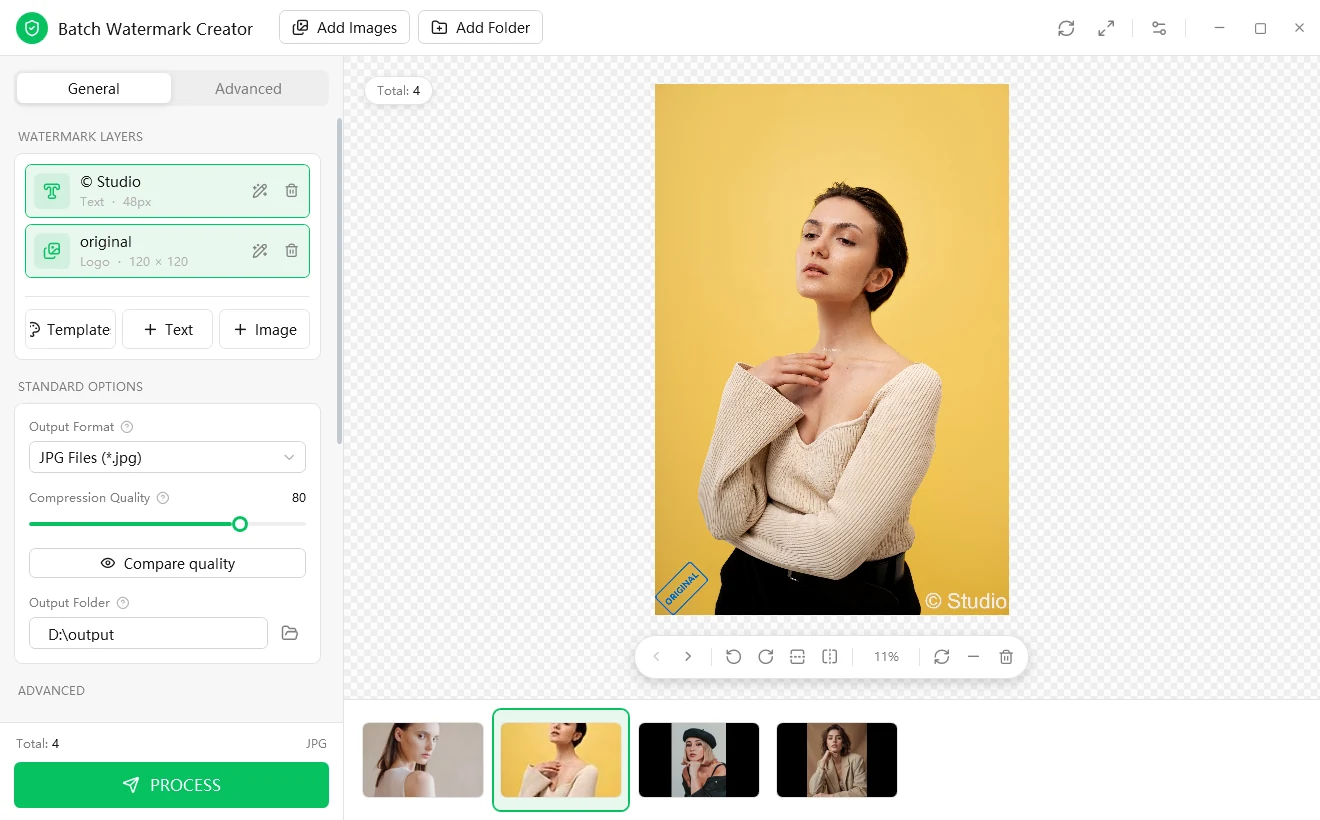
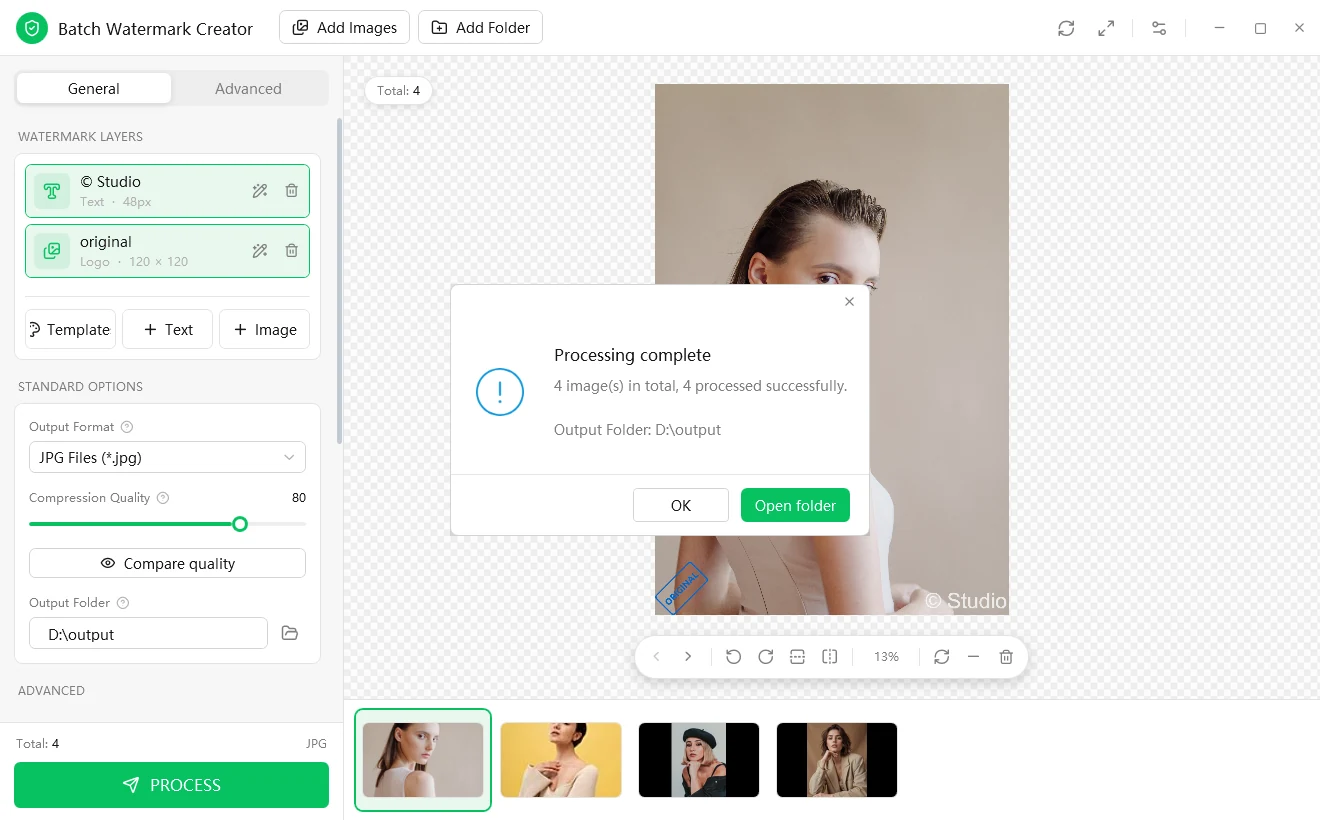
Text and image layers can be stacked and switched on and off independently, as in this example with a text credit and a logo.
Step 2: tile the mark on detail images
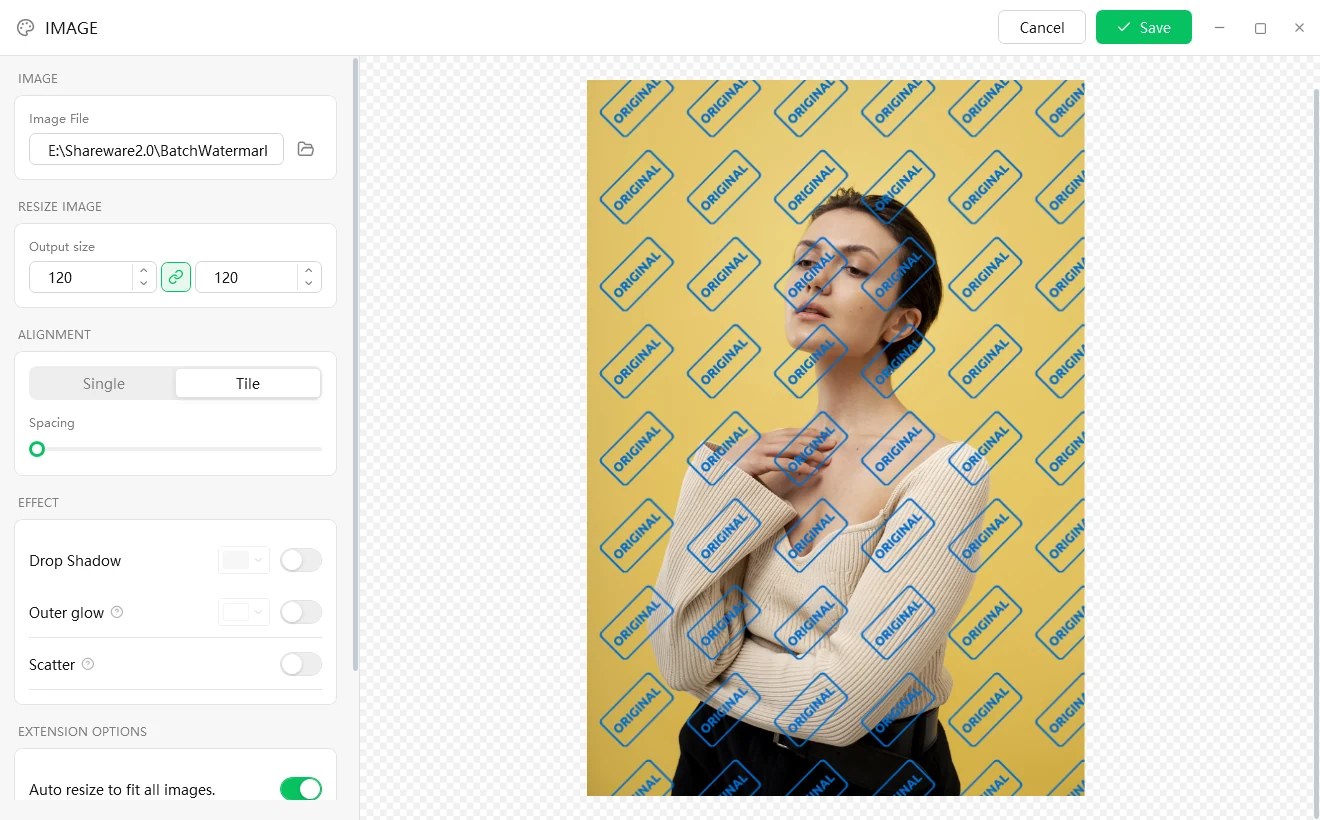
A corner mark disappears with one crop. For large images, use Tile: the logo or text repeats across the whole picture with adjustable spacing. Combined with random placement, layering and effects, removing it cleanly takes real effort.
Step 3: size, names and file weight in the same run
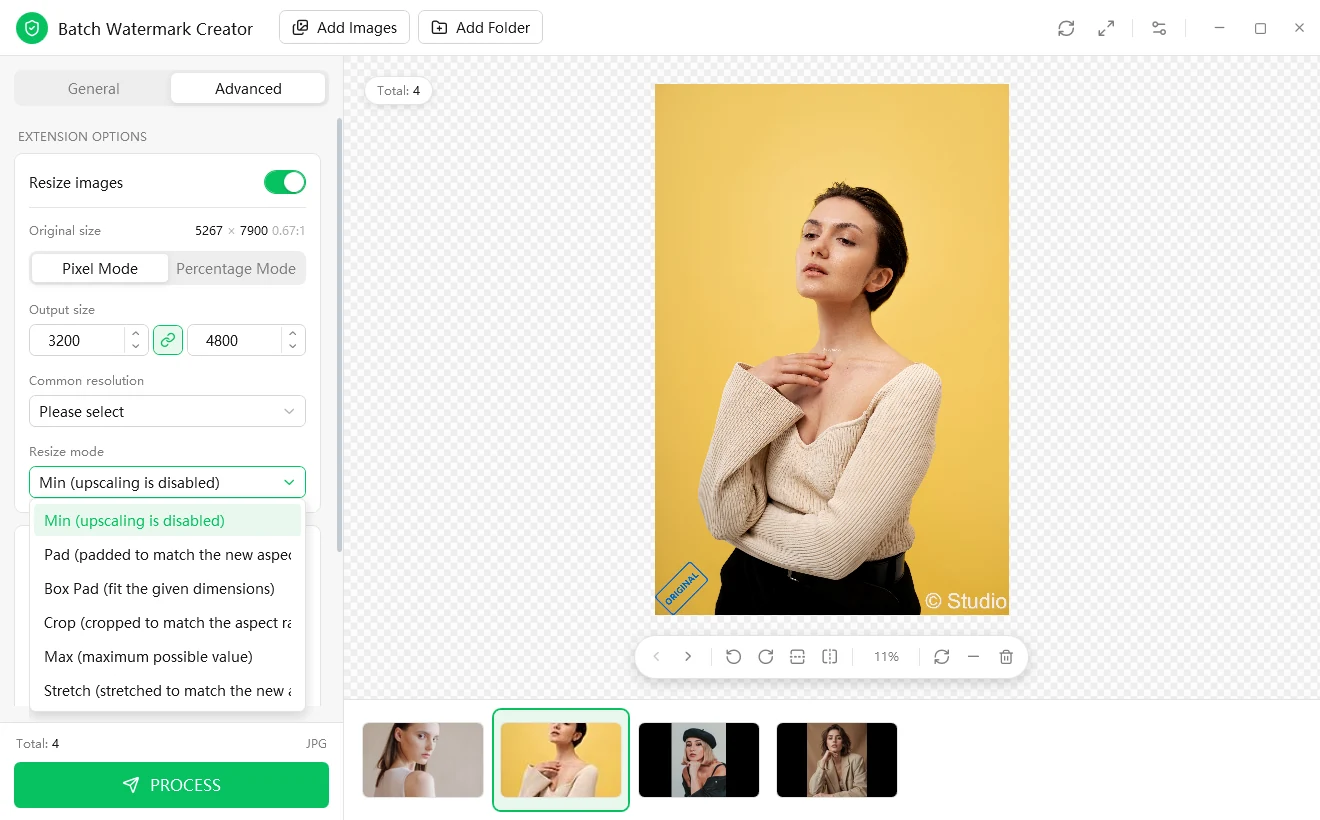
Switch to the Advanced tab. Resize images works by pixels or percentage, with common resolutions in a list and six resize modes: Min (upscaling is disabled), Pad, Box Pad, Crop, Max and Stretch. If your marketplace wants a fixed pixel size, Pad or Crop gets every image the same size in one pass.
Rename output files with numbering templates and placeholders, for example turning a mess of camera names into a scheme like shop-style-001.
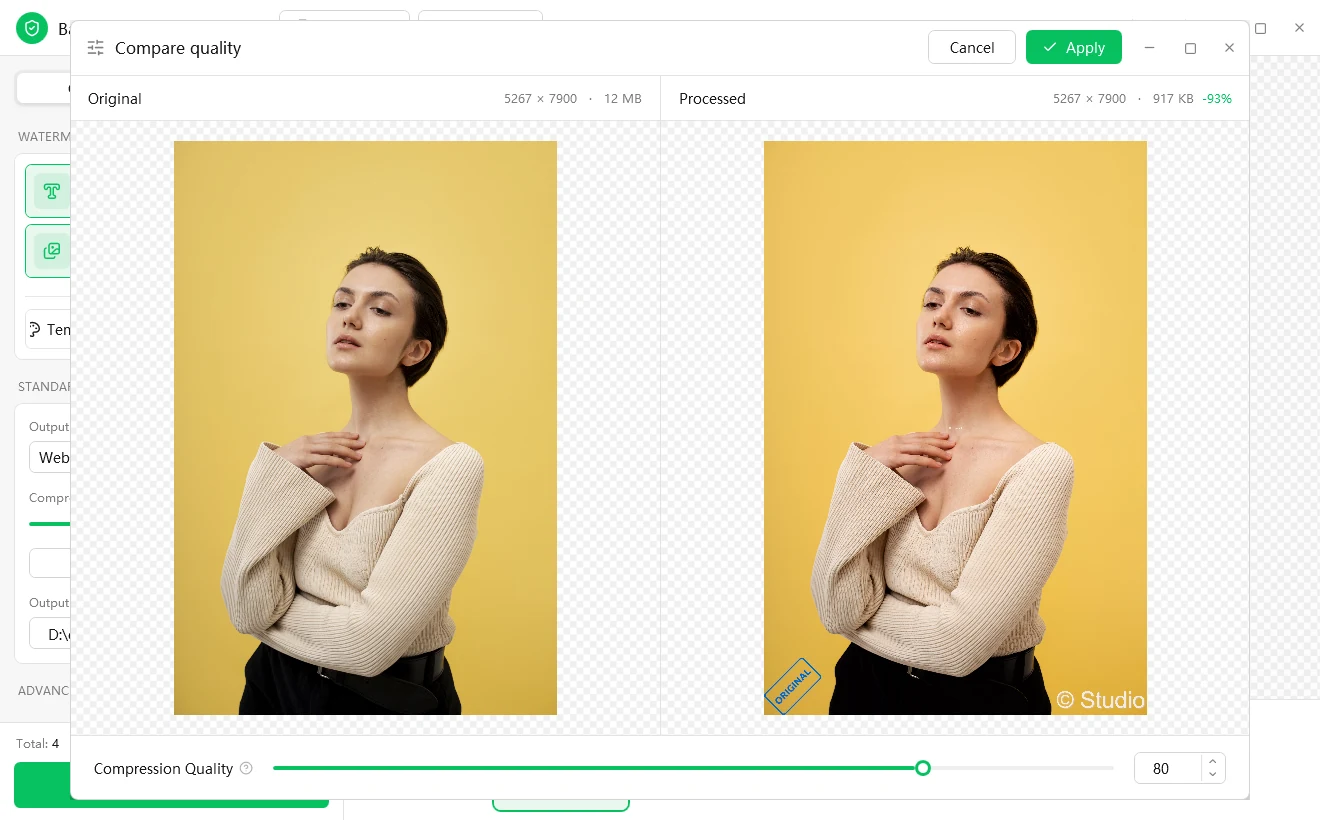
Output can be JPG, PNG-24, PNG-8, WebP, BMP, GIF or TIFF. If you are unsure about quality, click Compare quality: the original and the result appear side by side with sizes. In the example below a 12 MB original becomes a 917 KB WebP (-93%), and the slider lets you find the balance between sharpness and file size.
Step 4: press Process
Choose an output folder and press Process. A few tips:
- Write to a different folder so originals are untouched. With Overwrite off, files with the same name are numbered instead of replaced.
- Subfolders are included, and the folder structure is recreated in the output.
- One corrupt file does not stop the batch. It is skipped and counted as a failure, and the summary tells you how many succeeded.
- Reuse your settings. Every run is saved to Recent with its complete configuration, ready to apply to the next batch of listings.
For step-by-step instructions, read the user guide or download the trial.