

1Quick start
- Click Add Images (or Add Folder) in the title bar.
- Click Add Text Info or Add Image on the left, set it up and click Save.
- Check the watermark on the canvas; drag it if needed.
- Choose JPG as the output format and leave Compression Quality at 80.
- Enter an Output Folder, for example
D:\output. - Click the green PROCESS button and wait for it to finish.
When it is done, click Open folder in the result dialog to see the output.
2The main window
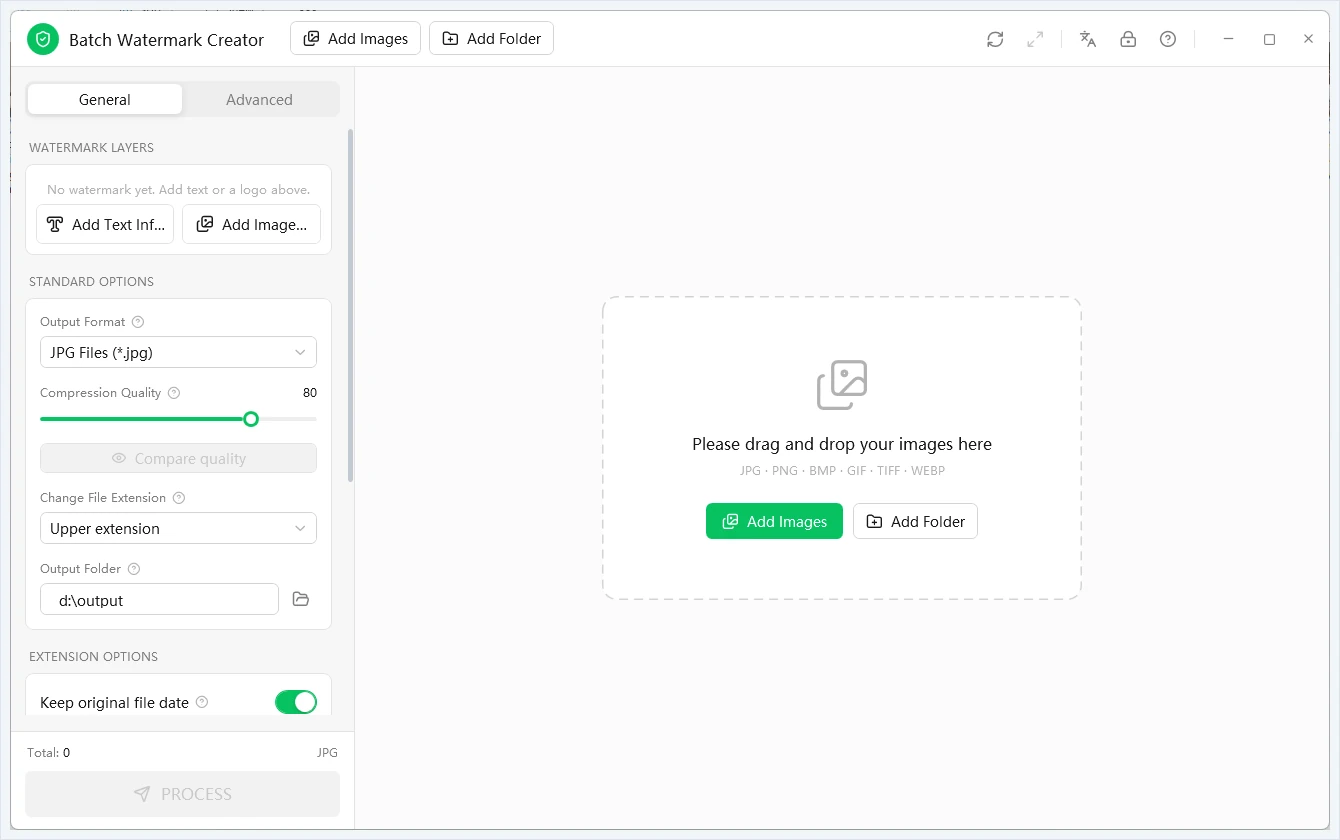
Before any images are added:
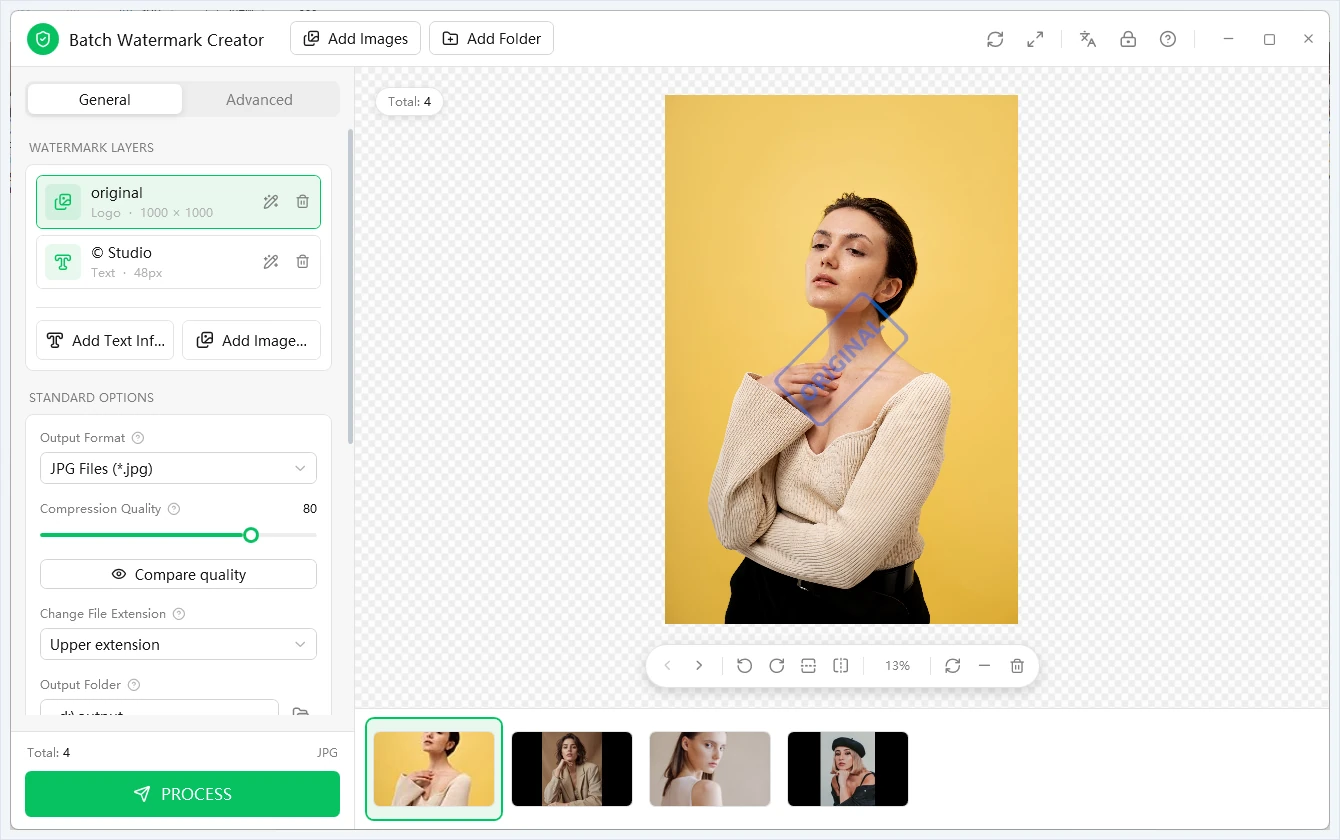
With images and a watermark:
| Area | Where | What it does |
|---|---|---|
| Title bar | Top | Add Images / Add Folder on the left; refresh preview, full-size view, language, activation and help on the right |
| Settings panel | Left | General and Advanced tabs with the watermark layers and all output options |
| Canvas | Center | Live preview of the current image |
| Thumbnail strip | Bottom | Imported images; click one to preview it |
| PROCESS | Bottom left | Enabled once images are imported |
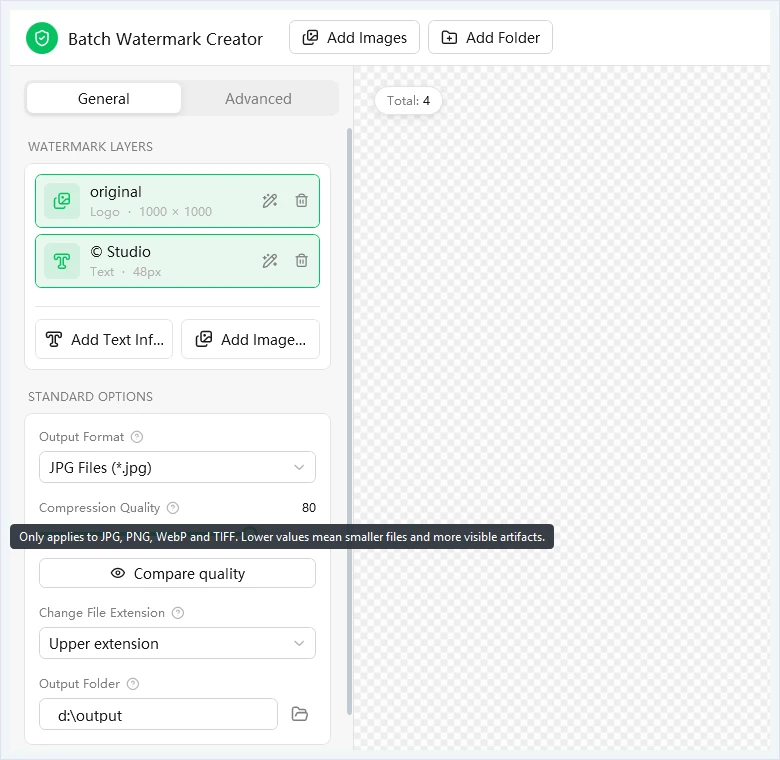
Tip: hover over the question-mark icon next to any field to see what it does.
3Importing images
Supported formats: JPG, PNG, BMP, GIF, TIFF and WebP.
| Method | How | Notes |
|---|---|---|
| Add Images | Pick files in the dialog (Ctrl for multiple, Ctrl + A for all) | For a selection of images |
| Add Folder | Pick a folder | Imports that folder and all its subfolders; the output keeps the same subfolder structure |
| Drag and drop | Drag image files onto the canvas | Files only — use Add Folder for folders |
The toolbar under the canvas:
| Button | Action |
|---|---|
| ‹ › | Previous / next image |
| ↺ ↻ | Rotate the preview 90° |
| ⇅ ⇄ | Flip the preview |
| Percentage | Current zoom; click to fit to window |
| ⟳ | Re-render the preview |
| − | Remove the current image from the list |
| 🗑 | Clear the list |
On the canvas: scroll to zoom, drag to pan, double-click to fit.
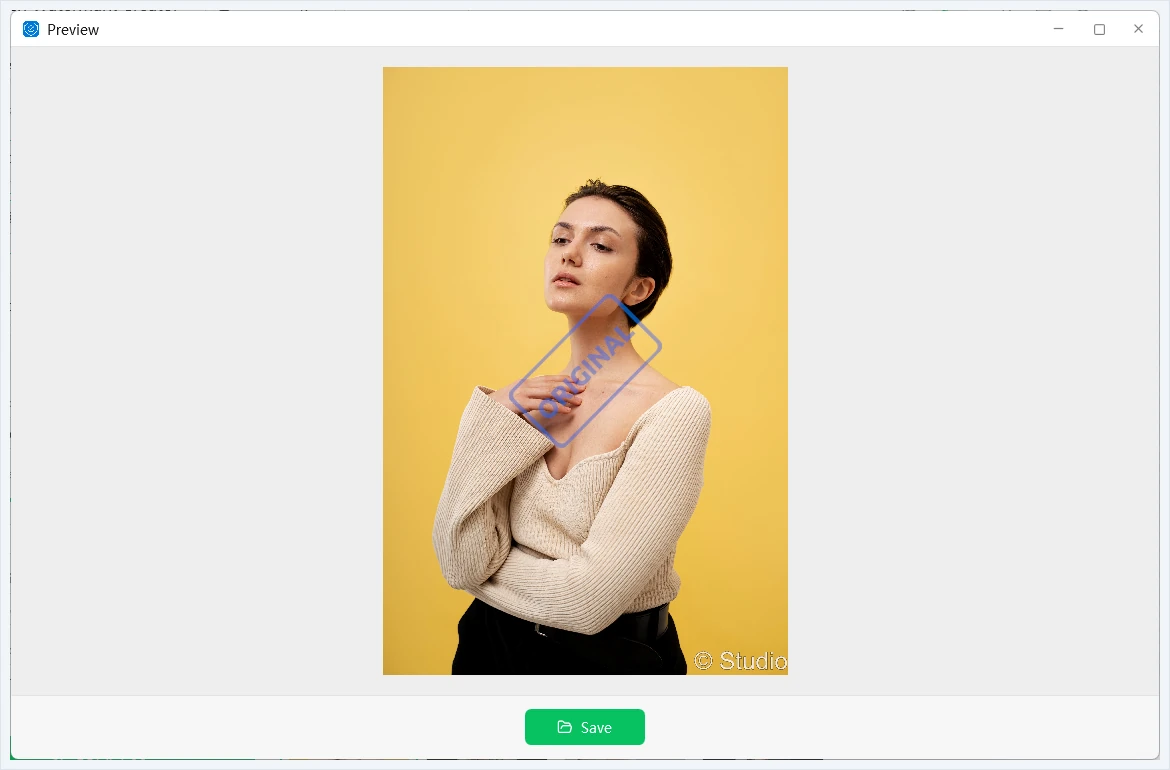
The expand button in the title bar opens a separate preview window; its Save button saves just the current image:
4Adding a text watermark
Click Add Text Info to open the text editor:
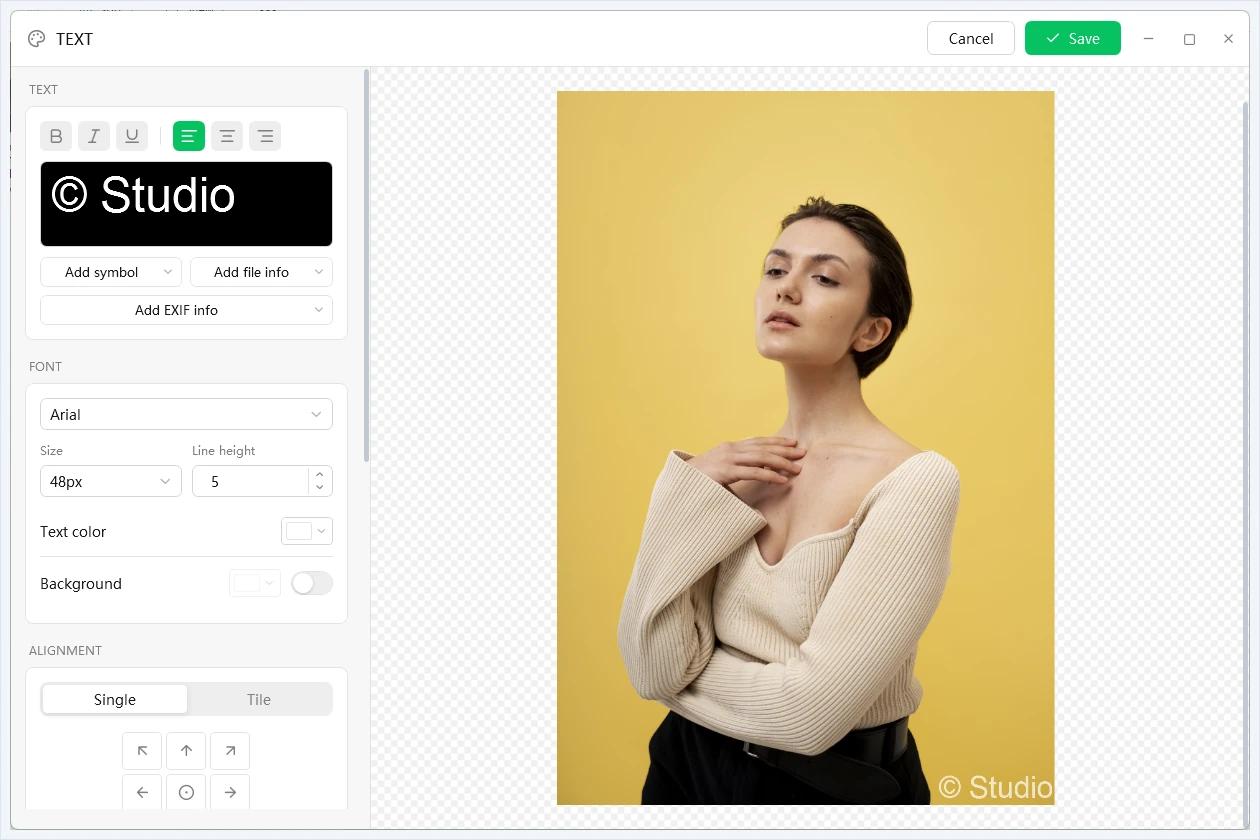
- Text — type in the black box (multiple lines are fine). The buttons above set bold, italic, underline and alignment.
- Variables (optional) — insert values that are filled in per image:
Button Inserts Add symbol ©, ®, ™ Add file info File name, extension, modified date, original date Add EXIF info Camera model, artist, date/time, exposure time, F number, ISO 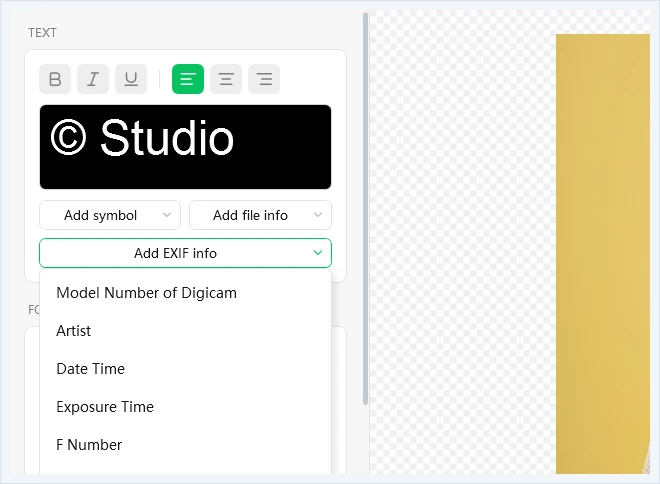
Add EXIF info With Filename inserted,
a.jpgshowsaandb.jpgshowsb. EXIF variables are empty for images without EXIF data (screenshots, images re-saved by social apps). - Font — font, size, line height and color; turn on Background for a filled box behind the text.
- Alignment — the 3×3 grid snaps to nine positions. Random places the watermark differently on each image, which makes it harder to crop out.
- Extension options:
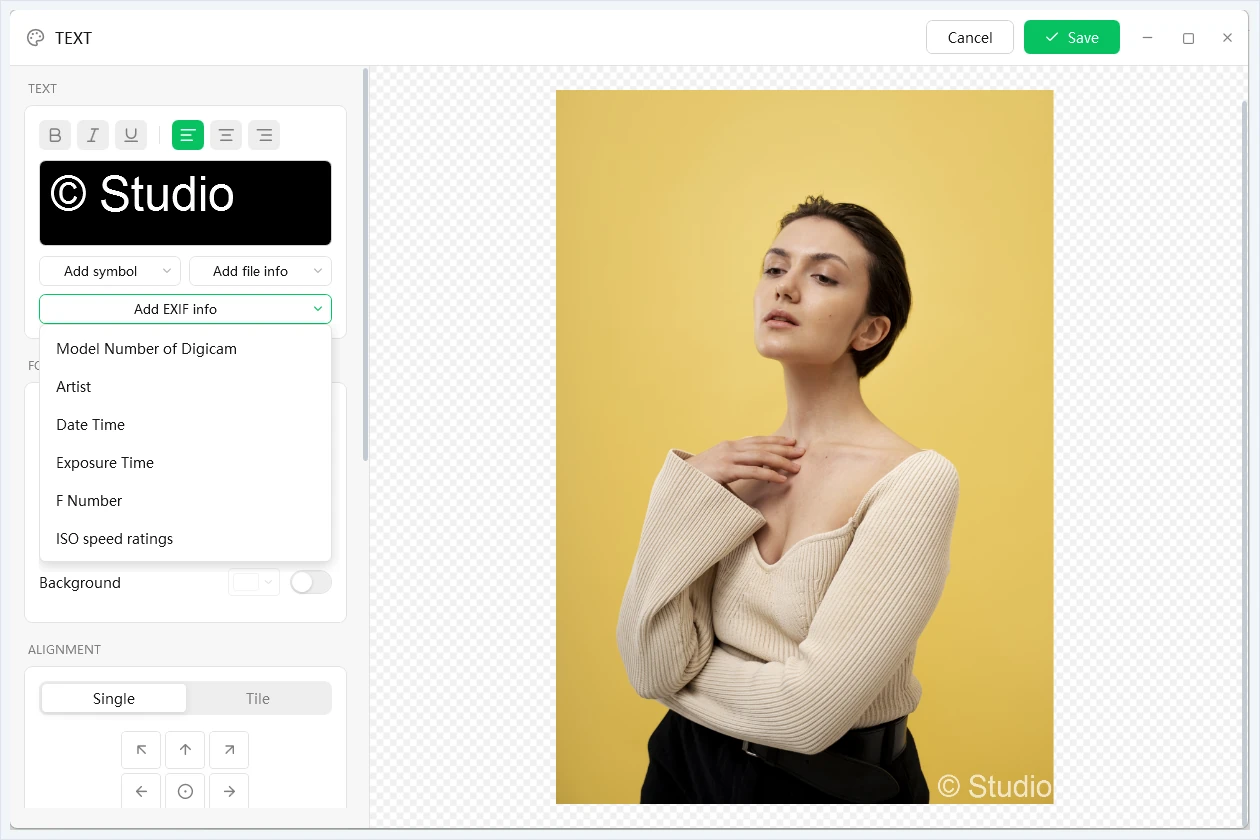
Option Notes Auto resize to fit all images Recommended. Scales the watermark to each image's width so it looks the same on large and small images Opacity 1–100; lower is more transparent Rotate 0–360° - Click Save.
5Adding an image watermark
Click Add Image:
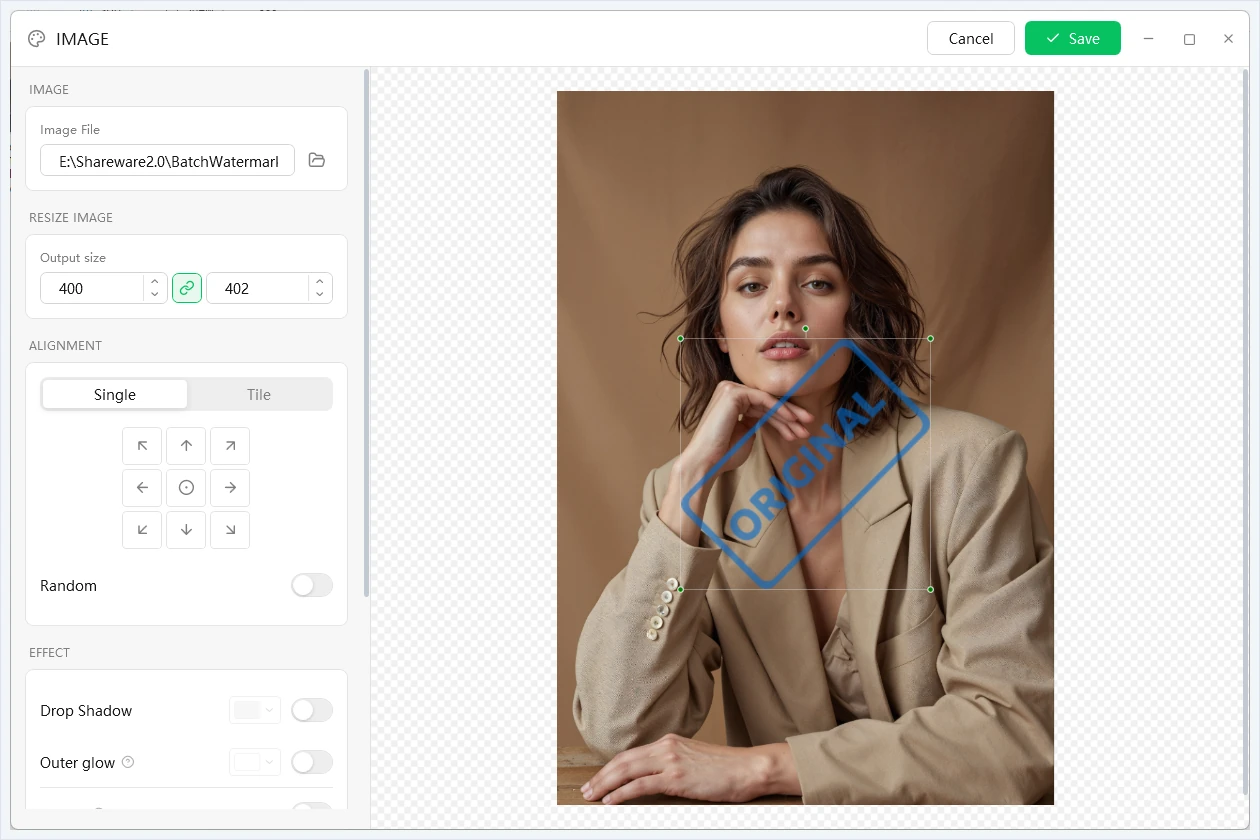
- Image file — click the folder icon or paste a full path. The box turns red if the file does not exist. Transparent PNGs keep their transparency.
- Output size — the link button in the middle locks the aspect ratio so the logo never gets distorted.
- Alignment — with Single selected, use the grid (the center dot centers the logo).
- Opacity / Rotate — under Extension options, e.g. opacity 60.
- Click Save.
Output size is in pixels of the original photo. On a 5000-pixel-wide photo a 250-pixel logo looks tiny — make it larger or turn on Auto resize to fit all images.
6Effects and tiling
6.1 Effects
If the watermark is hard to see on a busy background, turn on an effect:
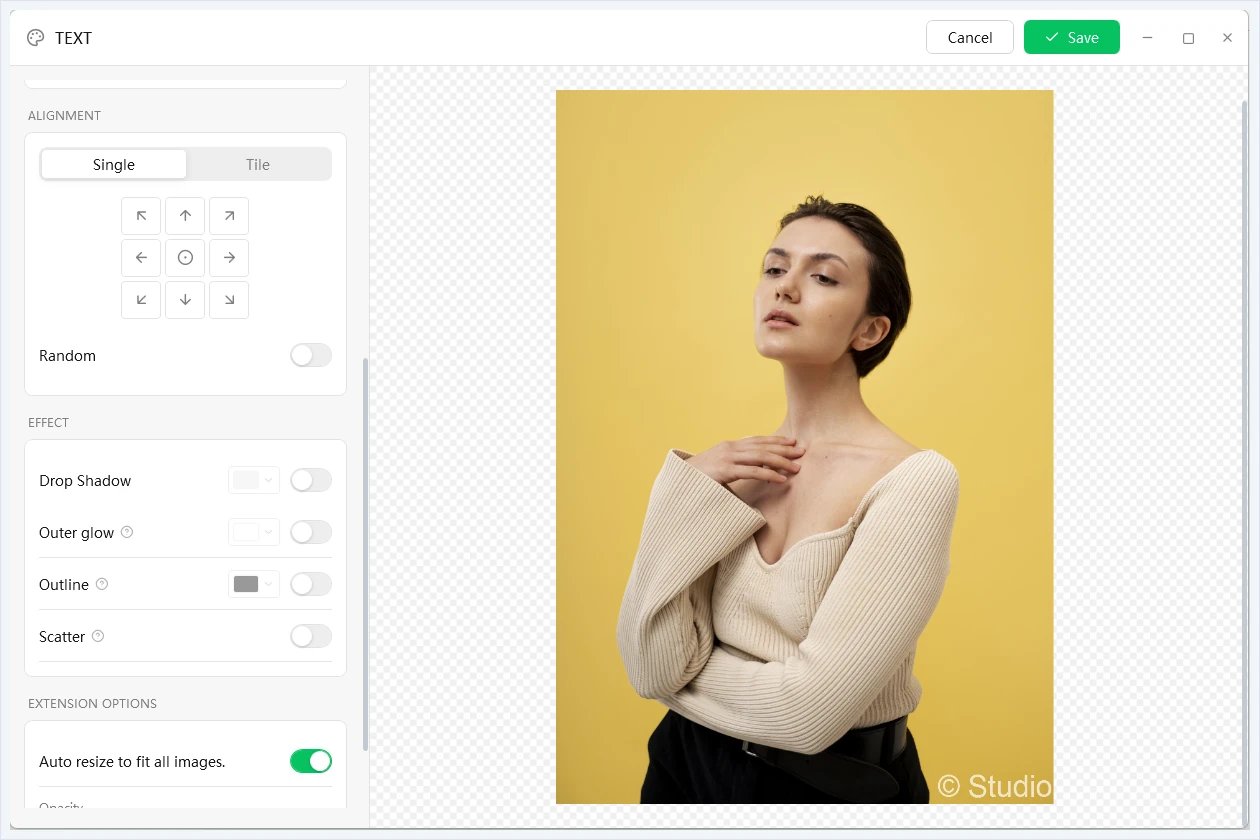
| Effect | When to use | Settings |
|---|---|---|
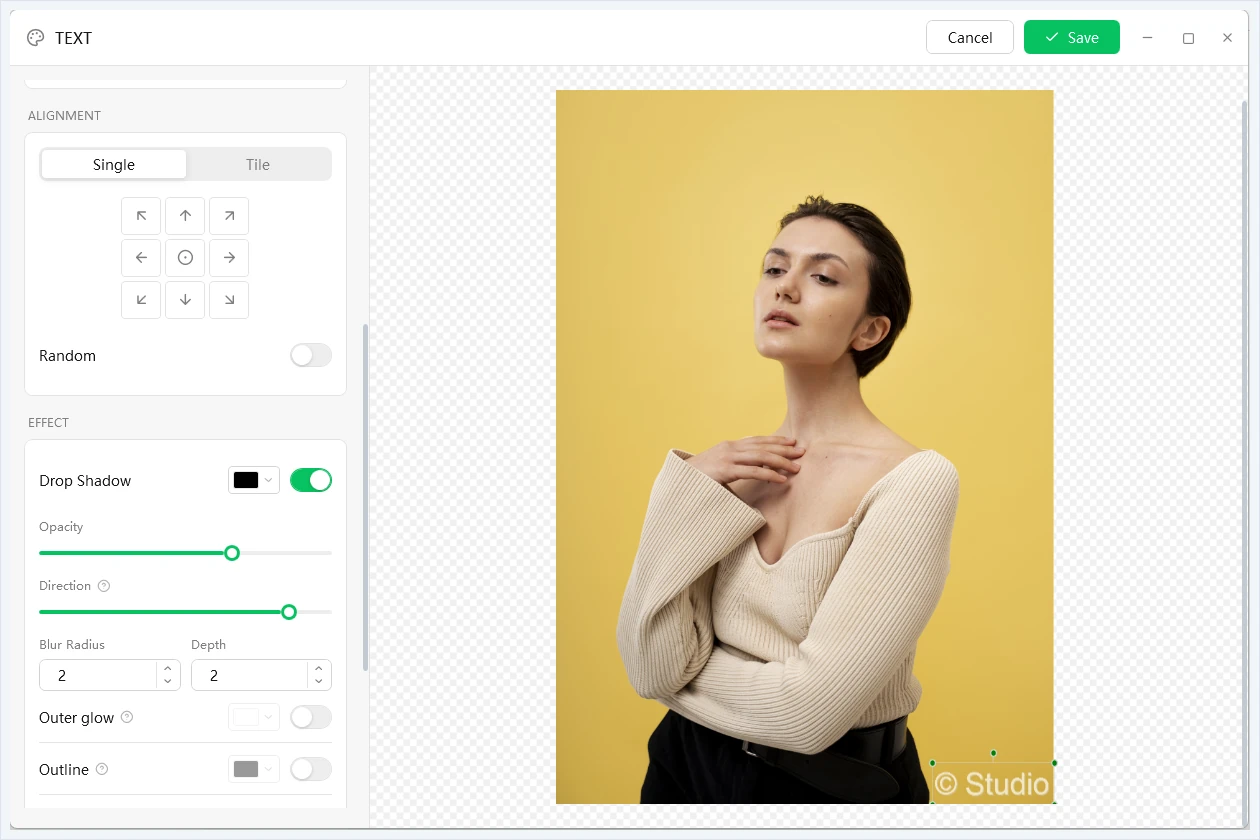
| Drop Shadow | General purpose | Color, opacity, direction, blur radius, depth |
| Outer glow | Very busy backgrounds | Color, size, opacity |
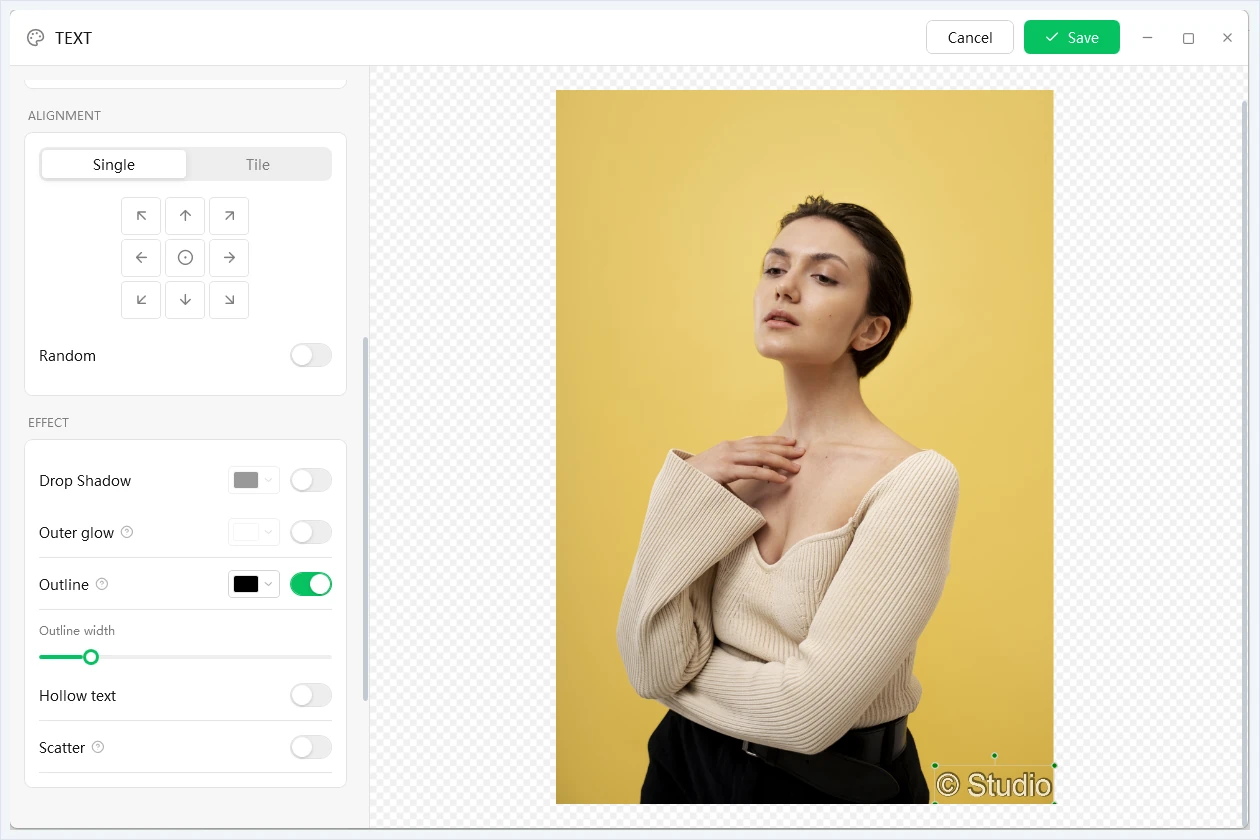
| Outline (text only) | Outlined or hollow text | Color, width, hollow text |
| Scatter | Worn / spray-paint look | Amount, grain size |
Drop shadow settings:
Outline settings (Hollow text keeps only the outline):
6.2 Tiling
Switch Alignment from Single to Tile to repeat the watermark across the whole image; the Spacing slider controls density.
Text:
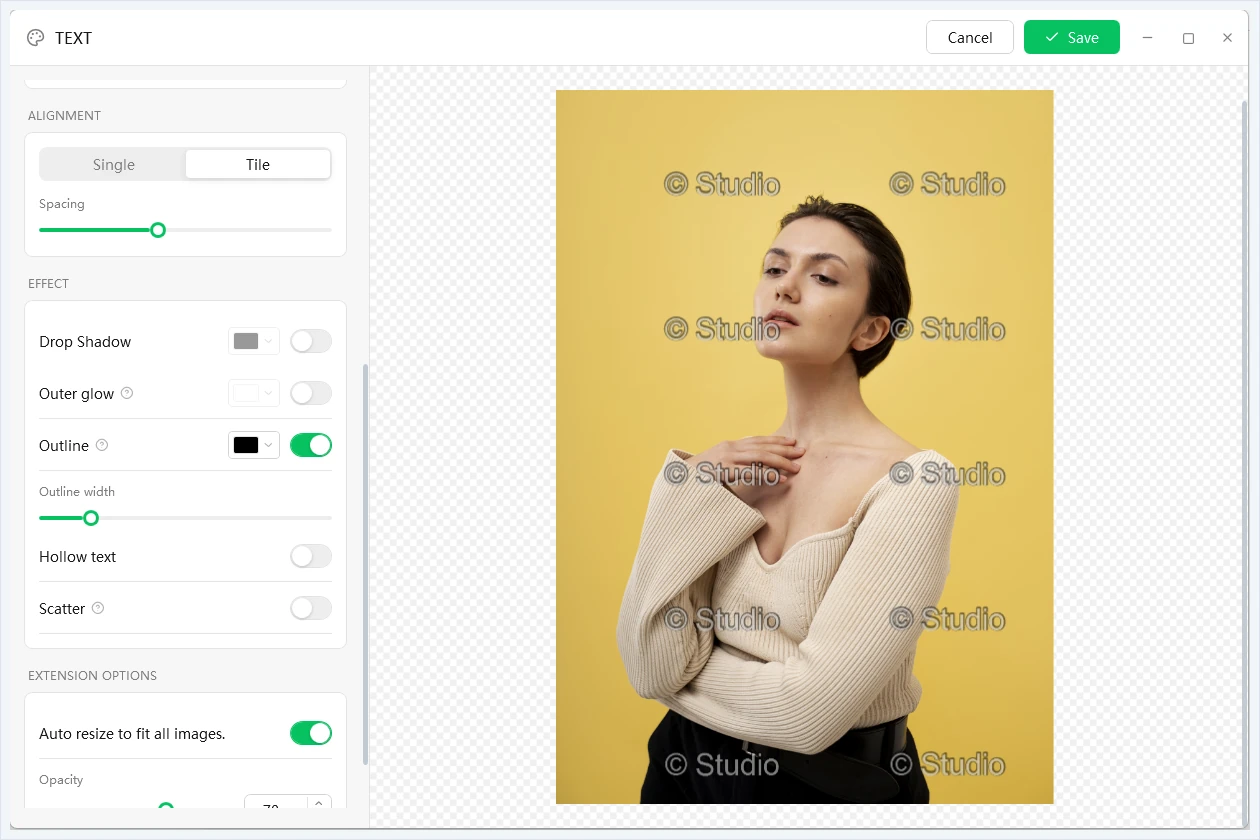
Image:
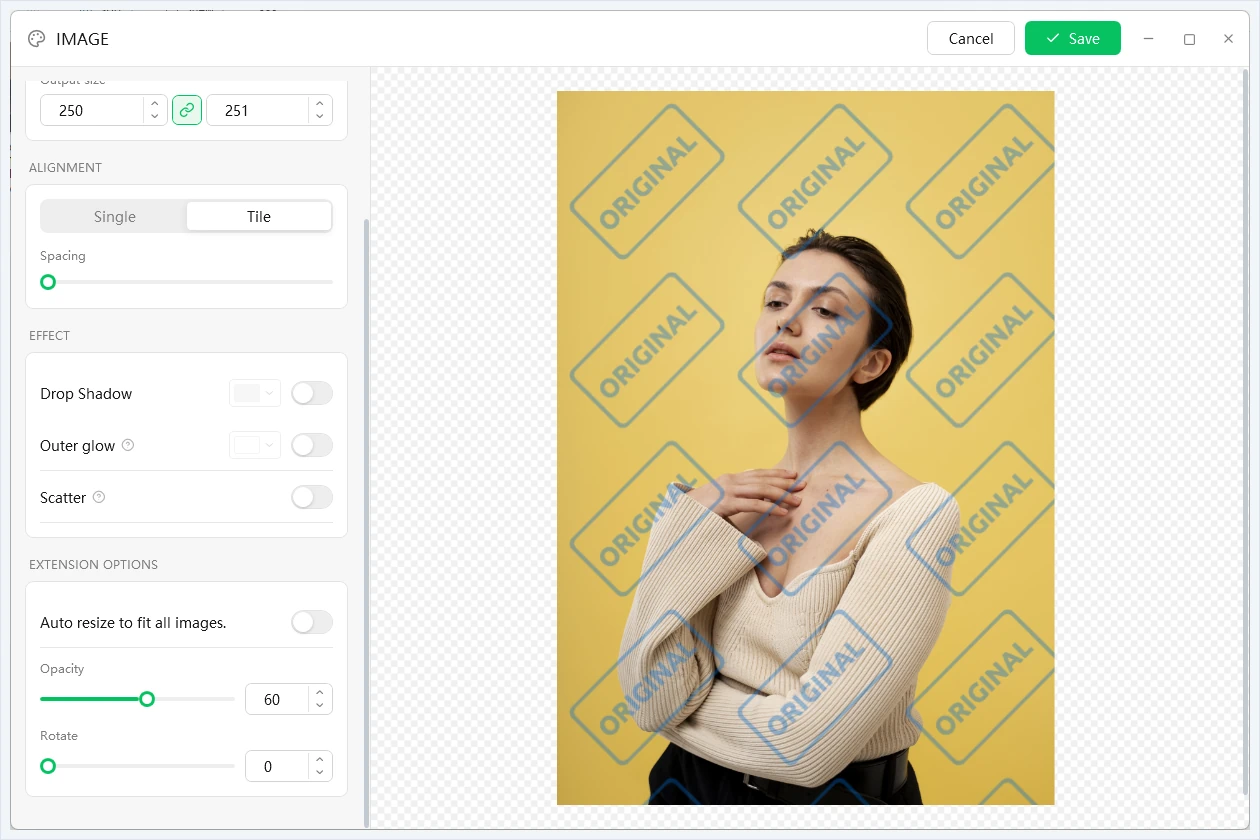
Tiling with about 30% opacity protects the image without spoiling it.
7Managing watermark layers
You can combine several text and image watermarks. They are listed under Watermark Layers:
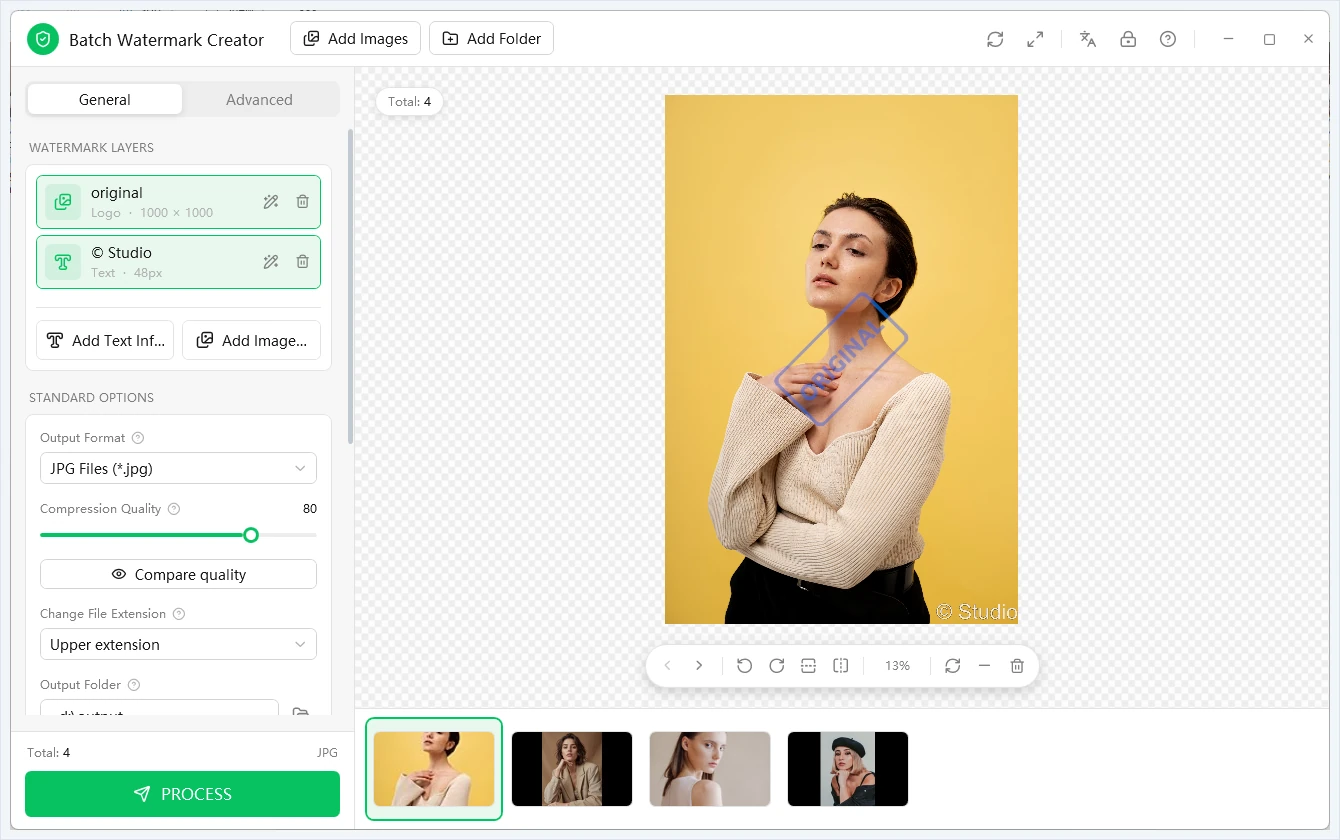
| Action | Result |
|---|---|
| Click the row | Enables / disables the layer. Green = enabled (included in the output); grey = disabled (kept but not drawn) |
| ✎ Pencil | Opens the editor again |
| 🗑 Trash | Deletes the layer |
New layers are enabled when you save them.
8Output settings
On the General tab under Standard Options.
8.1 Output format
Every image is saved in the format chosen here:
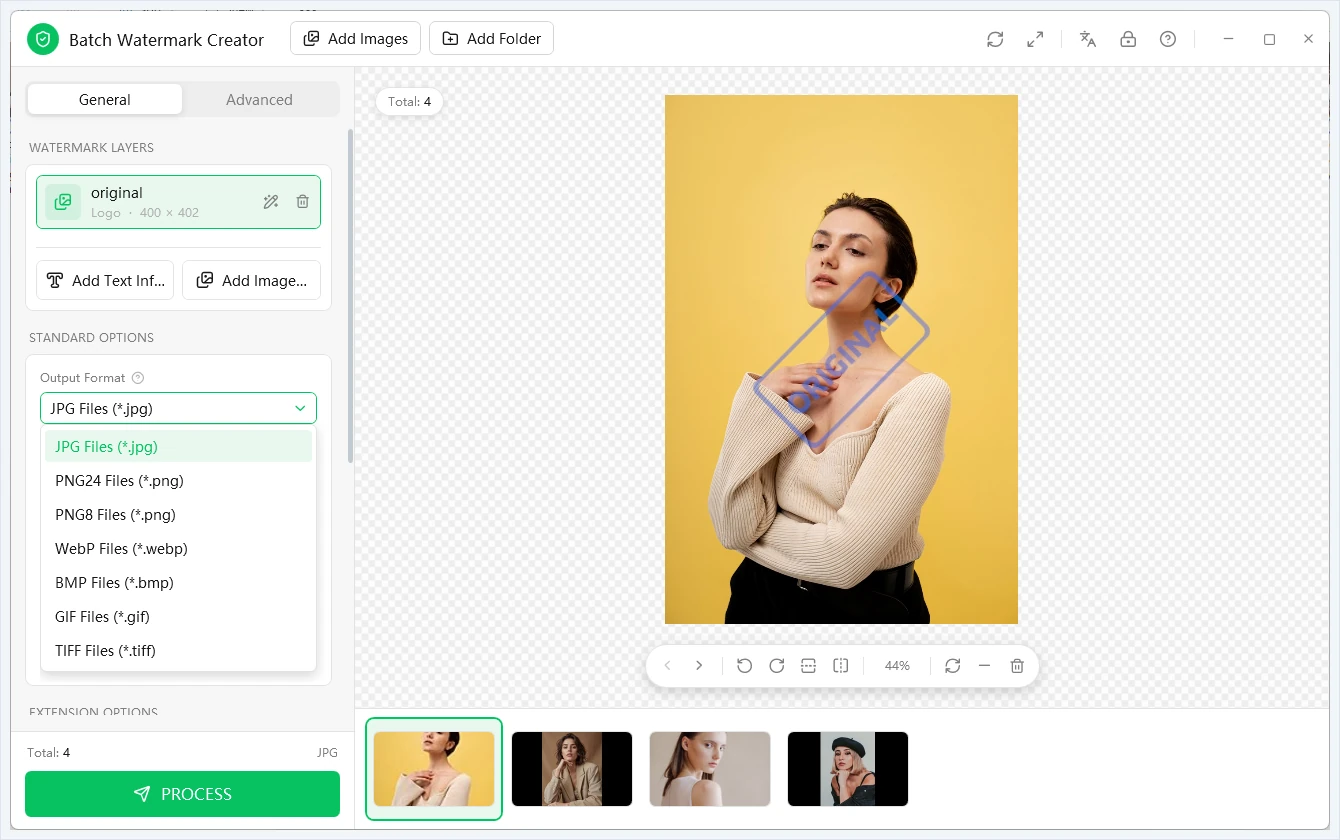
| Use | Format |
|---|---|
| Photos, general use | JPG |
| Transparent background | PNG24 |
| Web, smallest files | WebP |
| Simple graphics, screenshots | PNG8 |
| TIFF |
8.2 Compression quality
10–100, default 80. Lower values give smaller files and more visible artifacts. Applies to JPG, PNG, WebP and TIFF.
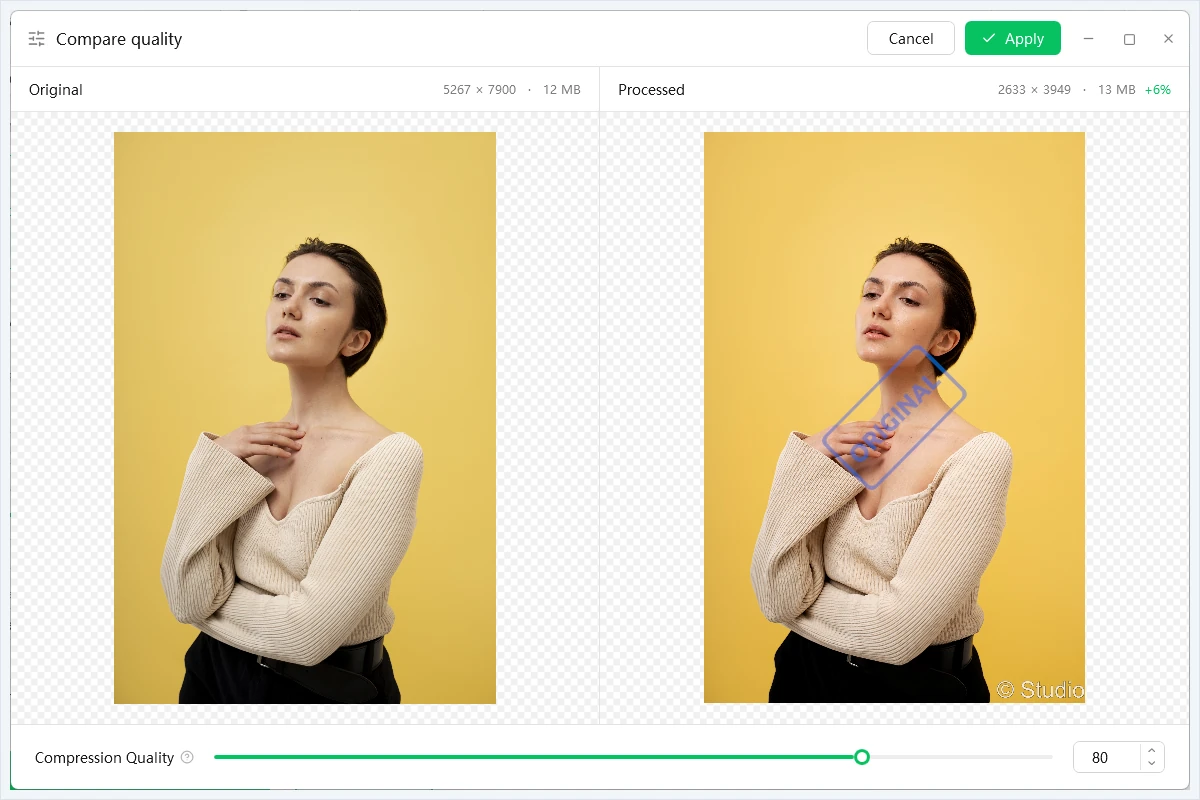
Click Compare quality to see the original on the left and the real output on the right, with size and file-size change. Adjust the slider and click Apply when you are happy.
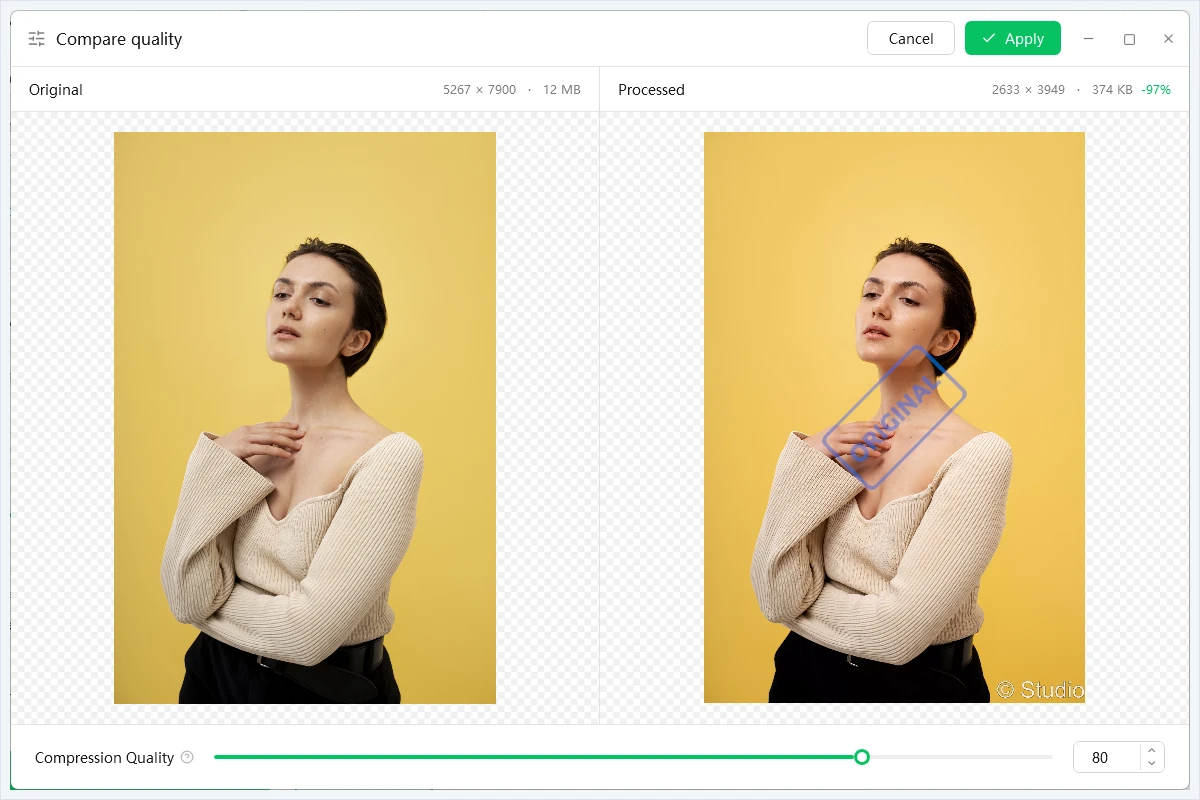
Above: a 12 MB photo becomes about 370 KB as WebP (quality 80, resized to 50%).
The wrong format can make files bigger. The same photo saved as PNG24 is larger than the original:
8.3 Change file extension
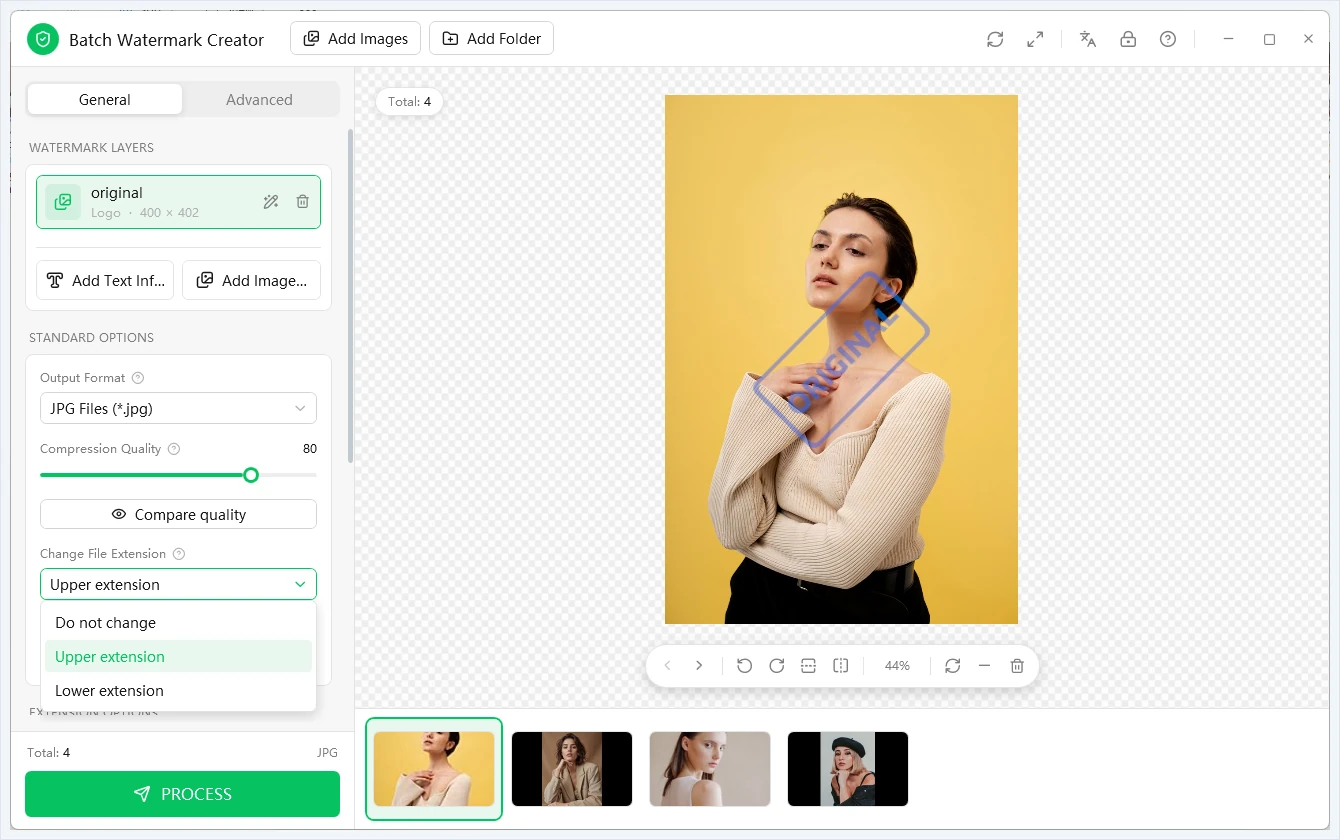
Only changes the case of the extension (.JPG / .jpg), not the actual format:
8.4 Output folder
Where processed images are saved. It is created if it does not exist.
Do not use the folder that contains the originals, or you may overwrite them.
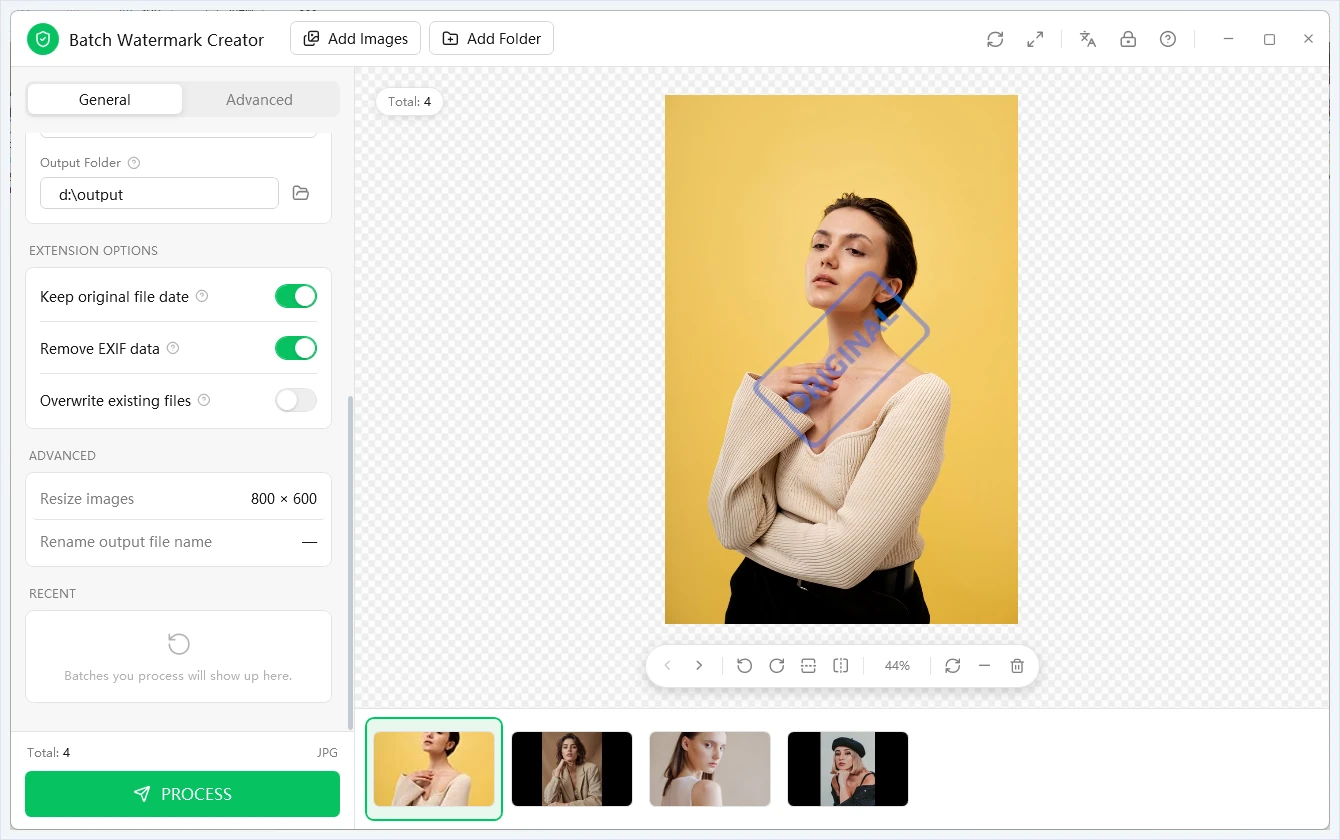
8.5 Extension options
| Option | Recommendation |
|---|---|
| Keep original file date | On — output files keep the original dates |
| Remove EXIF data | On when publishing online — removes GPS and other private data |
| Overwrite existing files | Off — existing names get (1), (2) added instead |
Below that, Advanced summarizes the current resize / rename settings, and Recent lists past batches. Click one to open its output folder, or use Use these settings again to restore that batch's settings.
9Resizing and renaming
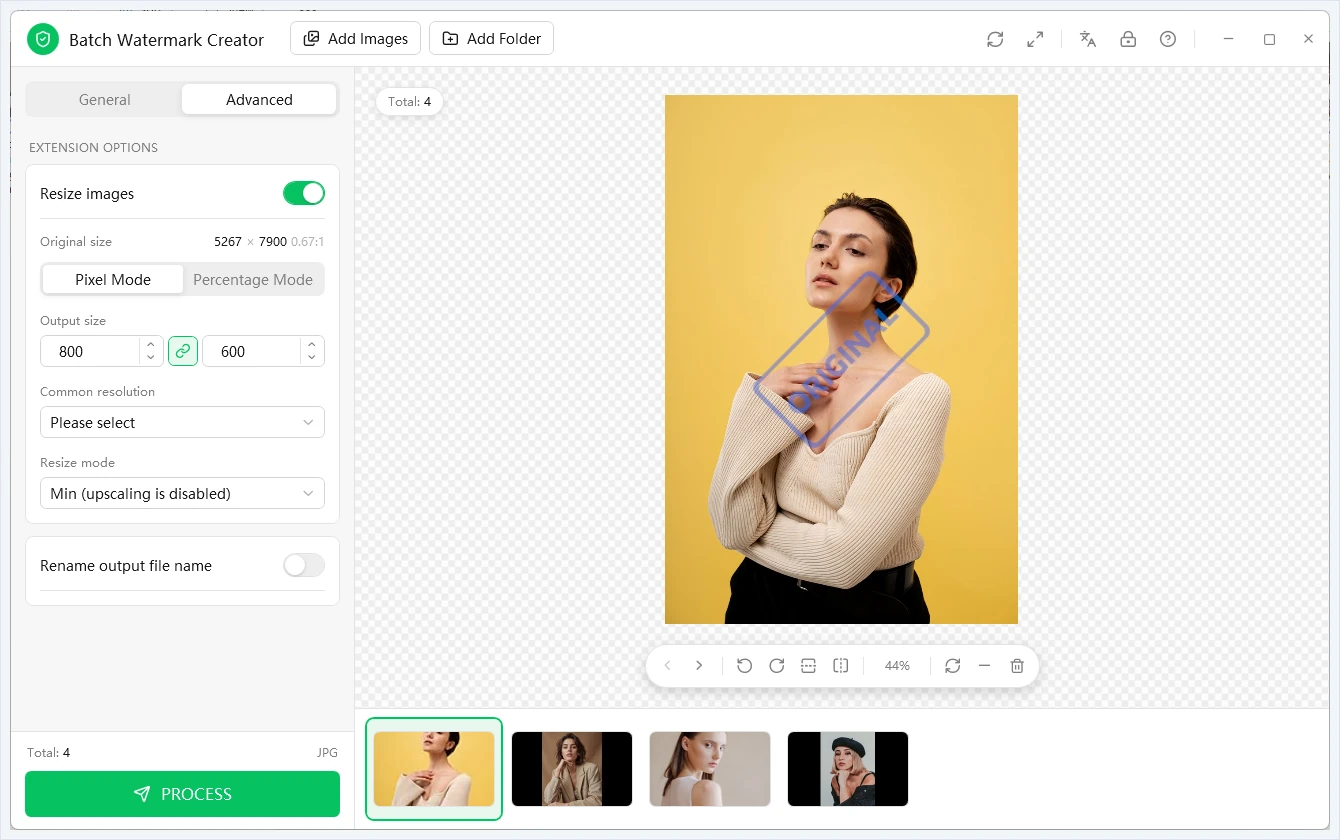
On the Advanced tab; skip it if you don't need it.
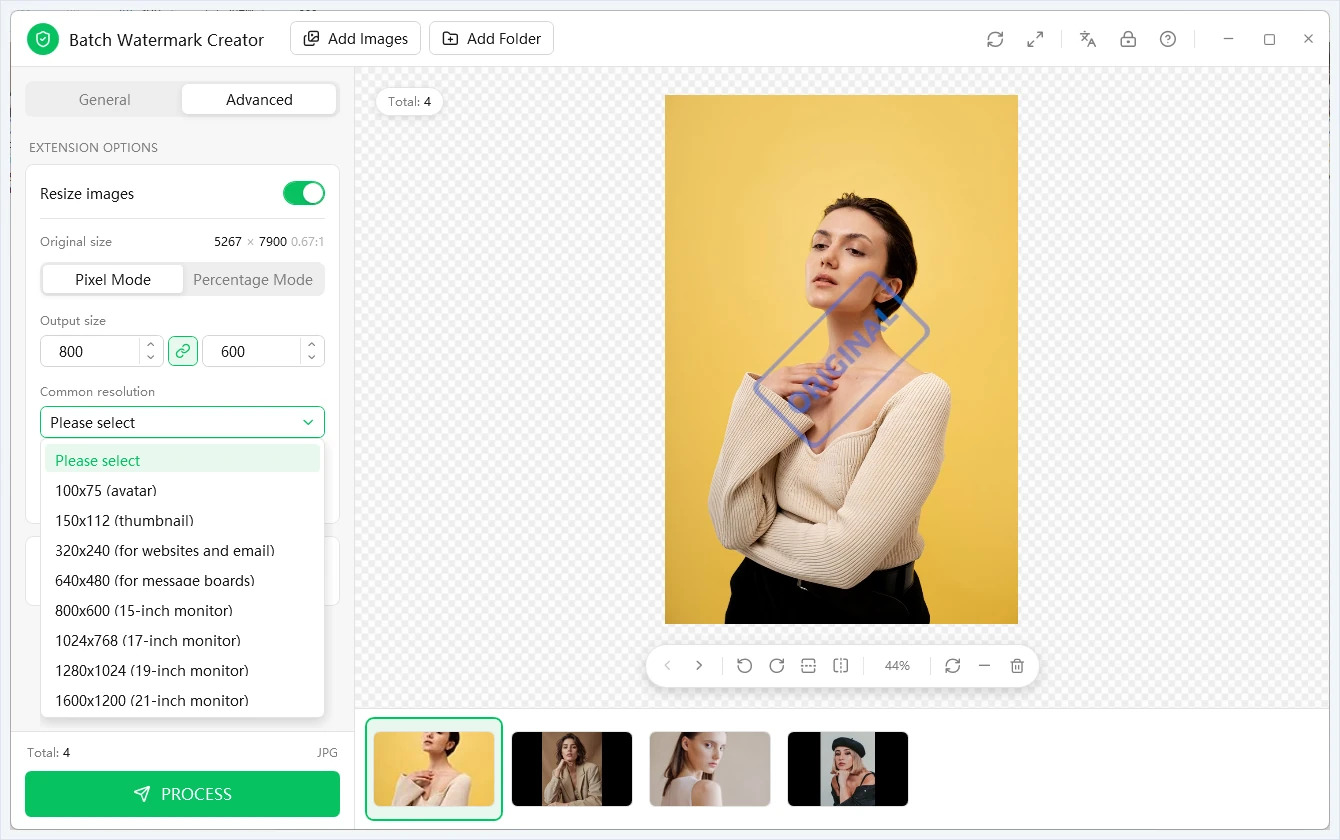
9.1 Resize images
- Turn on Resize images.
- Choose a mode:
- Pixel Mode — enter a width and height, or pick a Common resolution:
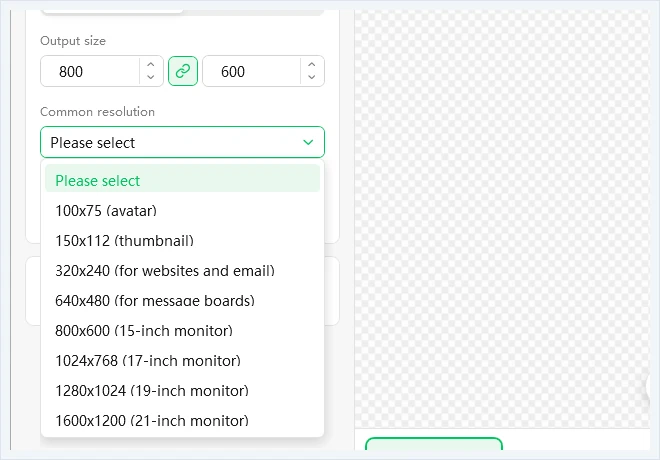
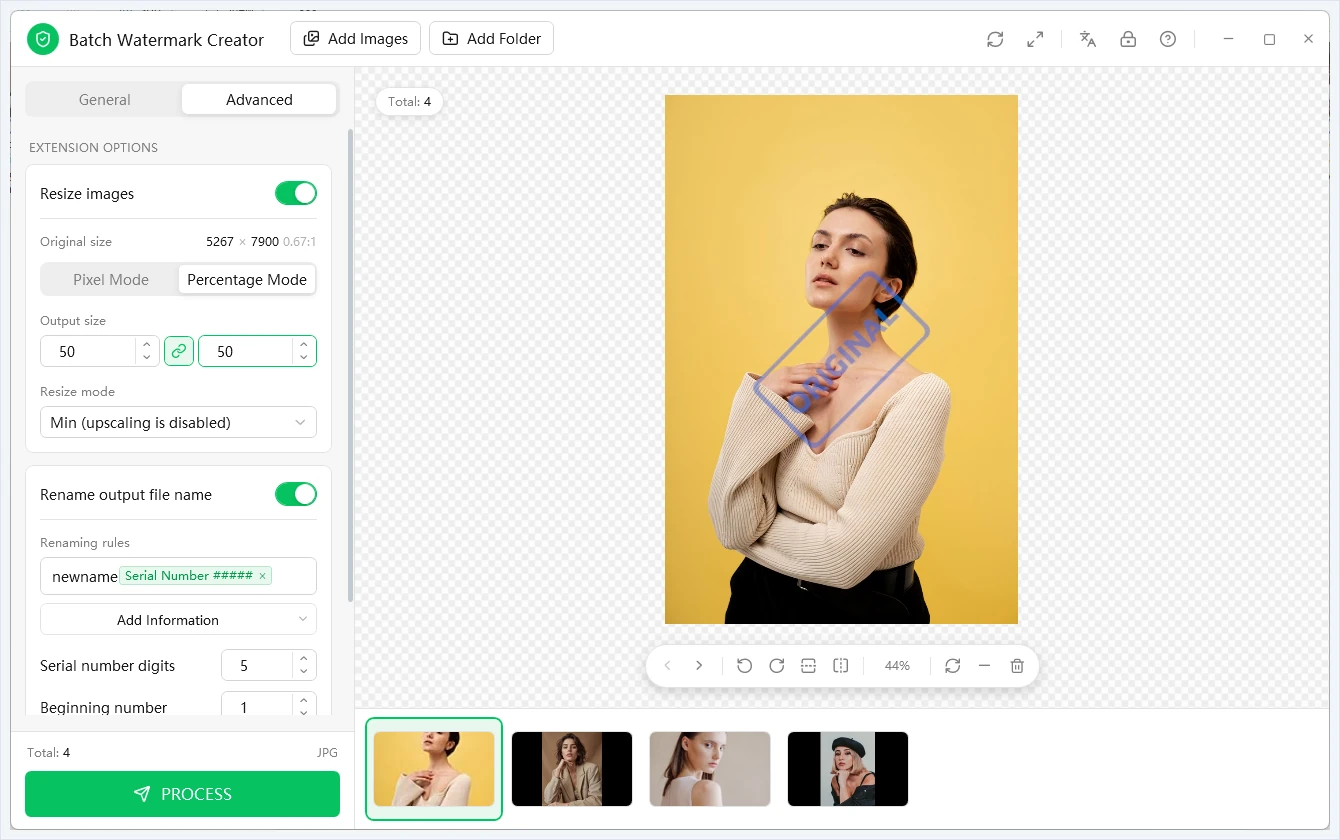
Common resolutions - Percentage Mode — scale by a percentage of the original, e.g. 50 halves it:
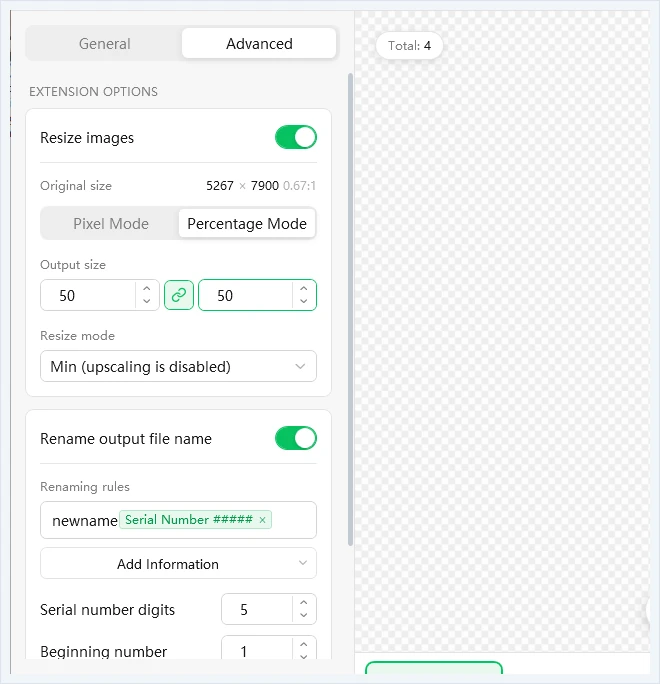
Percentage mode
- Pixel Mode — enter a width and height, or pick a Common resolution:
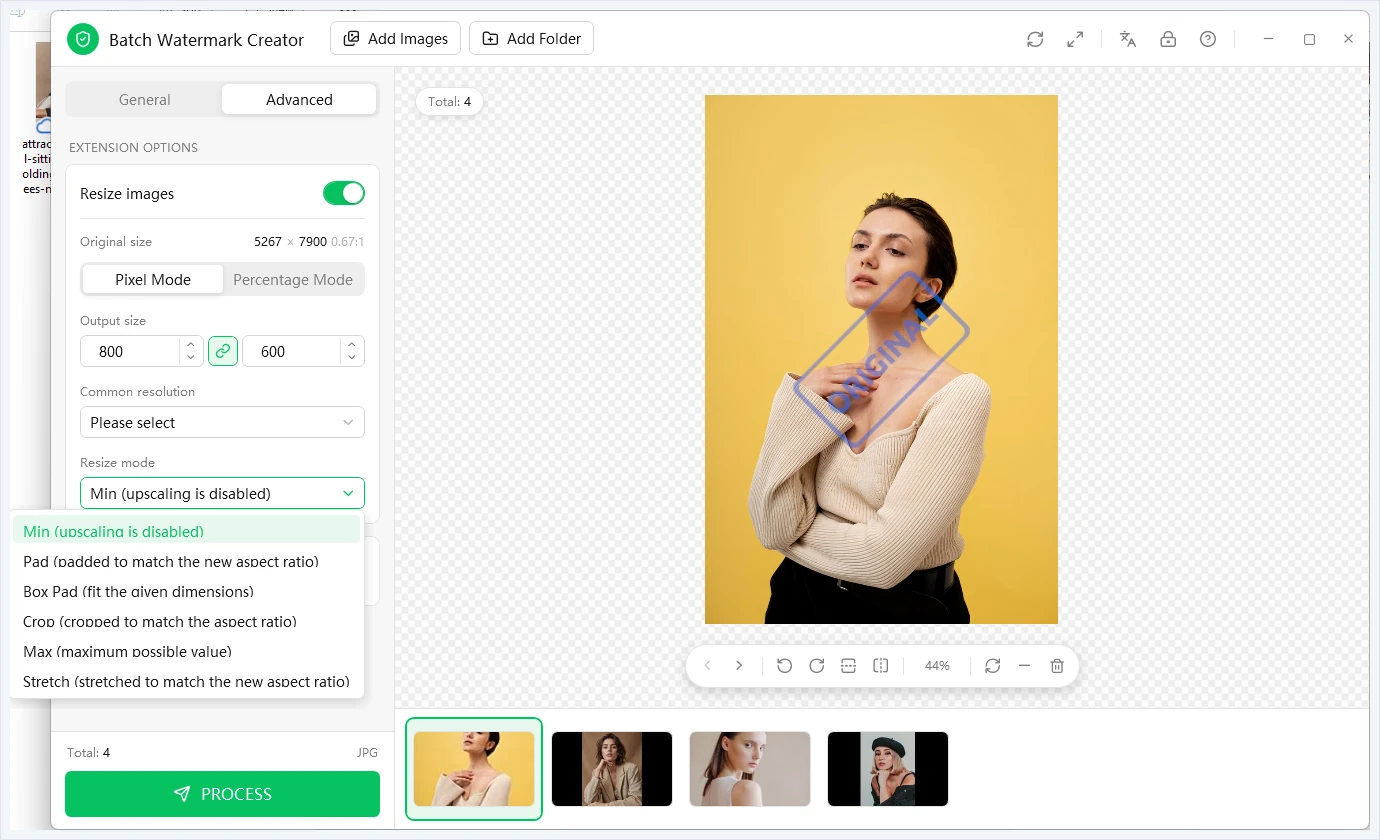
- Choose a Resize mode for images whose proportions differ from the target:
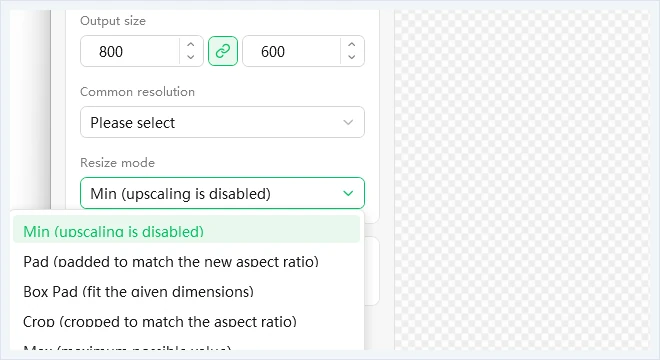
Resize mode Mode Result Min (recommended) Fits inside the target box without cropping or distortion Pad Fits, then pads to the exact target size Box Pad Like Pad, but never enlarges small images Crop Fills the target and crops the overflow Max Scales to cover the target box Stretch Forces the exact size — distorts the image
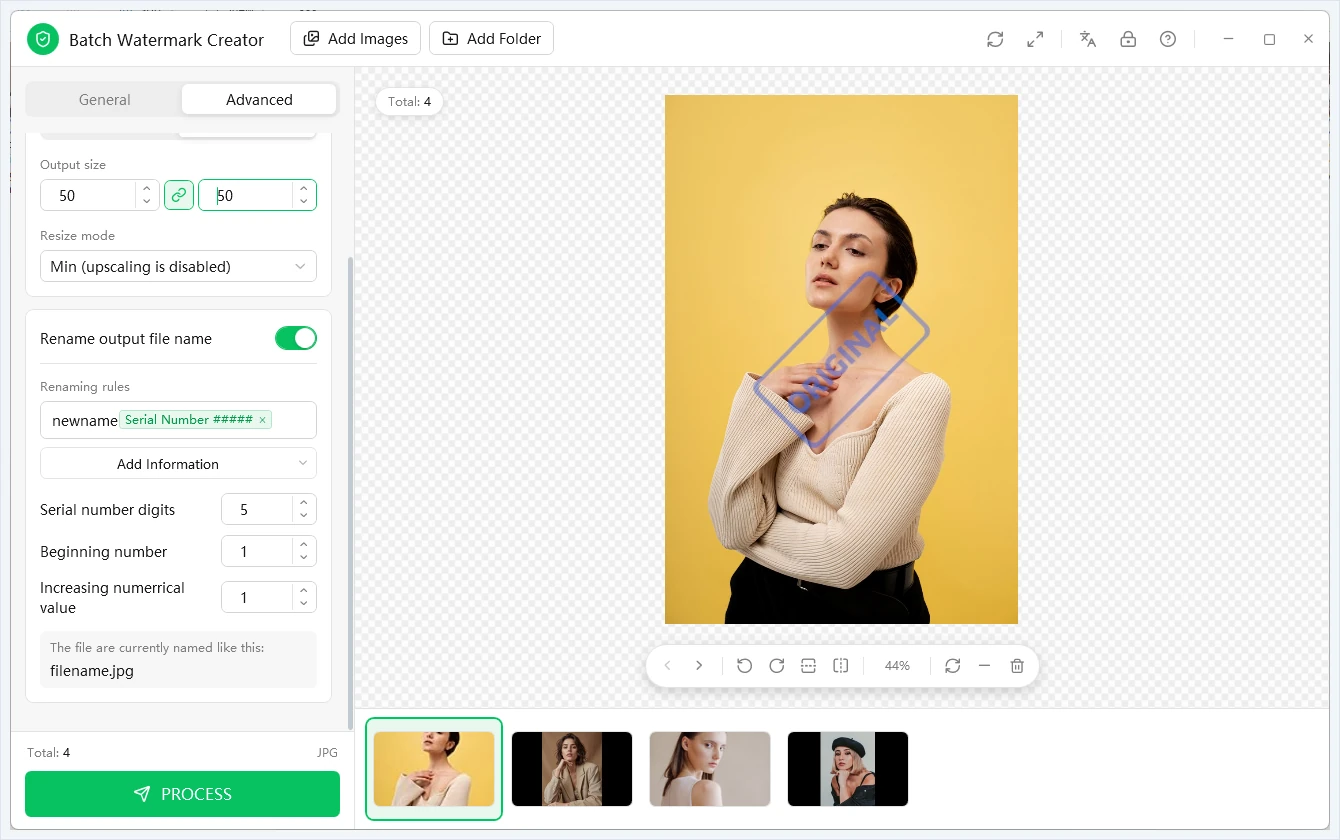
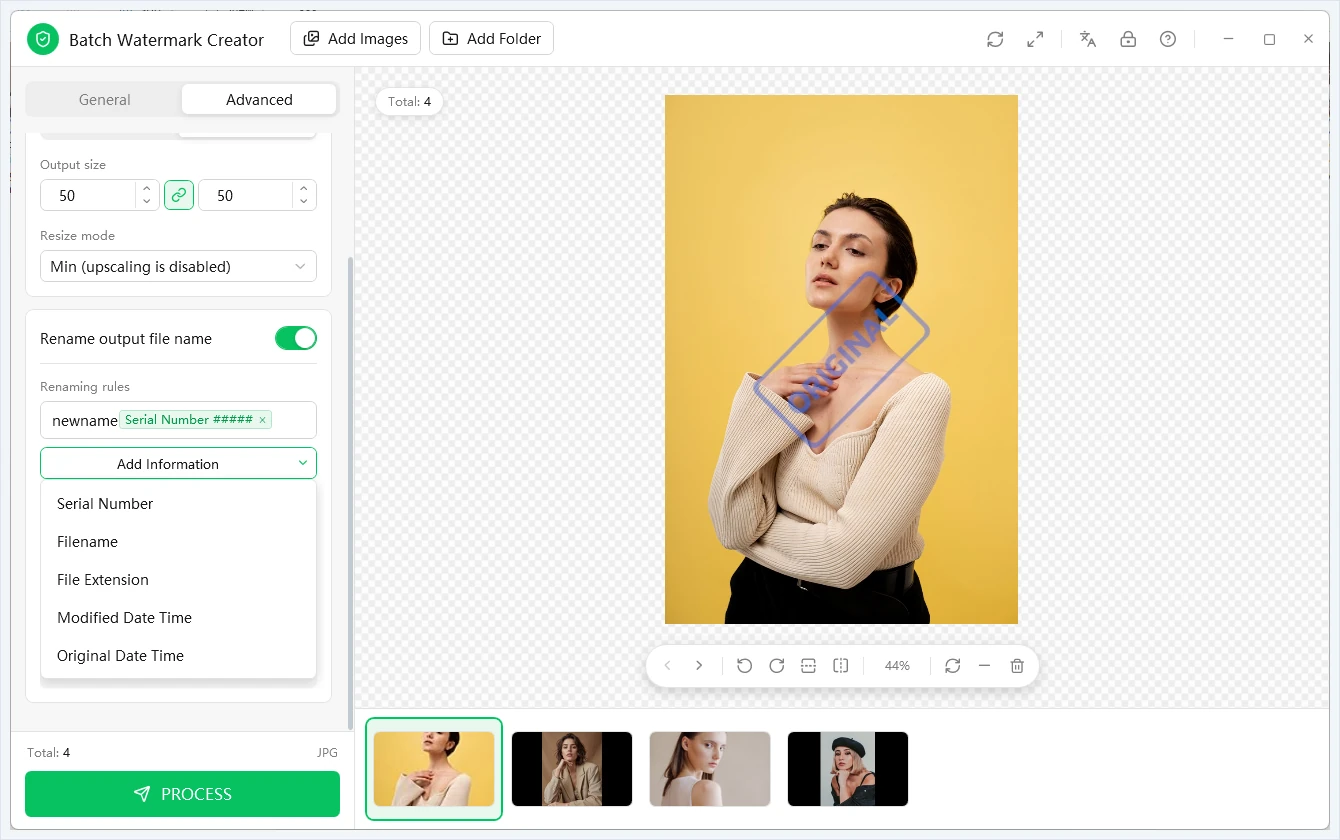
9.2 Rename output files
- Turn on Rename output file name:
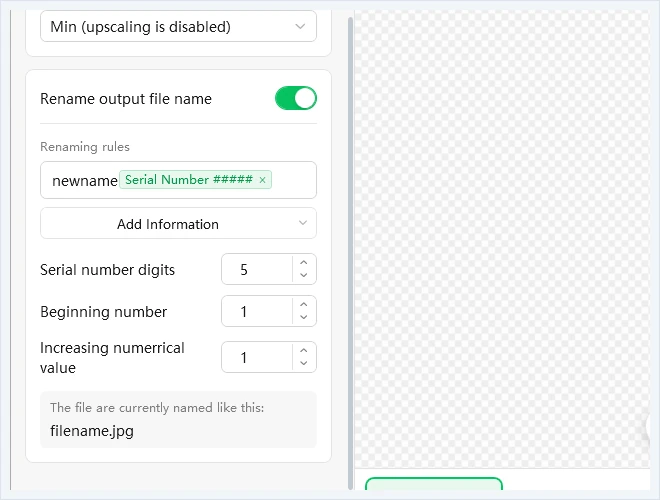
Rename output files - Edit the Renaming rules template (default
newname[#####]). - Use Add Information to insert: Serial Number, Filename, File Extension, Modified Date Time, Original Date Time.
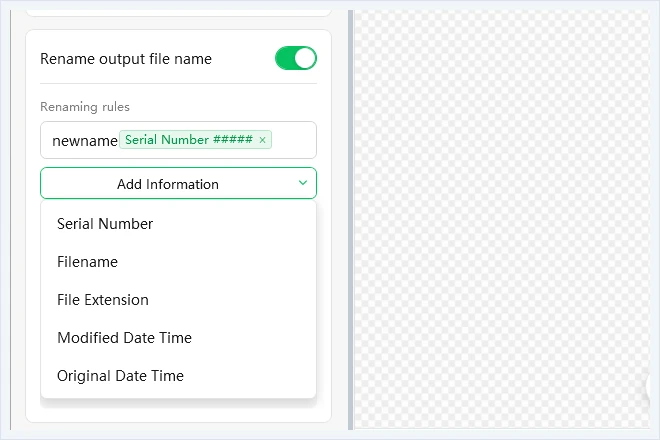
Add information - Set Serial number digits, Beginning number and Increasing numerical value.
| Template | Result |
|---|---|
newname[#####] | newname00001.jpg |
product_[###] | product_001.jpg |
[name]_watermarked | originalname_watermarked.jpg |
The number of # characters is the number of digits in the serial number.
10Processing
Click PROCESS. The progress dialog shows current / total; click Cancel to stop:
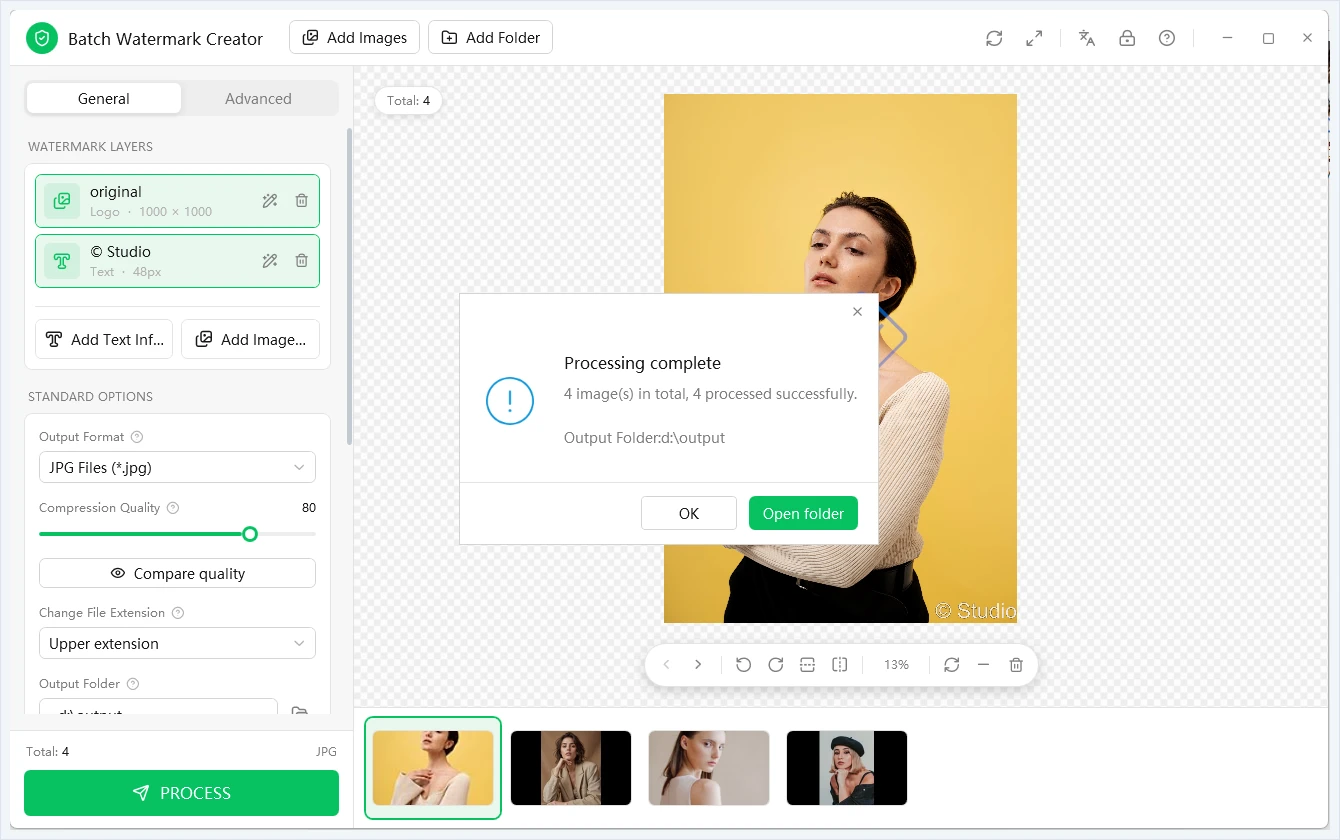
When it finishes:
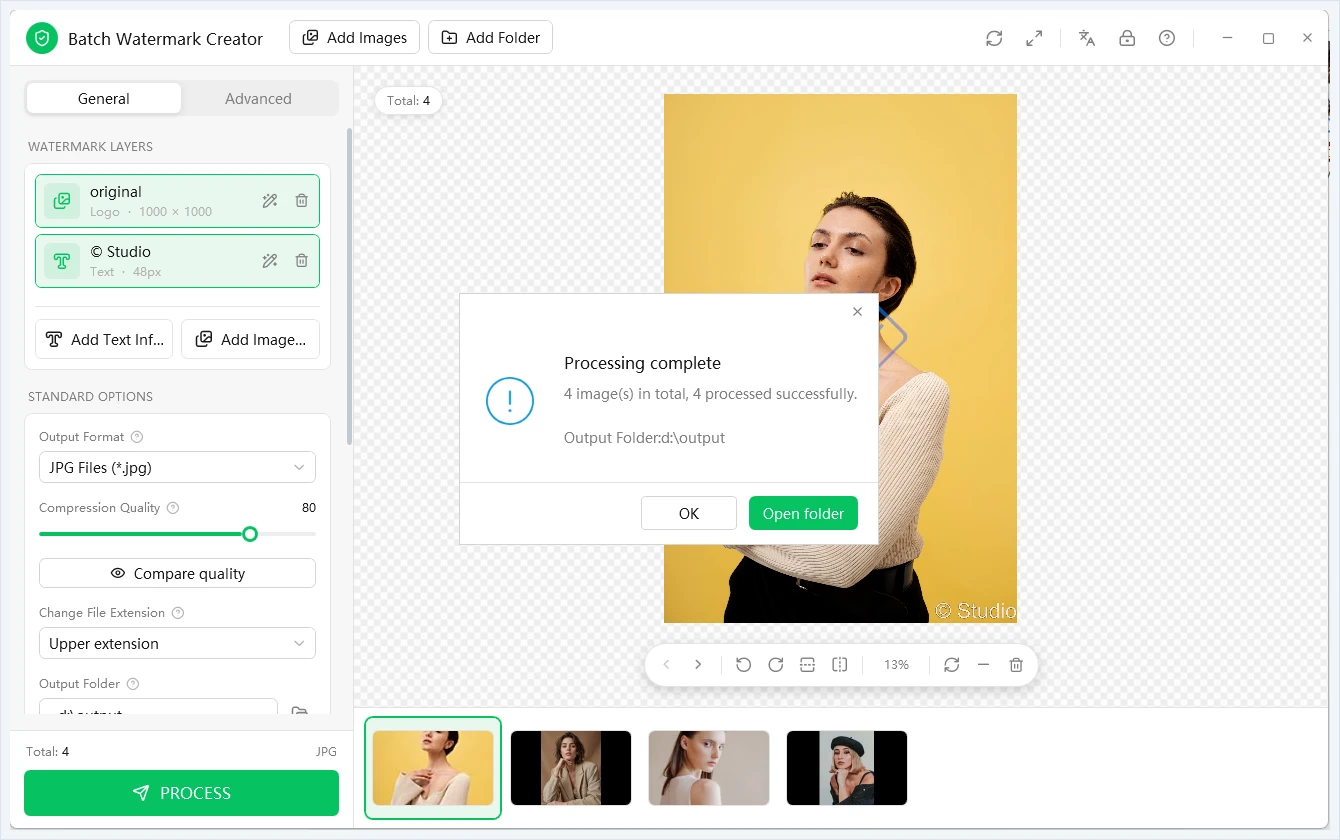
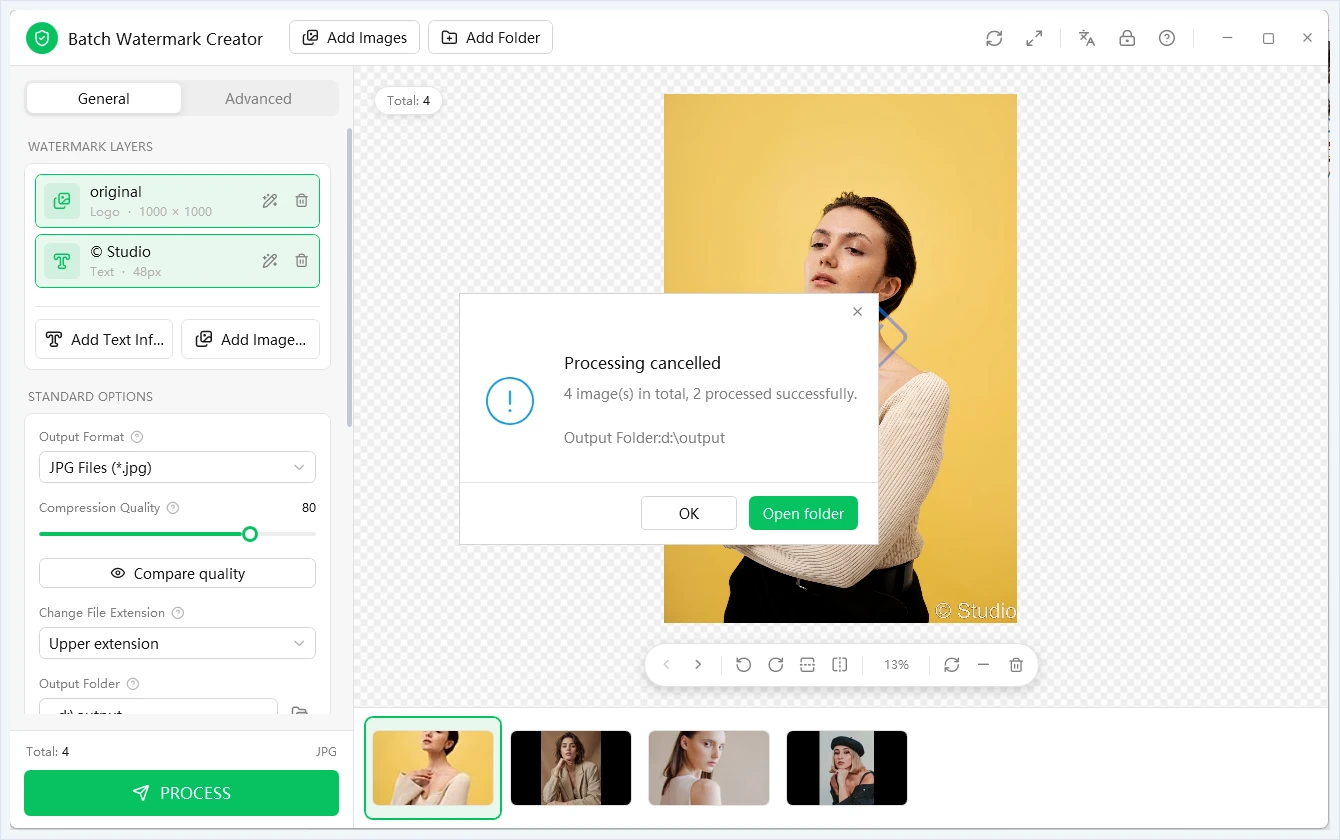
If you cancel, the dialog says Processing cancelled; files already written are kept and counted:
- One failed image does not stop the batch; the dialog tells you how many failed.
- Very large images (tens of megapixels) can take several seconds each — please wait and don't click again.
11Changing the language
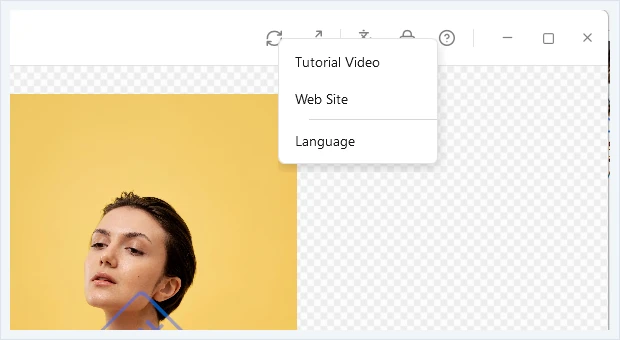
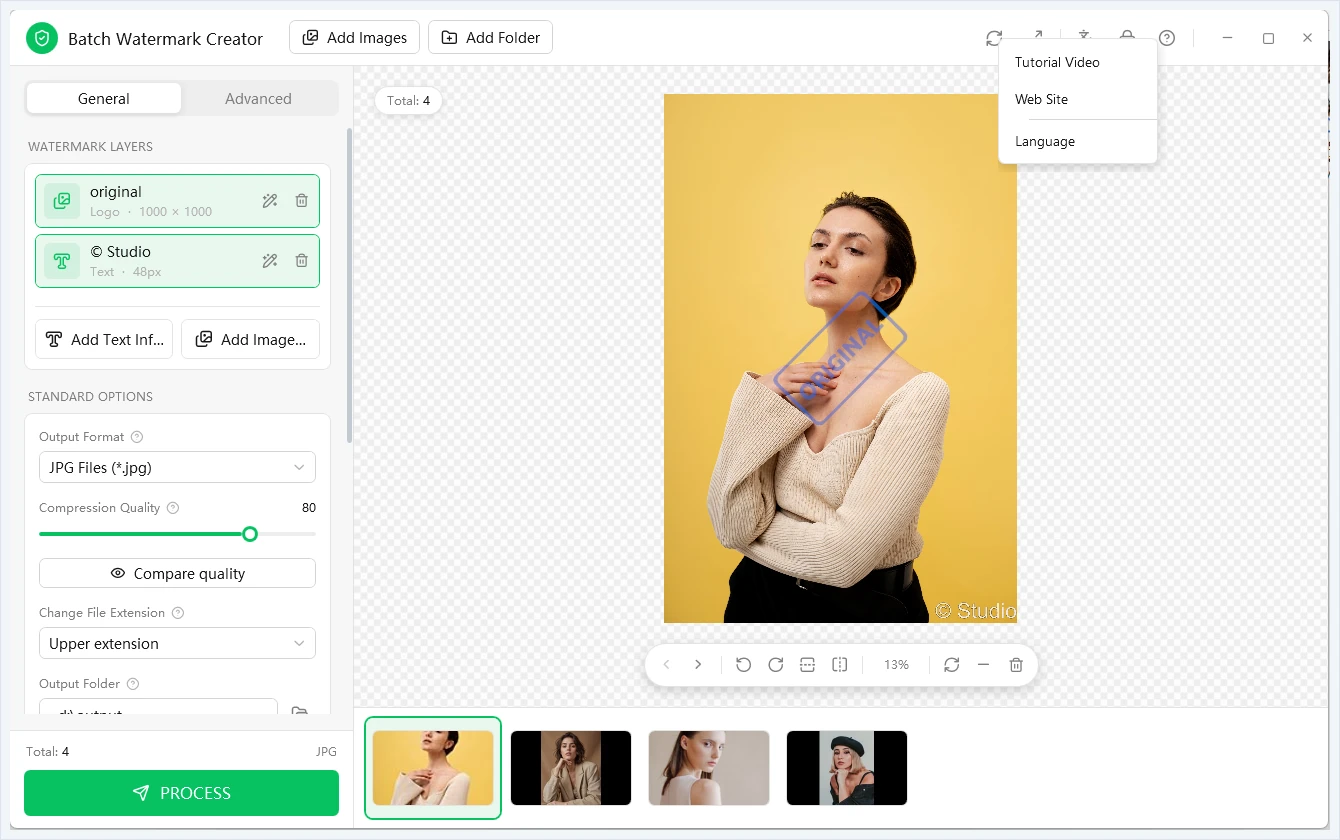
- Click the ? button in the title bar and choose Language:
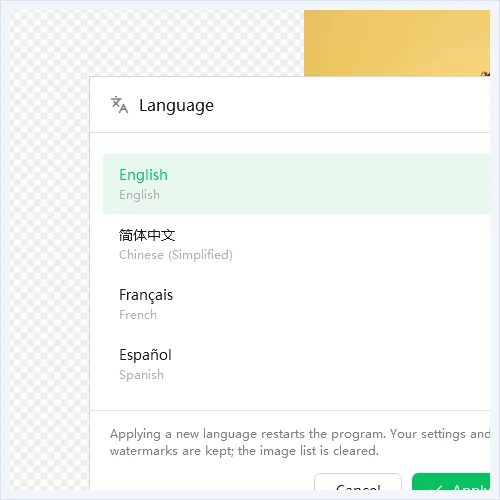
Help menu - Pick English / 简体中文 / Français / Español and click Apply:
Language
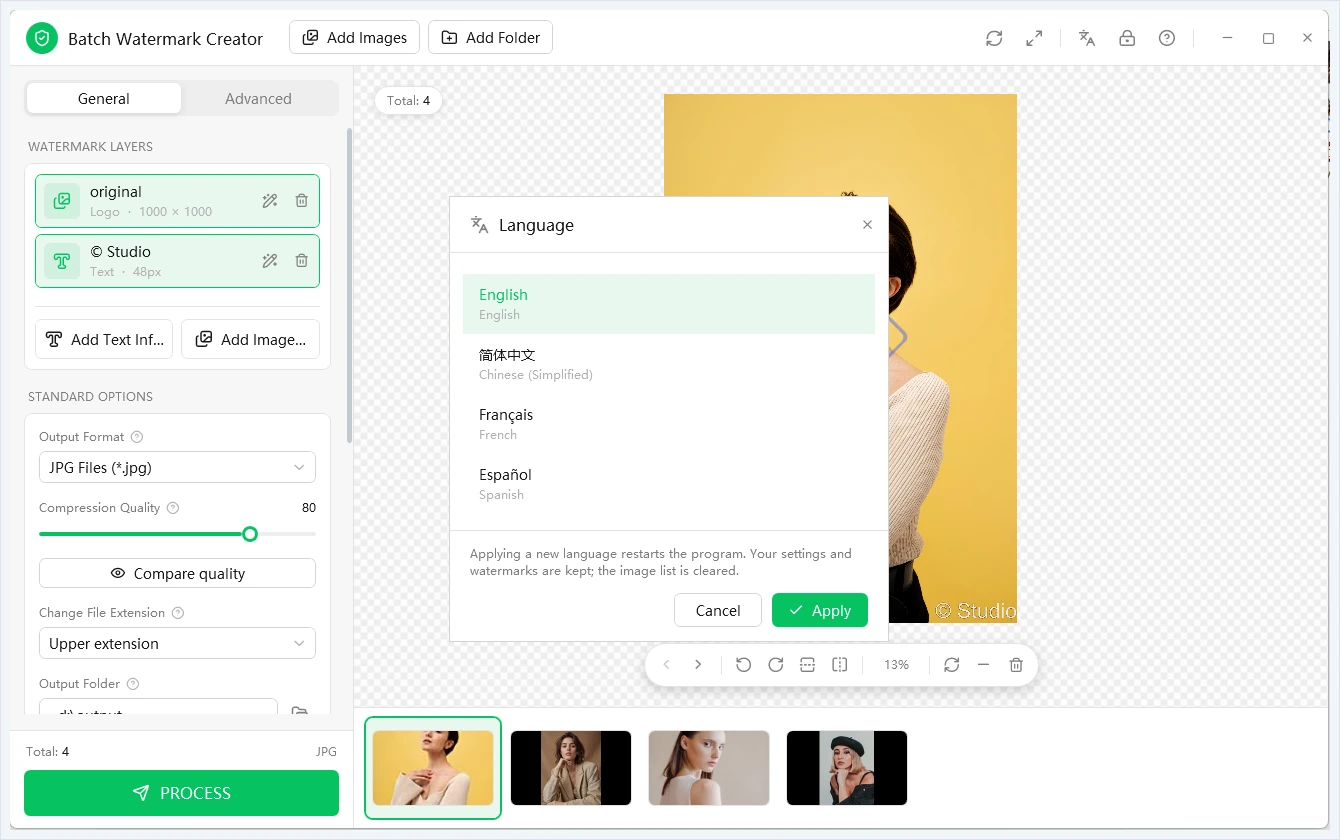
The program restarts. Settings and watermarks are kept; the image list is cleared.
12Activation
12.1 Trial
Without activation you can use the program for 5 days from the first run. During the trial, output images carry an "Unregistered" mark; after it ends, images can no longer be processed.
12.2 Activating
- Have the name, email you used when buying and your license key ready, and make sure you are online.
- Click the lock button in the title bar and select Activate.
- Enter name, email and key (copy and paste the key; watch for extra spaces). The button is enabled once all three are filled in.
- Click Activate. After the success message, click OK — the program closes. Start it again to finish activation.
Once activated, the page shows your registration details:
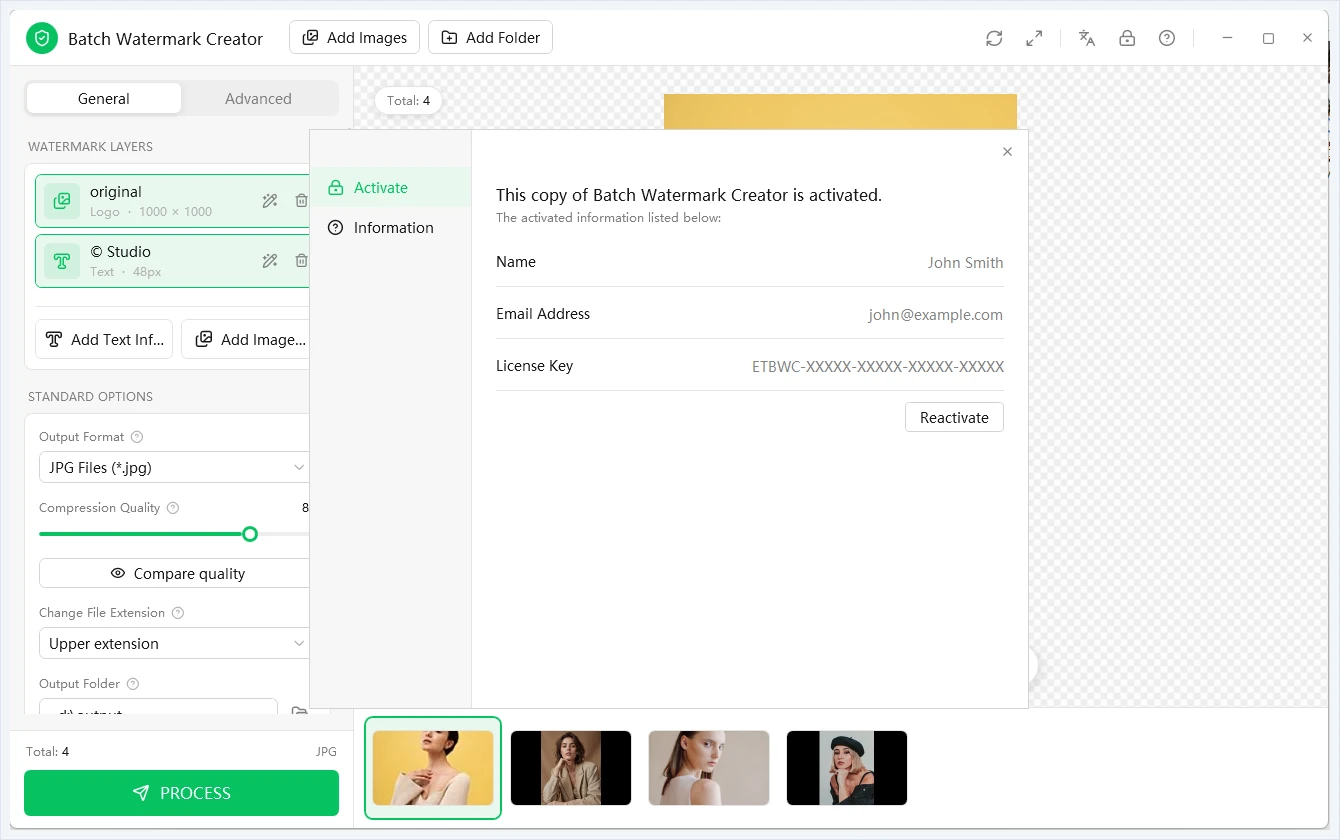
To use a different key or after reinstalling, click Reactivate.
12.3 Version information
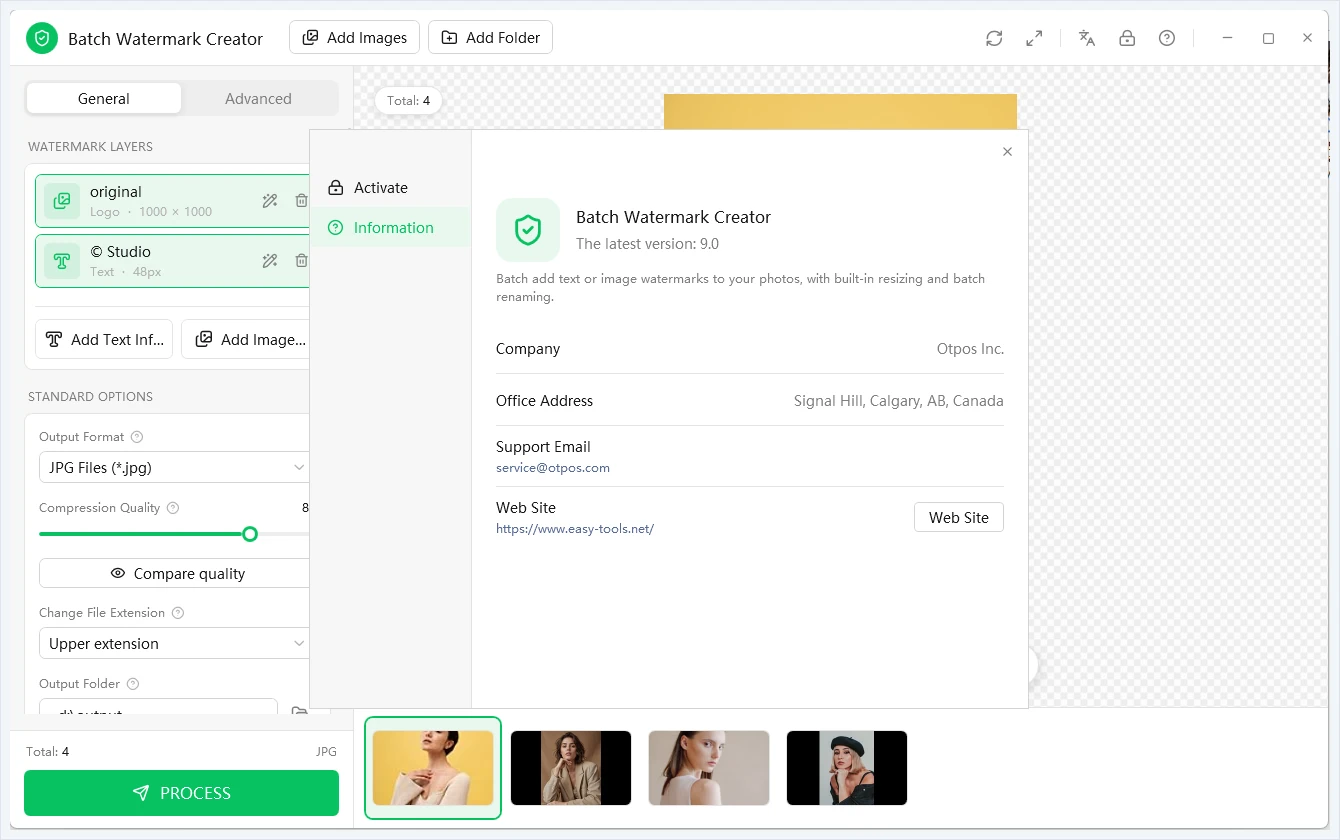
The Information page shows the version, support email and website:
12.4 If activation fails
| Message | Cause | What to do |
|---|---|---|
| Cannot connect to host | No connection, or blocked by a firewall | Check the connection, allow the program in the firewall, or try another network |
| License key error | Wrong key, or it doesn't match the name / email | Copy the key again; make sure name and email match your purchase exactly |
| Other | Reason returned by the server | Send a screenshot to the support email |
13FAQ
The watermark is tiny on large photos. Turn on Auto resize to fit all images in the layer editor, or make the watermark larger.
I added a watermark but can't see it on the canvas. Make sure the layer row is green (enabled). Click a grey row to enable it.
The logo is stretched. Make sure the link button between width and height is pressed (aspect ratio locked).
Output images say "Unregistered". Activate the program (see section 12) and restart it.
Where are my processed images? In the Output Folder. Click Open folder in the result dialog, or click the batch under Recent on the General tab.
What folder structure does Add Folder produce? The same as the source. Photos\2024\Trip\a.jpg is written as 2024\Trip\a.jpg in the output folder.
Compression quality has no effect on GIF. GIF is an indexed-color format; the quality setting does not apply.
Files were overwritten. Turn off Overwrite existing files; duplicates will then get a number added. Overwritten files cannot be recovered.
Are my settings saved? Yes, automatically when you close the program.
Click any screenshot to see it in full.