

1Quick start
- Tap Add photos and pick the photos you want to stamp.
- Tap a template under Templates. The watermark goes on the photo and the editor opens so you can fine-tune it.
- Tap Export at the top right, check the format and folder, then tap Export N photos.
By default the results are saved to Pictures/Watermark, so they show up in your gallery right away.
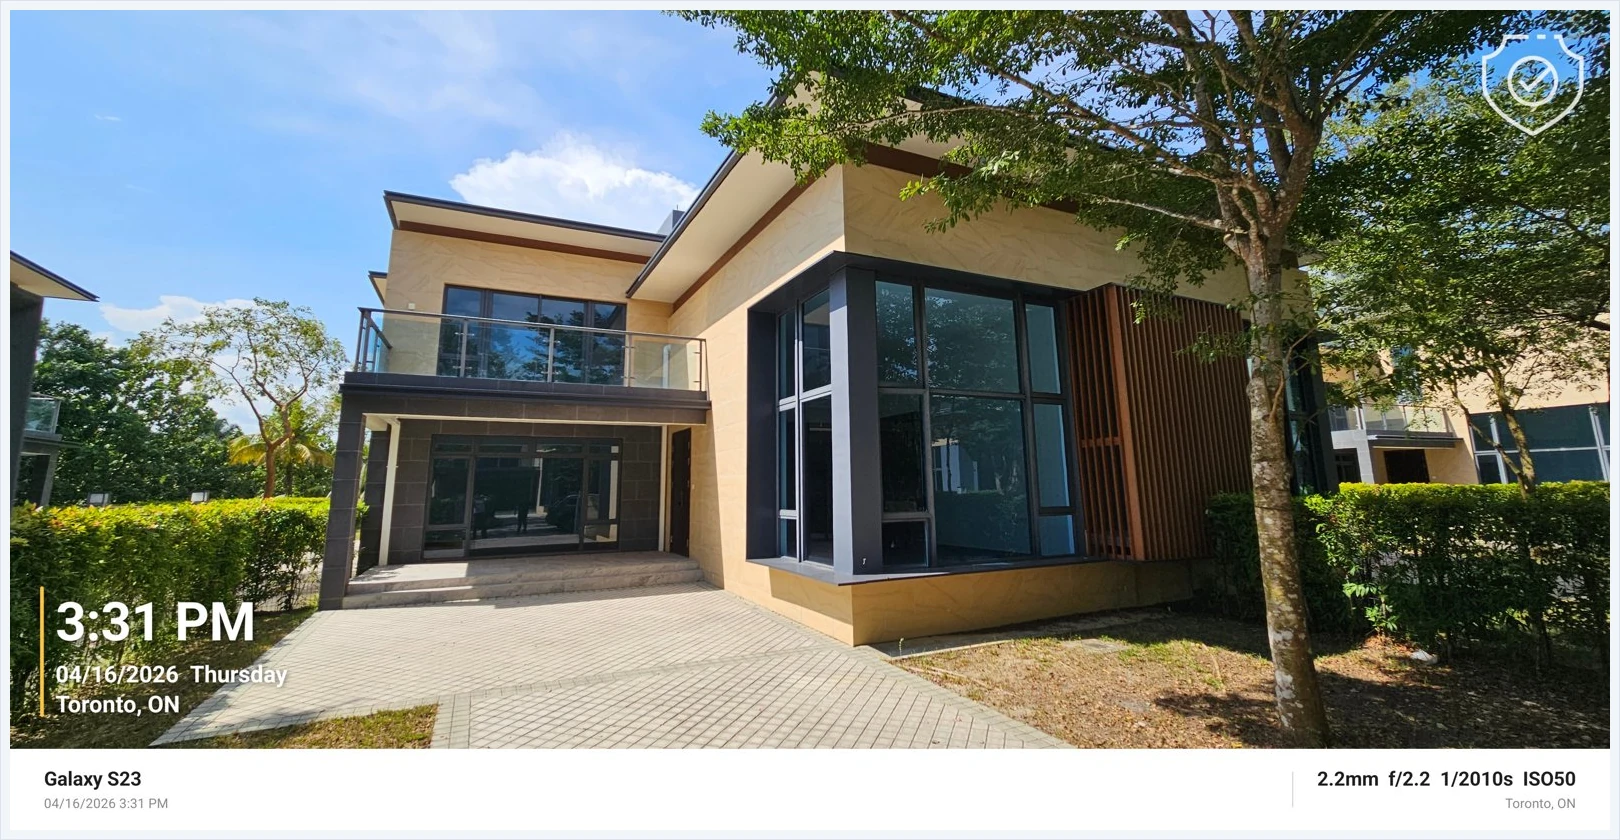
2The home screen
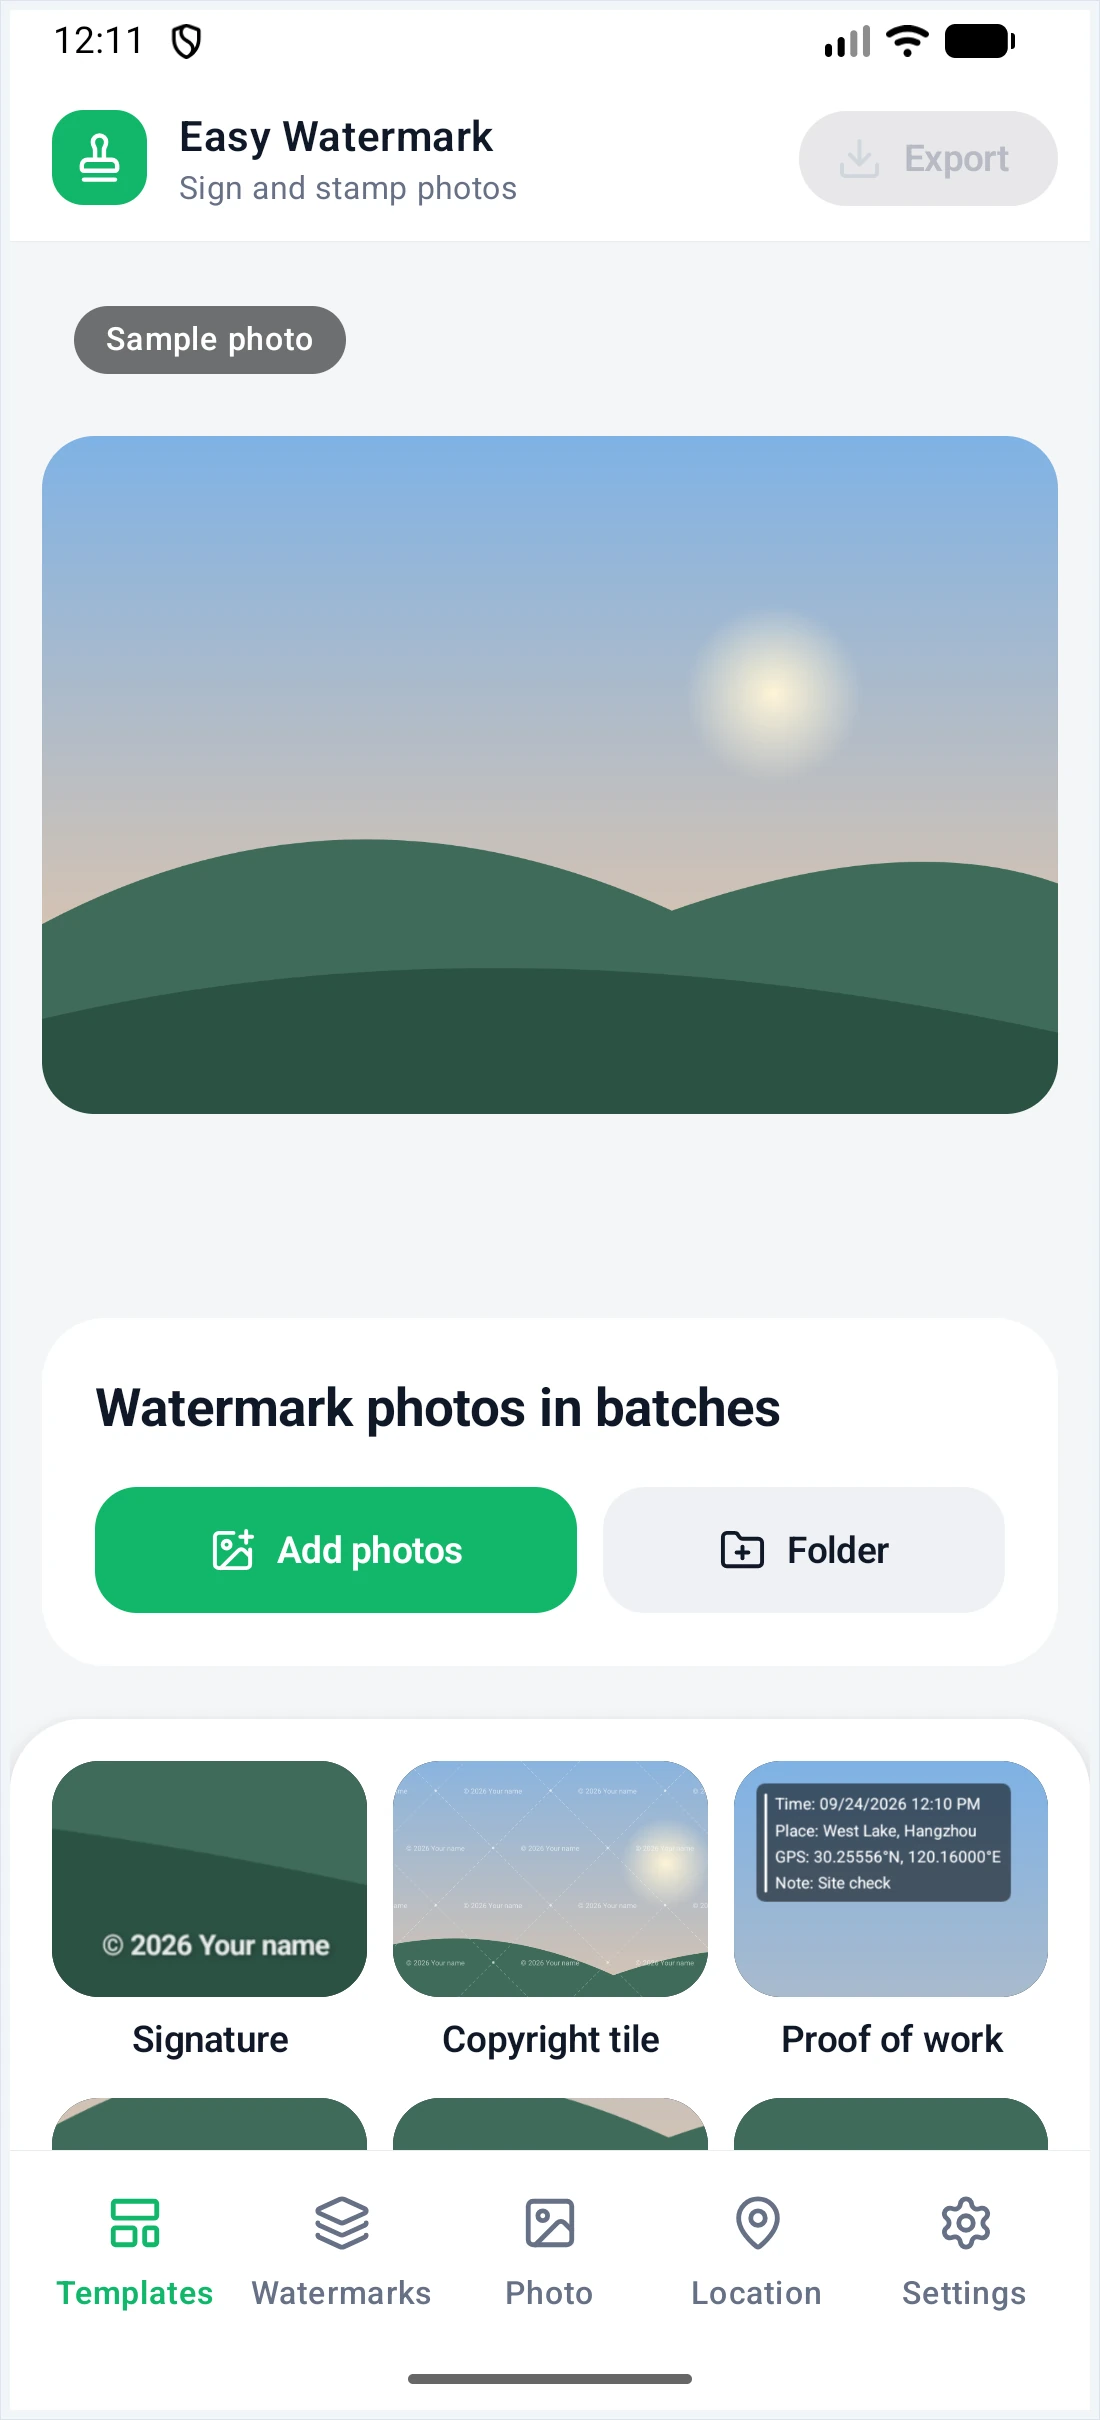
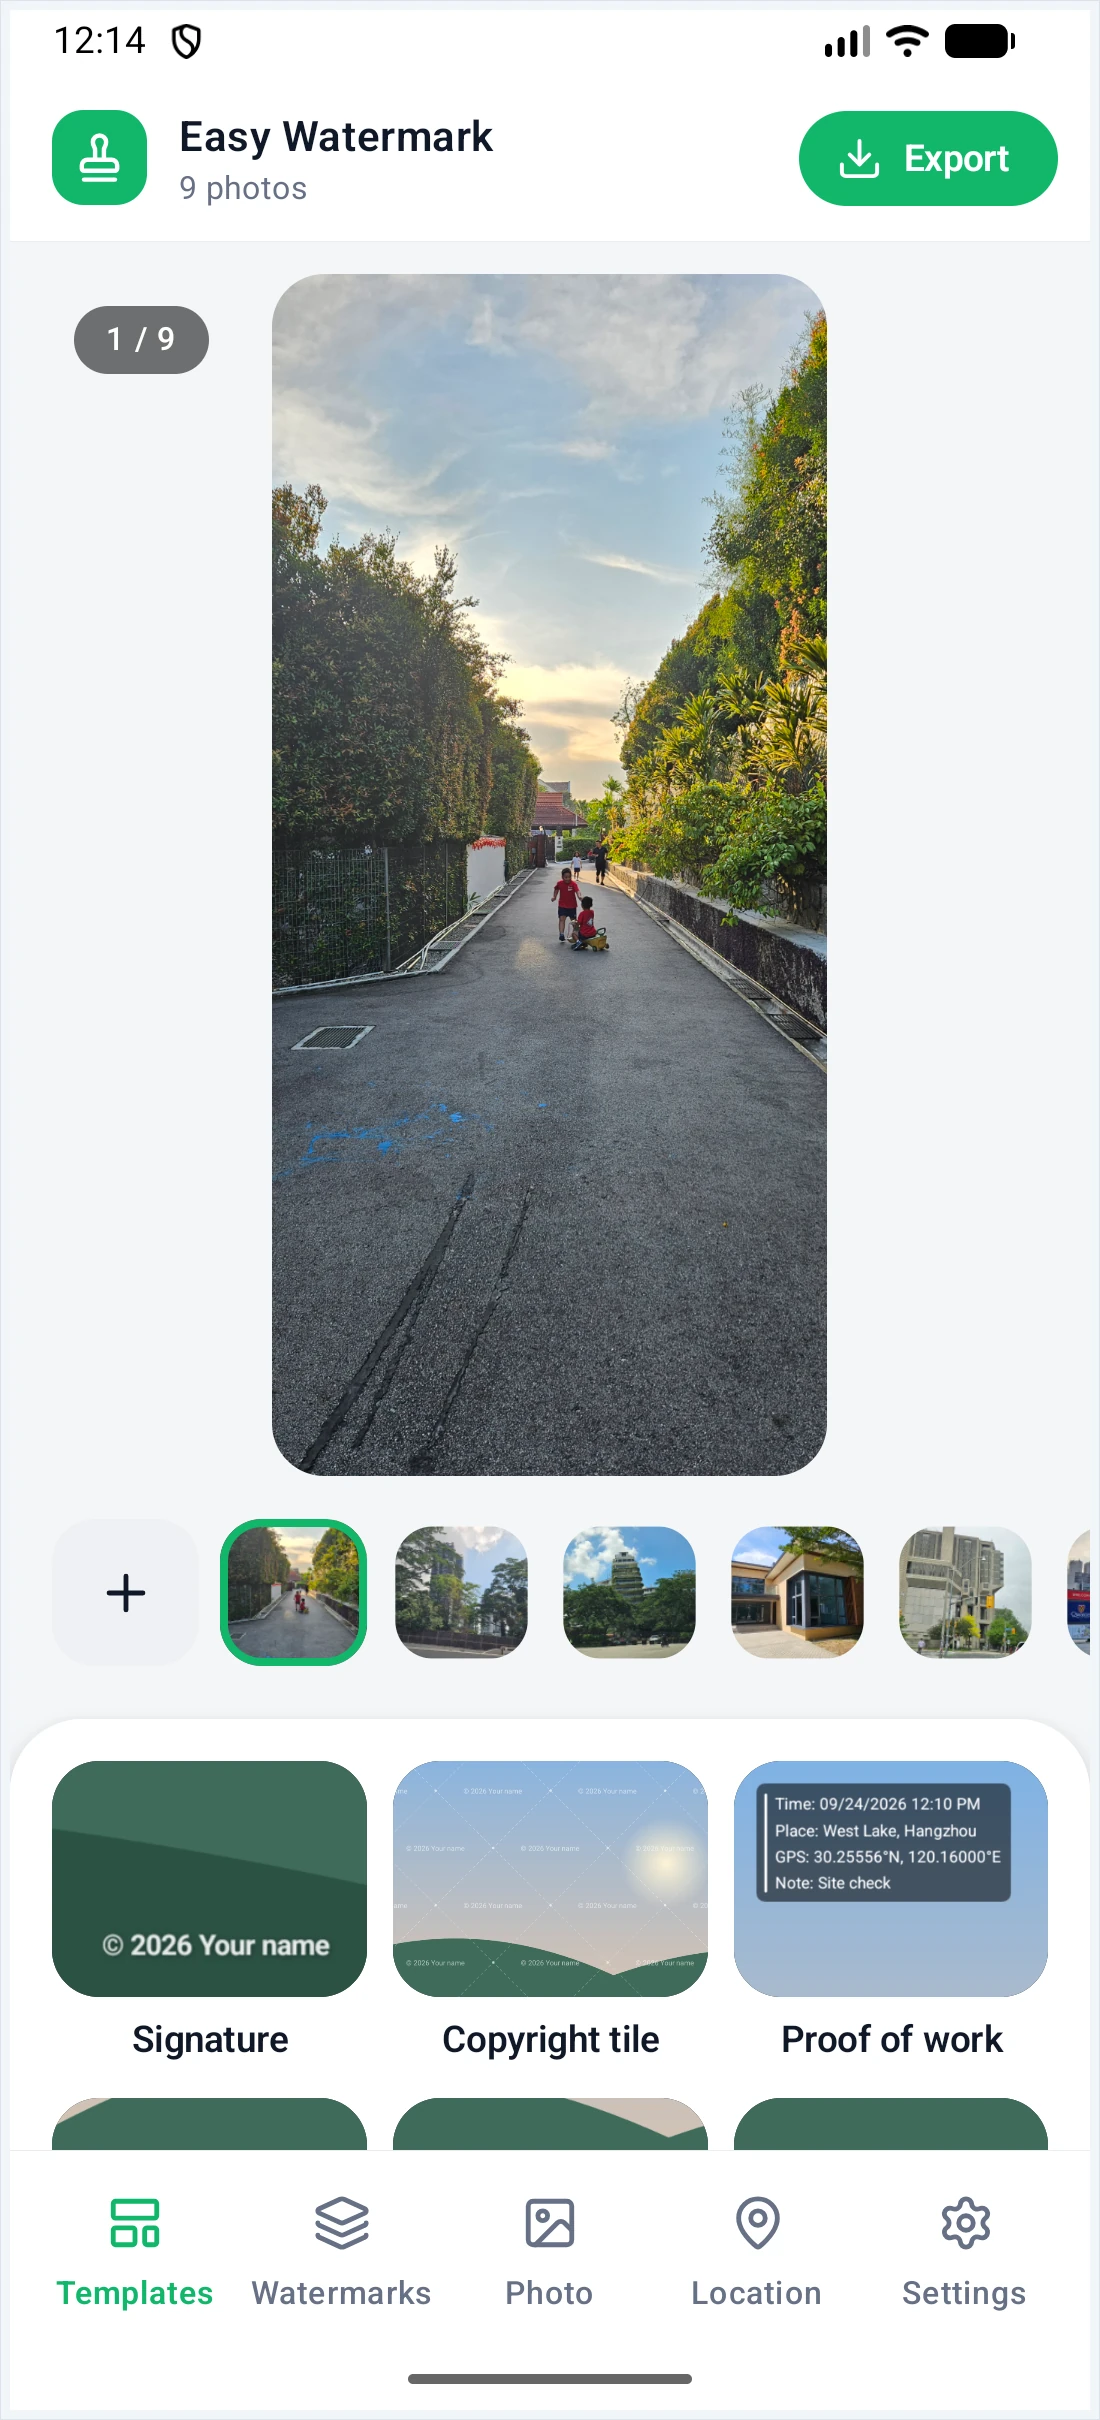
The home screen has three parts:
- Top bar: the number of photos, and the Export button (enabled once photos are added).
- Preview: the current photo with its watermarks, exactly as it will be exported. The badges at top left show which photo you're on and how many photos have GPS data. Use the thumbnail strip to switch photos; the + on the left adds more.
- Bottom bar: five pages.
| Page | What it's for |
|---|---|
| Templates | Add a ready-made watermark in one tap |
| Watermarks | See and manage the watermark layers; add a new text, image or frame watermark |
| Photo | Rotate, mirror, flip or remove photos |
| Location | Choose how places are written; check or change each photo's place |
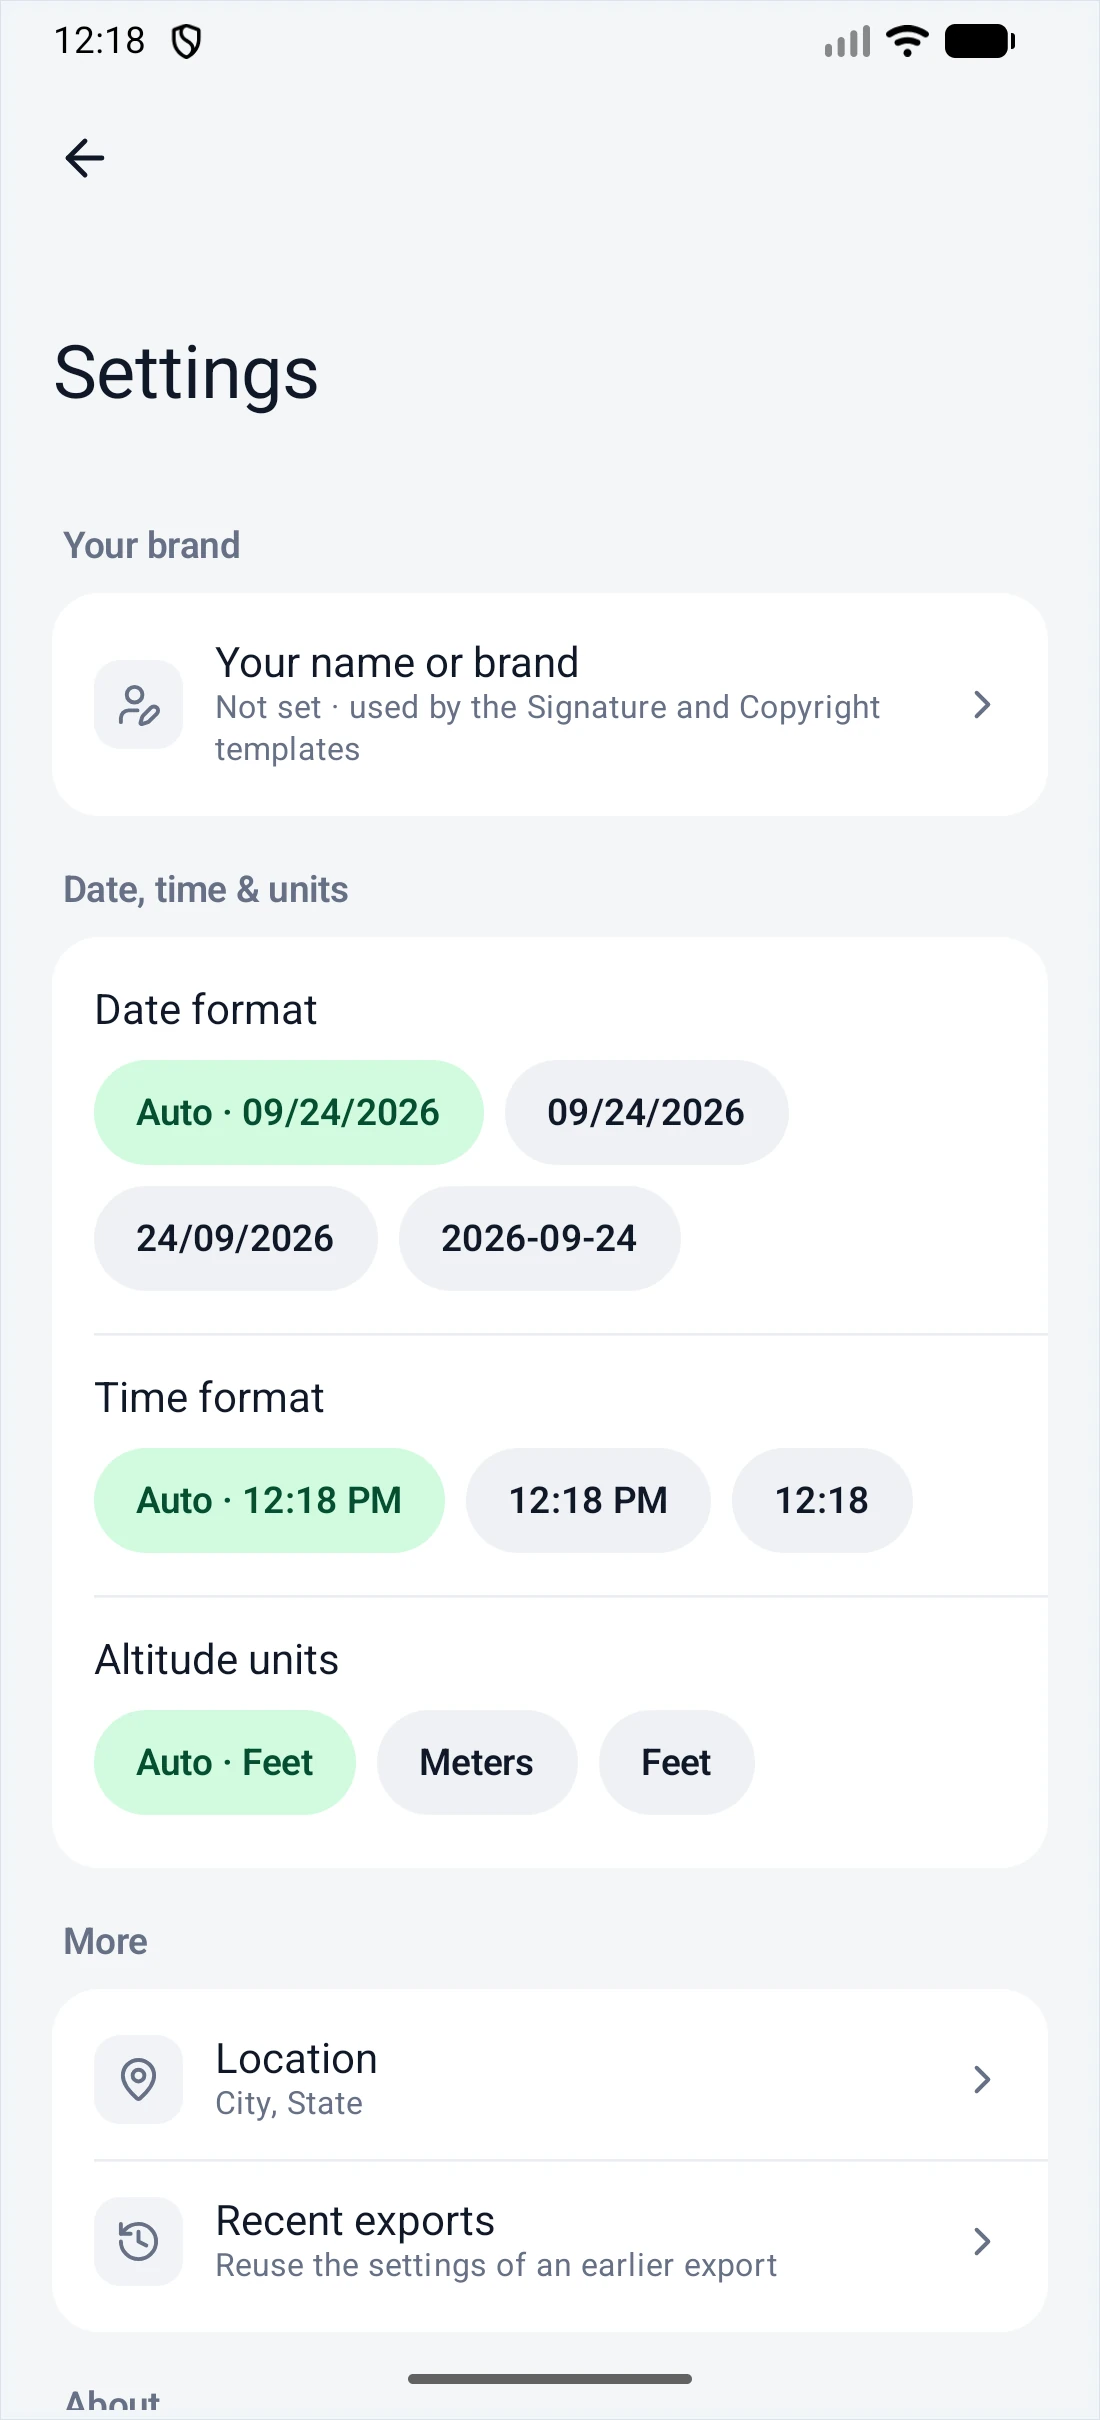
| Settings | Your name, date/time formats, altitude units, recent exports |
Before you add photos, the preview shows a Sample photo so you can try watermarks out first.
3Adding photos
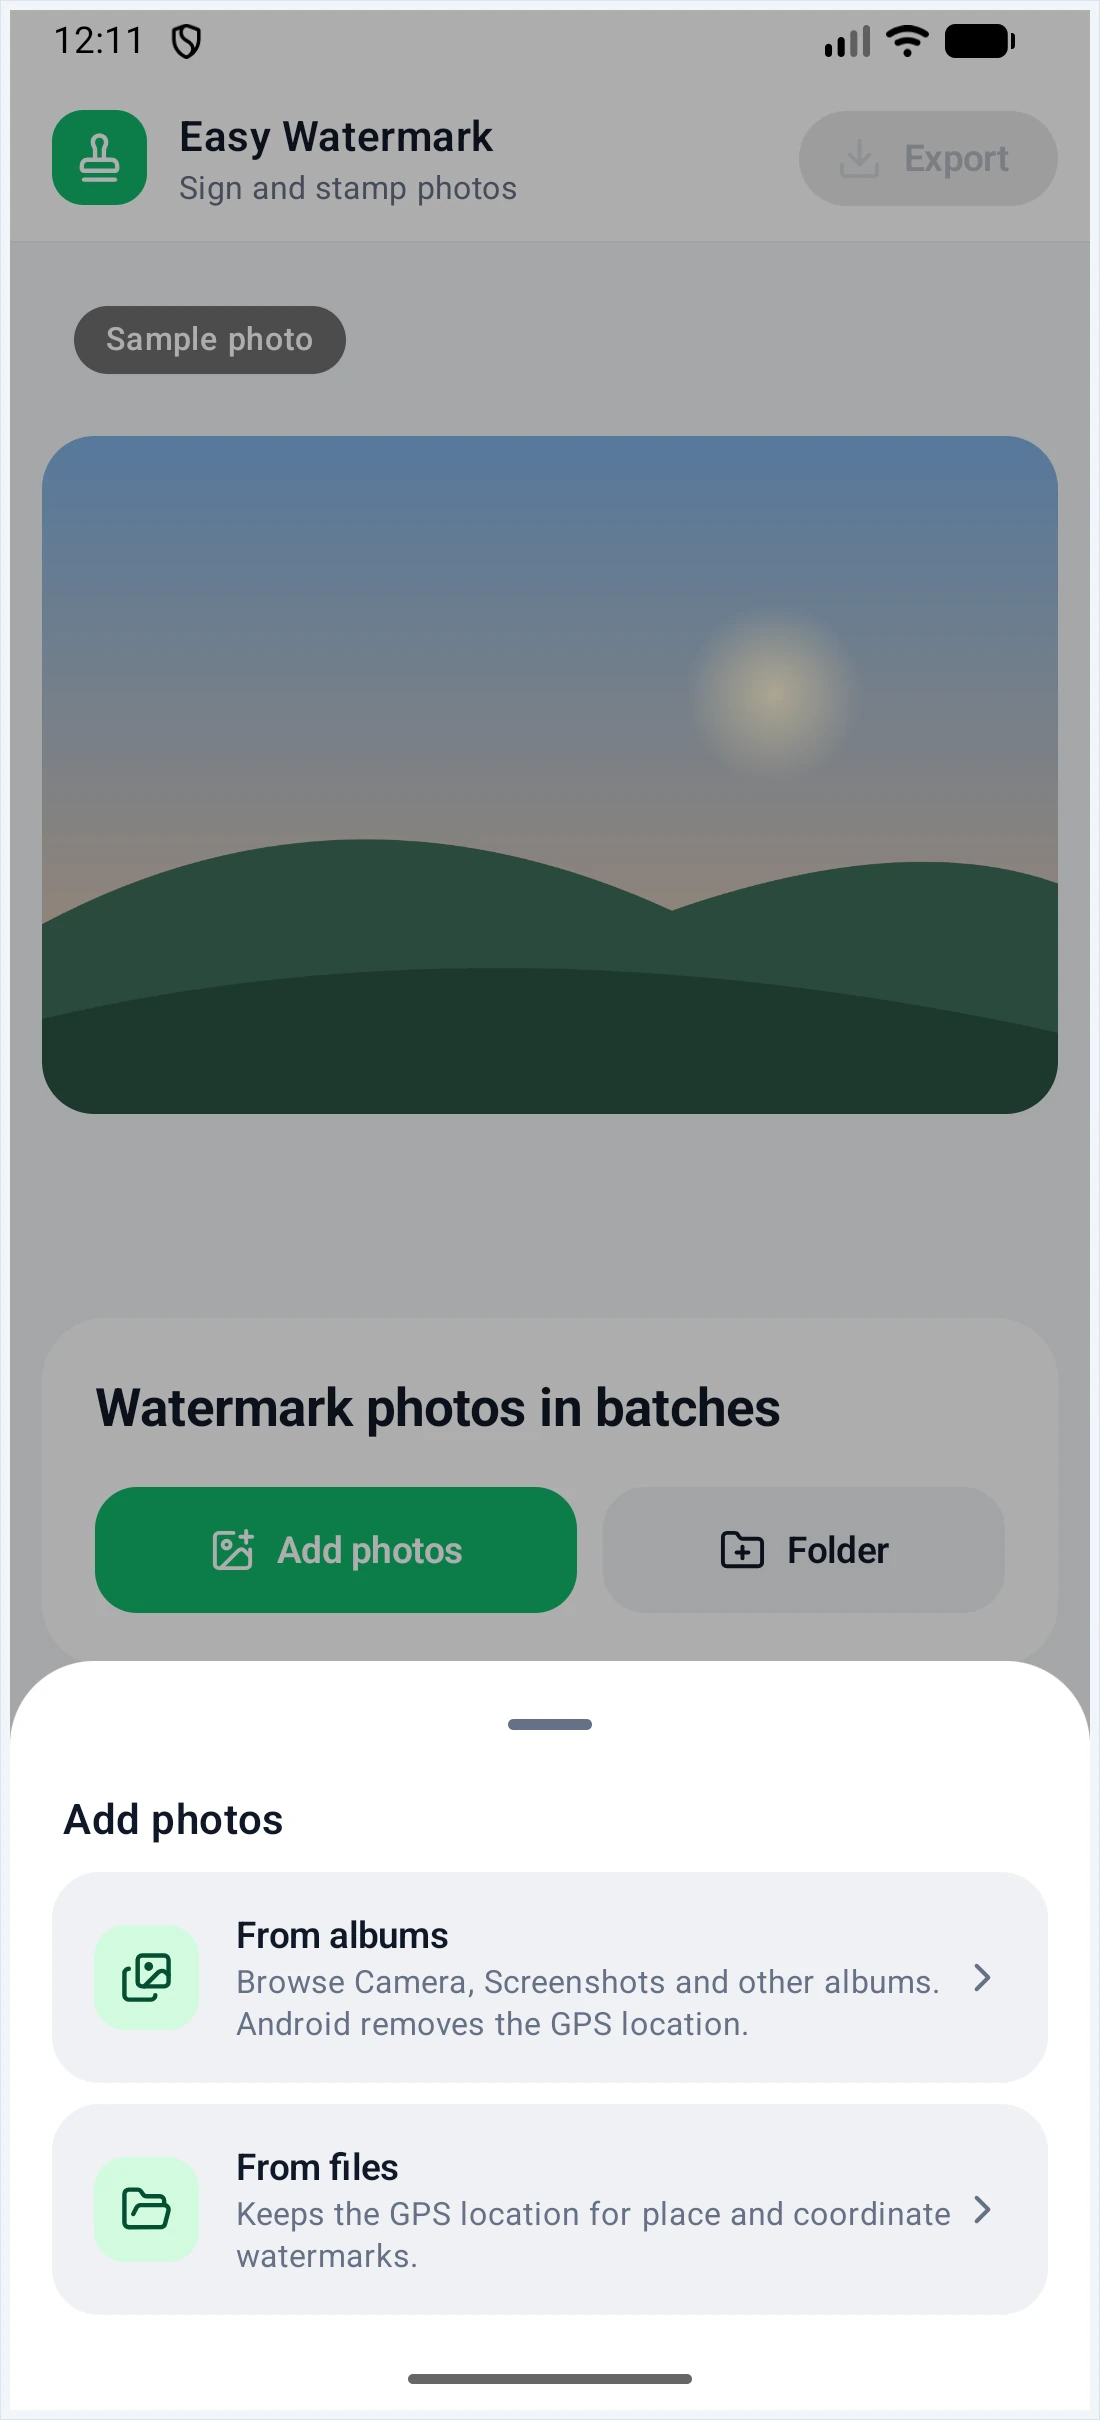
Tap Add photos and choose a source:
- From albums: browse Camera, Screenshots and your other albums. Android removes the GPS location from photos picked this way.
- From files: keeps the GPS location. Use this when you want place or coordinate watermarks filled in automatically.
In the file picker, long-press a photo to start selecting, tap the others you want, then tap Select.
You can also tap Folder to add every image in a folder.
4Templates
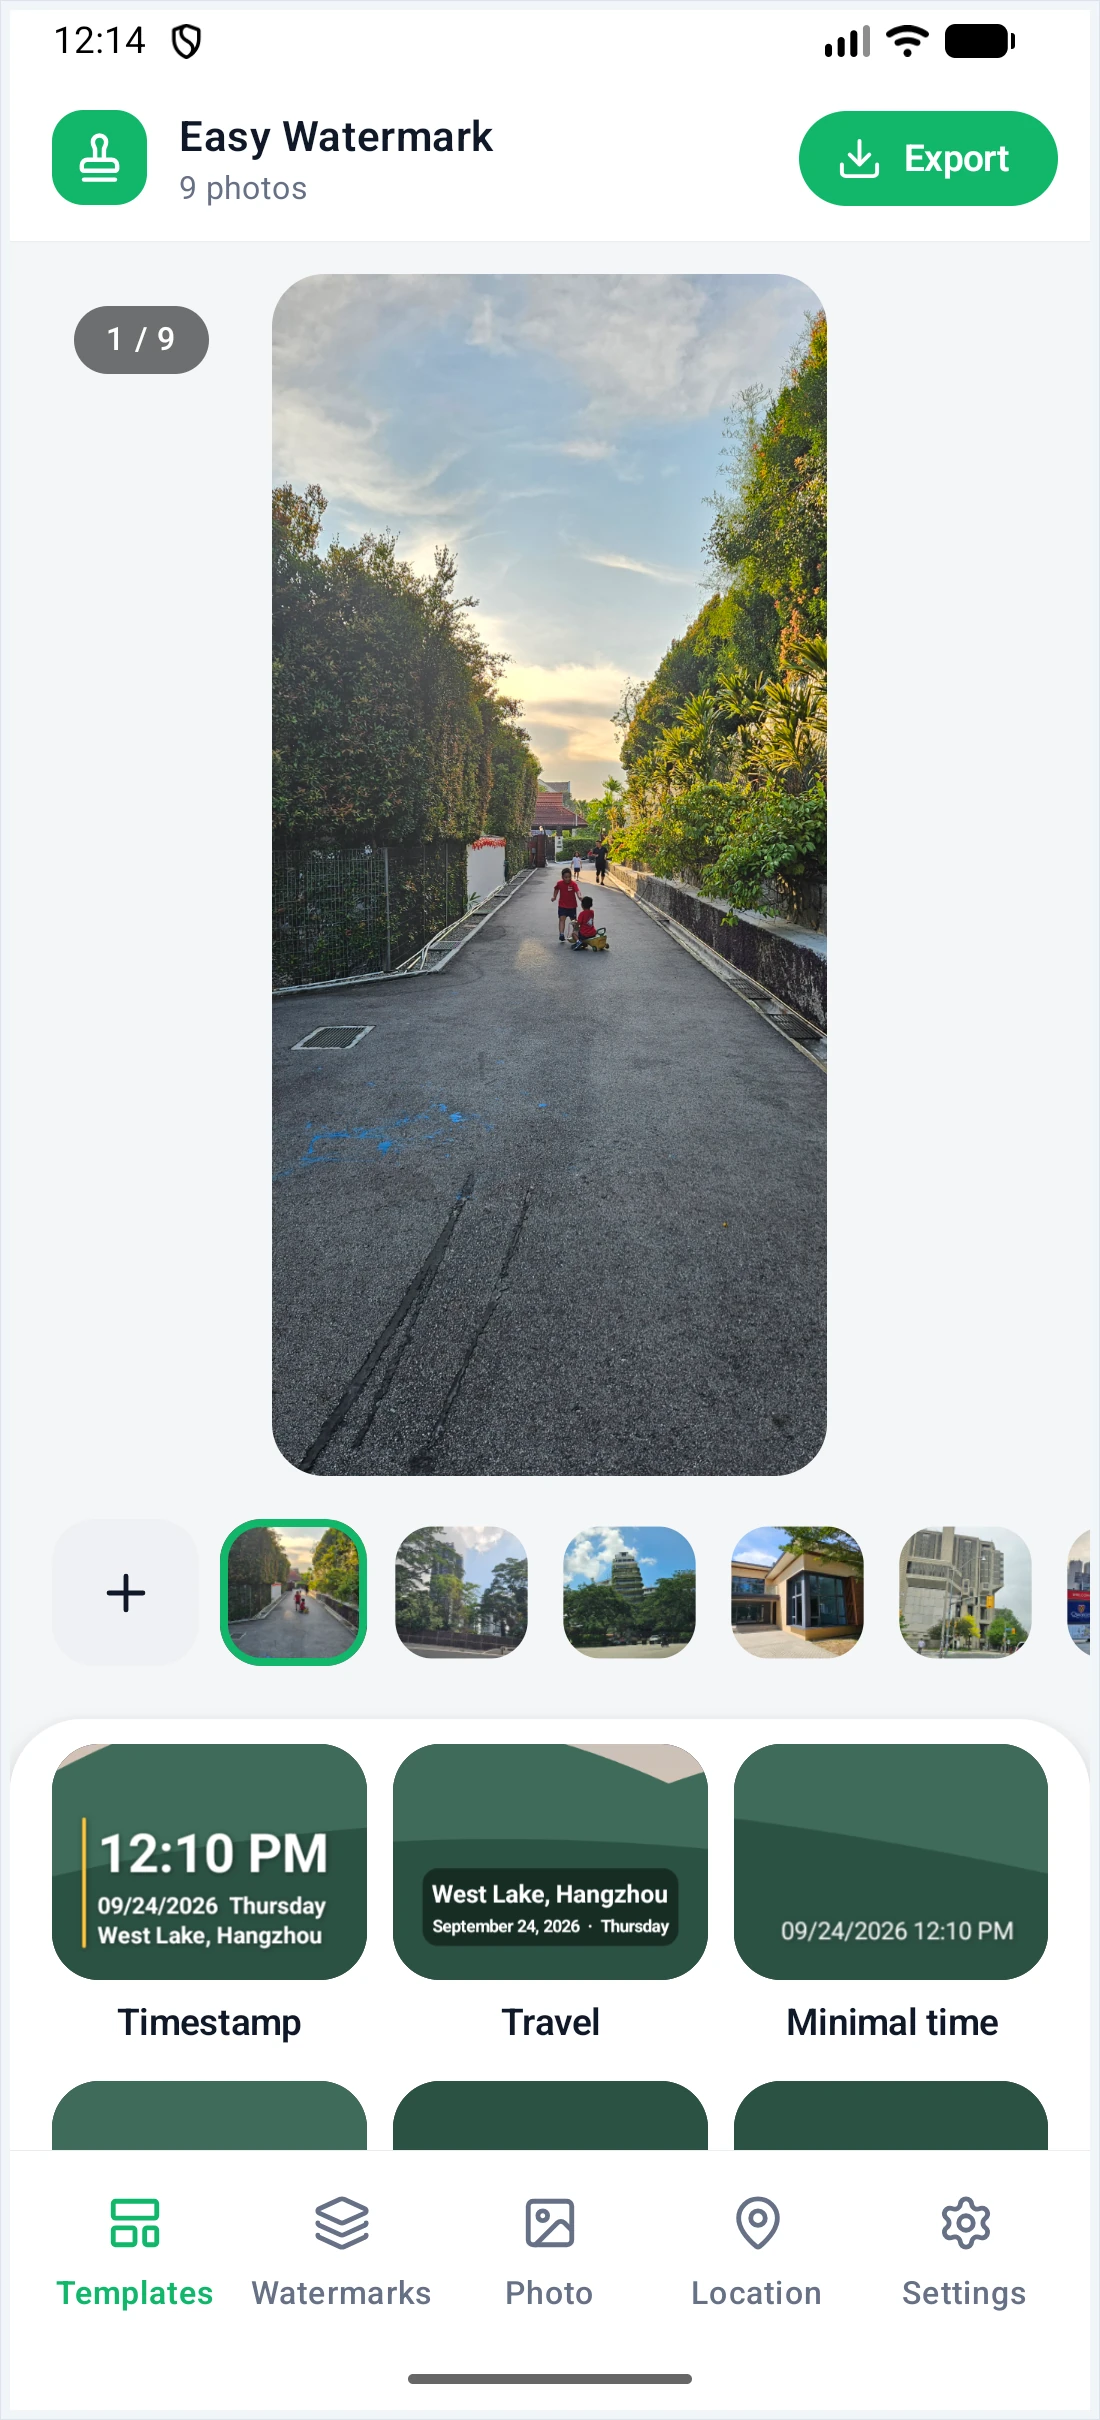
Templates build the watermark from each photo's capture time, date and location. Tap one to add it, then adjust it in the editor.
| Template | What it shows |
|---|---|
| Signature | © year and your name in a corner |
| Copyright tile | A faint © repeated across the whole photo |
| Proof of work | Time, address and GPS, for job-site photos |
| Timestamp | Big time, plus date, weekday and place |
| Travel | Place and date on a soft label |
| Minimal time | Just the capture date and time |
| Camera info | Camera model and shooting settings |
| Classic frame | White info bar under the photo |
| Dark frame | Black bar with place and time |
| City stamp | City name as a centered title |
| Film date | Orange date like an old film camera |
The Signature and Copyright tile templates use Settings → Your name or brand, so set that first.
5Editing a text watermark
Adding a template or a new text watermark opens the editor: a live preview on top, tools at the bottom.
- ✕ at top left closes the editor (it asks first if you have unsaved changes).
- Tap the pencil next to the title to rename the layer.
- Undo, Redo and Delete are at the top; Save is at top right.
- Drag the watermark in the preview to move it. Long-press another watermark to switch to editing that one.
Content
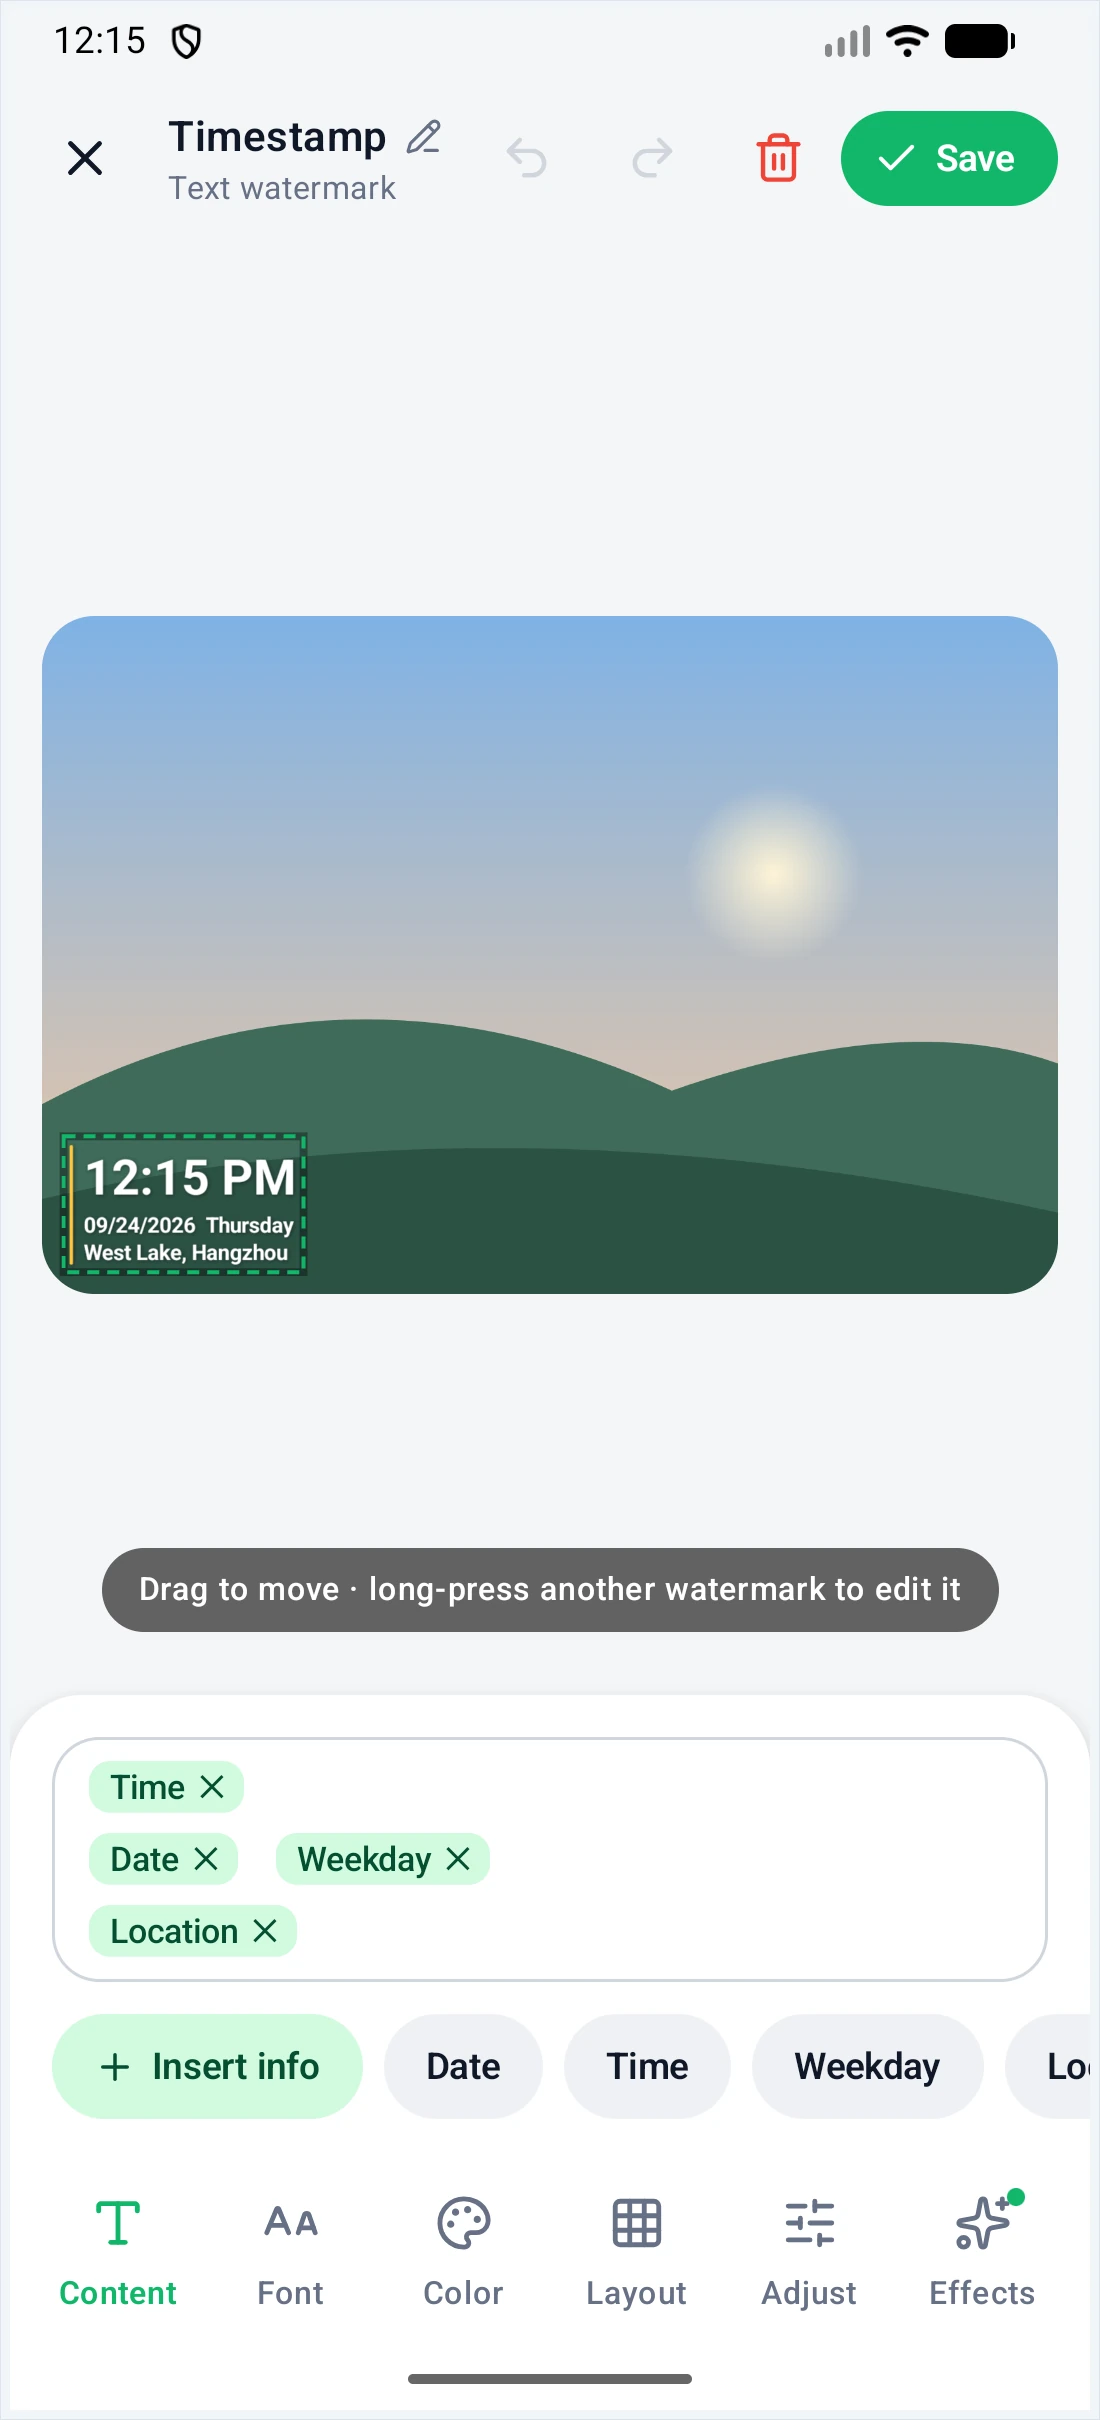
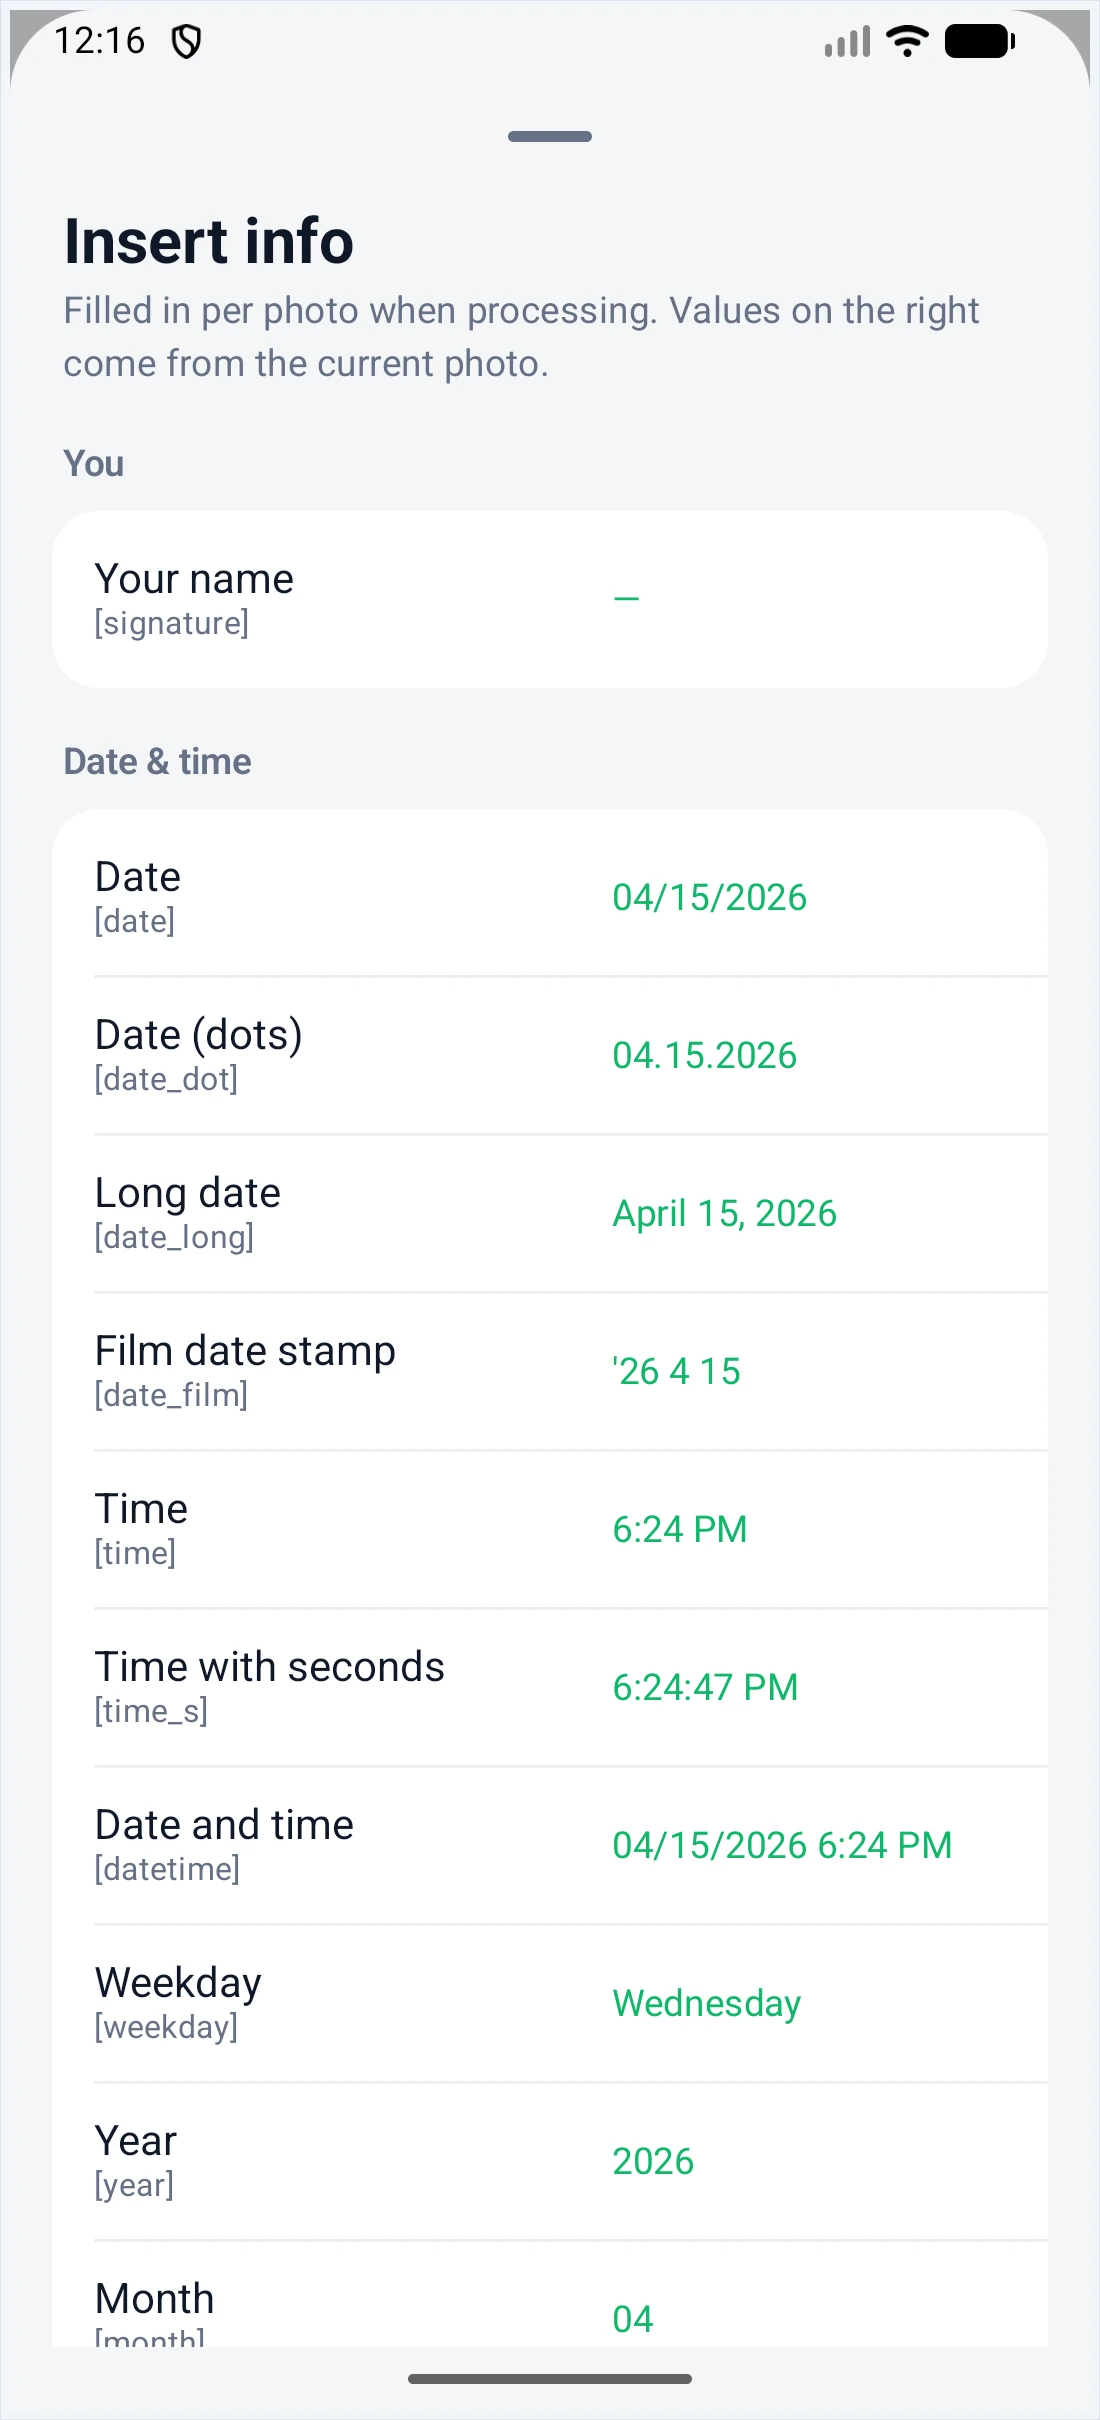
Type the watermark text. Words in square brackets, such as [date] or [loc], are filled in separately for every photo when you export. In the text box they appear as chips with an ✕.
Tap Insert info to see all fields. The column on the right shows each value for the current photo. The fields are grouped as:
- You: your name
- Date & time: date, date with dots, long date, film date stamp, time, time with seconds, date and time, weekday, year, month, day, modified date, original date
- Location: location, country, state/province, city, district, street, landmark, coordinates, latitude, longitude, altitude
- Camera (EXIF): make, model, lens, aperture, shutter speed, ISO, focal length, shooting parameters
- File: file name, extension
- Symbols: © ® ™
Font and Color
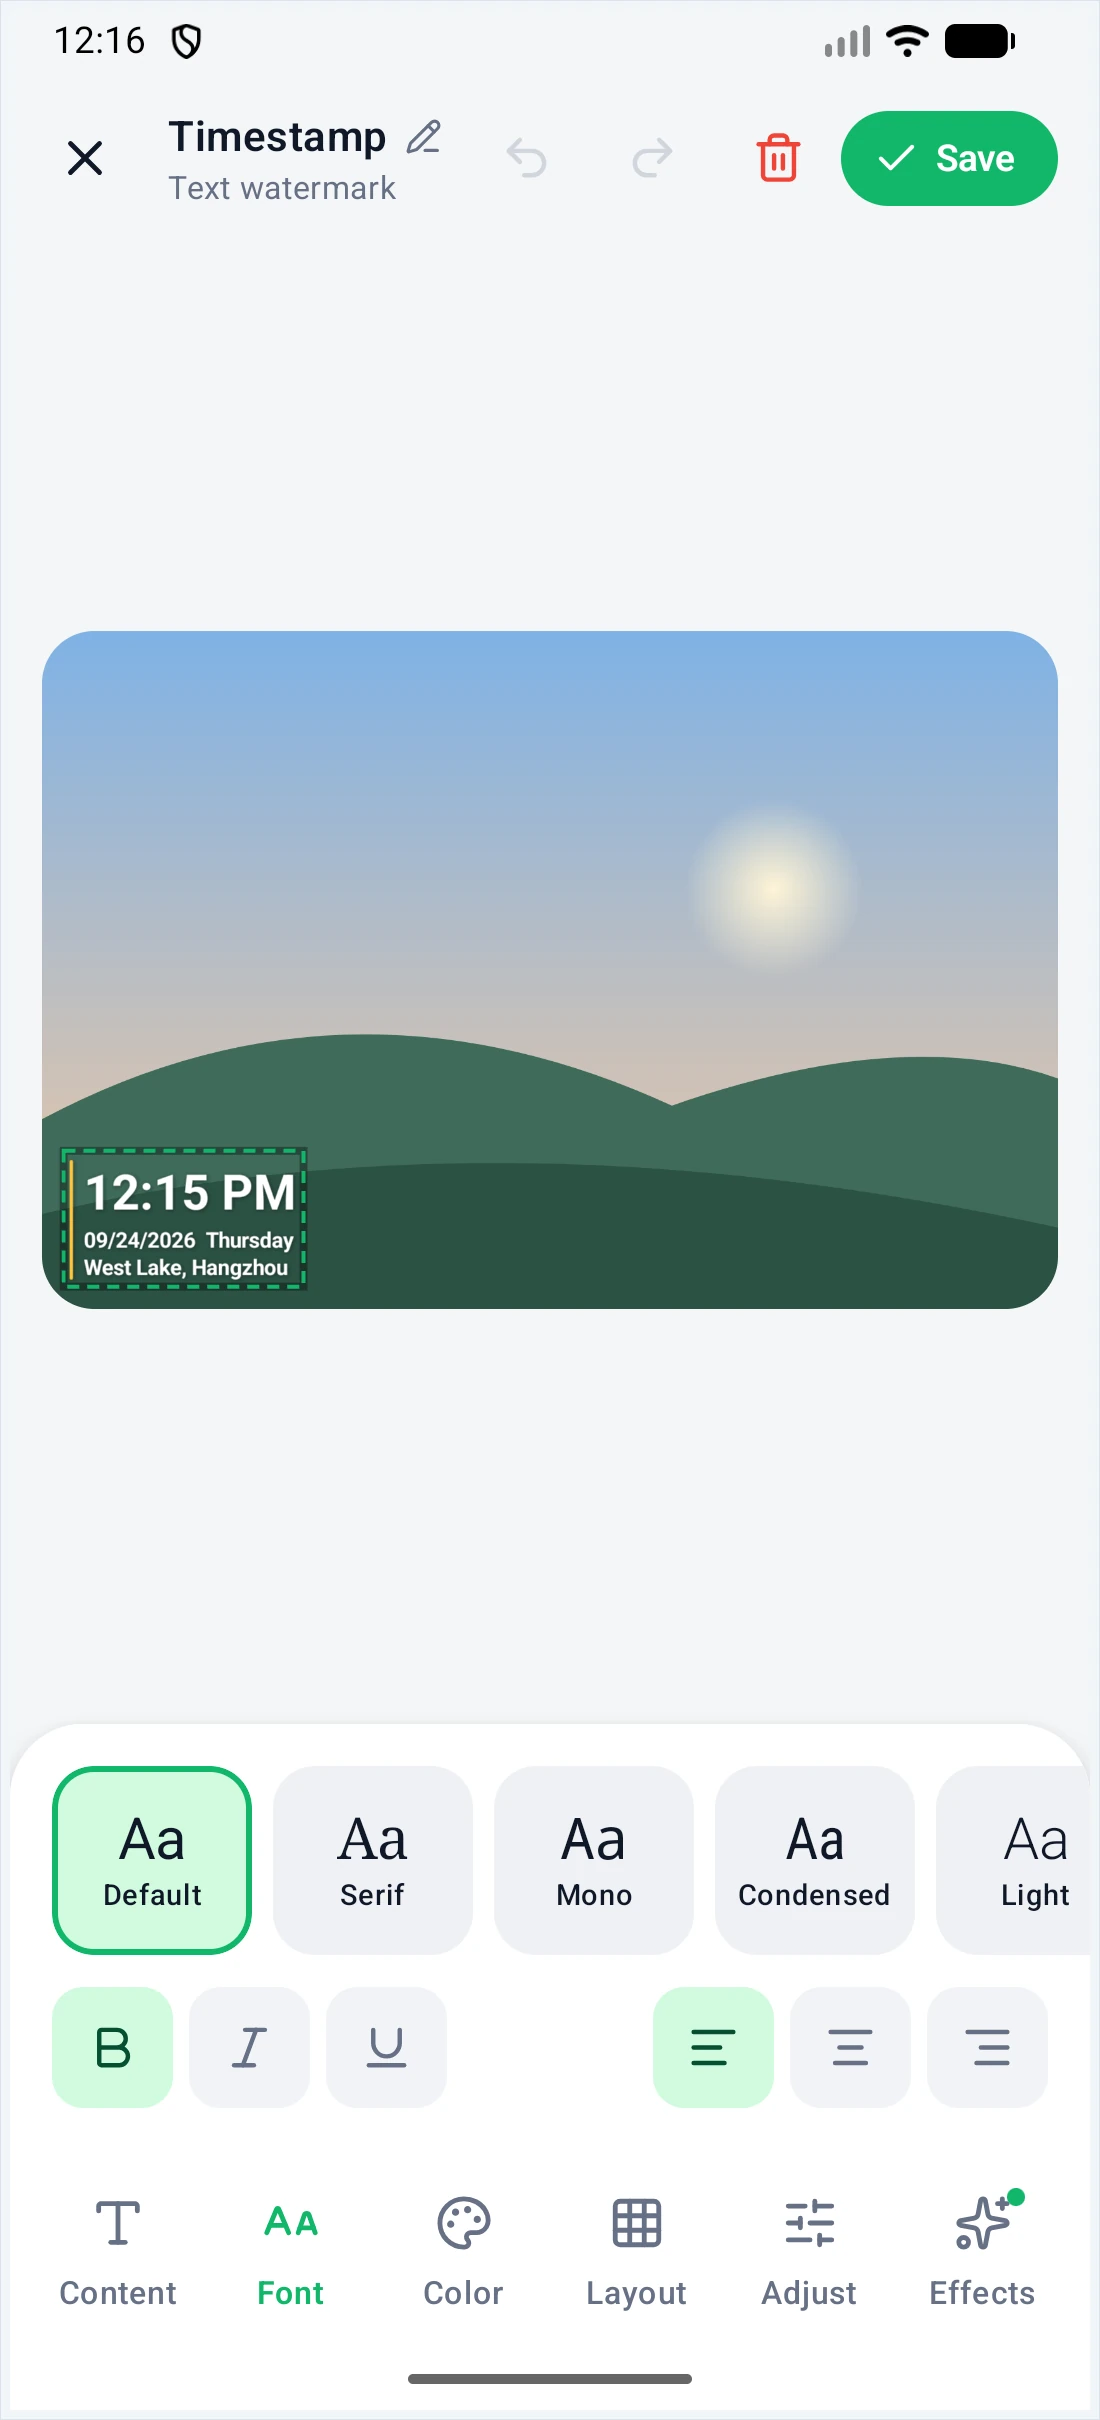
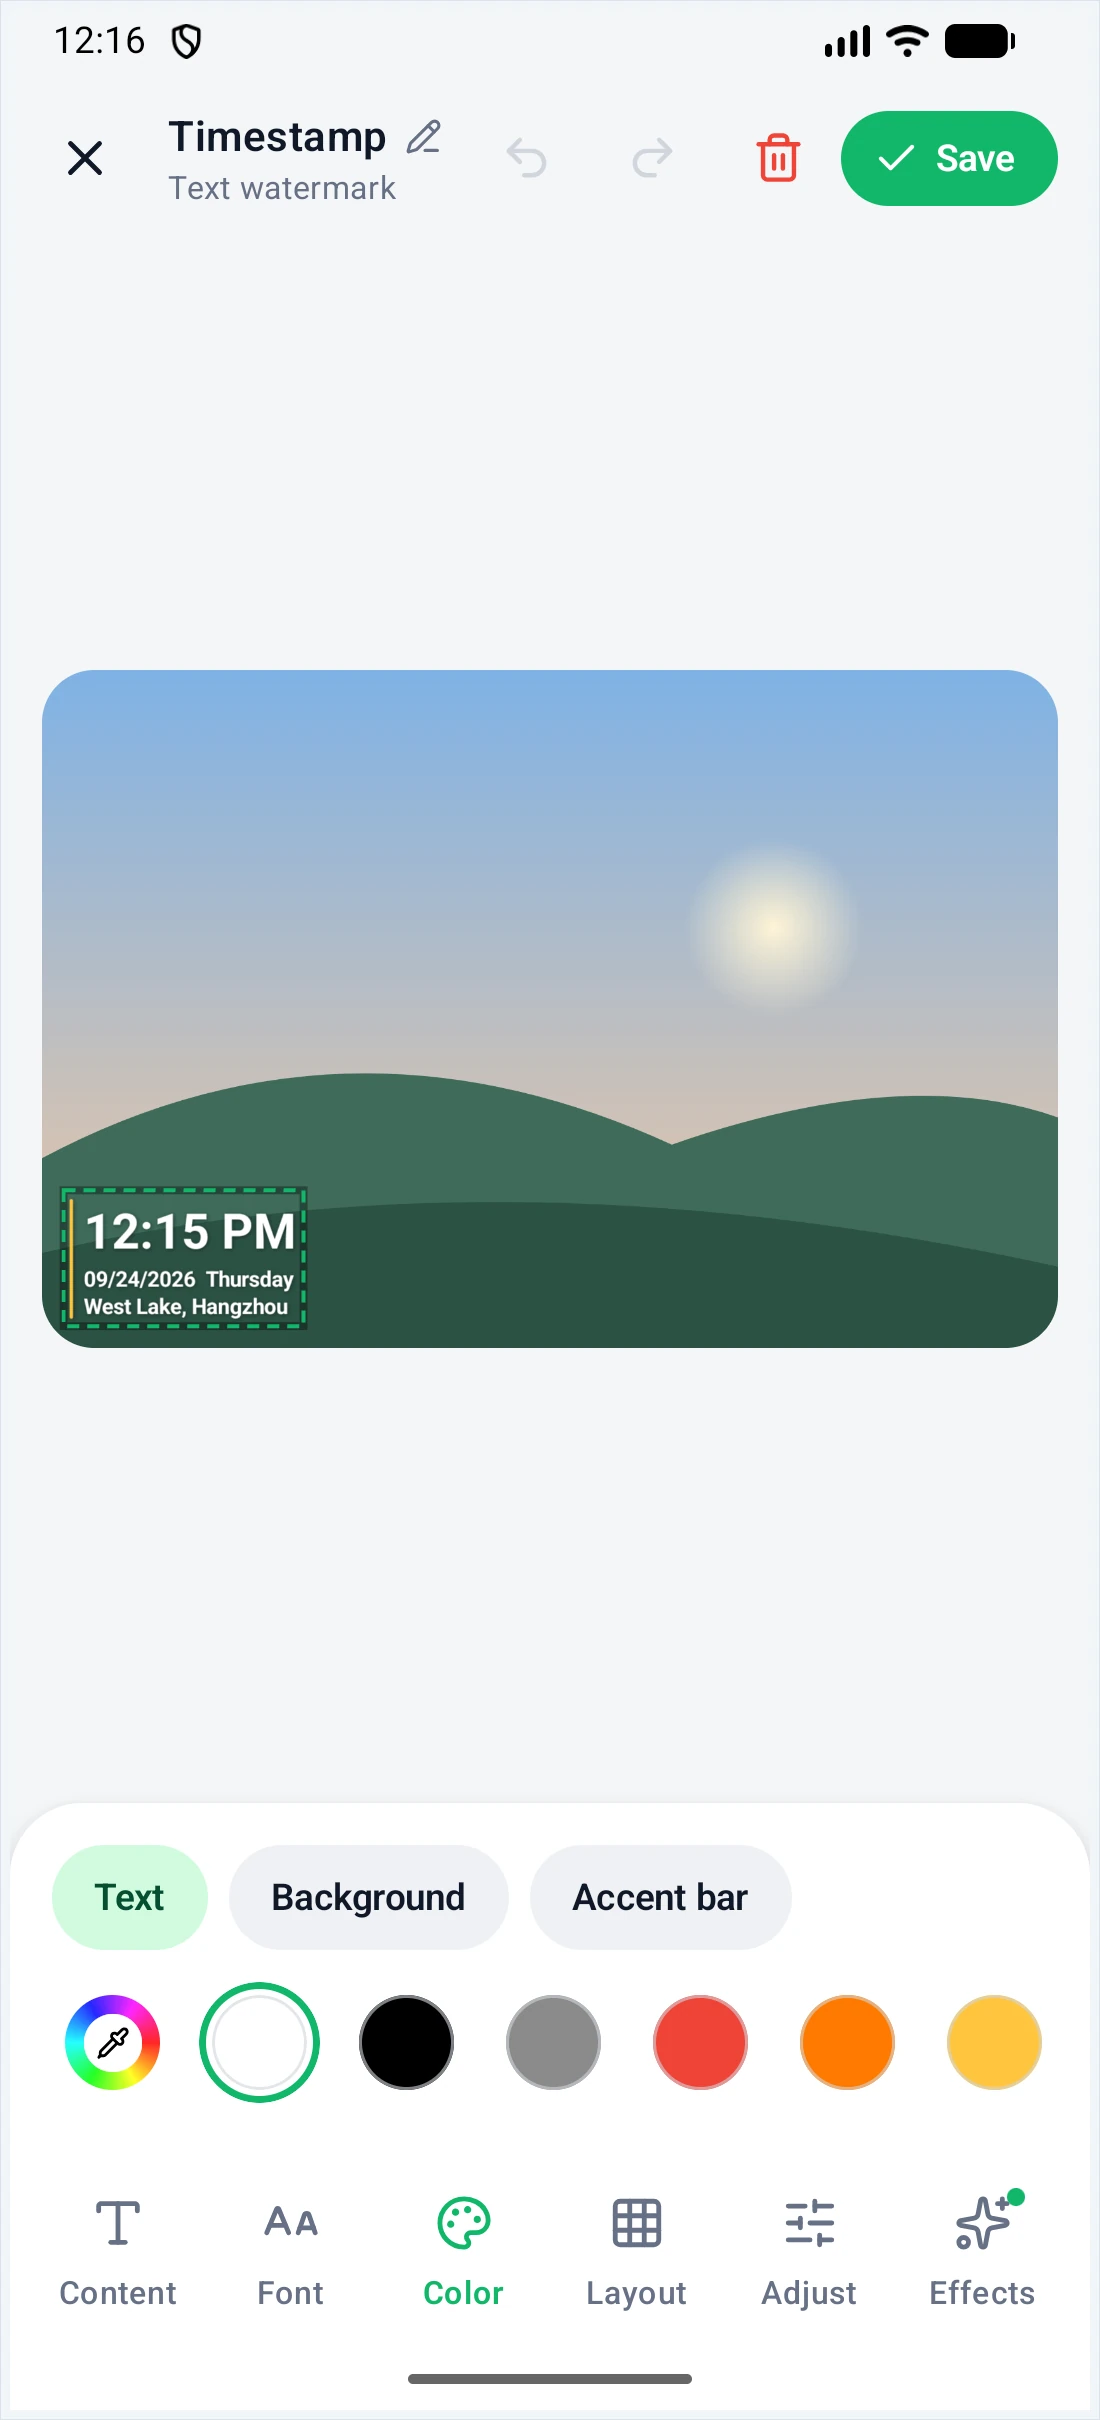
- Font: choose Default, Serif, Mono, Condensed, Light, Script and more (swipe sideways), or Import font. The row below sets bold, italic, underline and left/center/right alignment.
- Color: first pick what to color — Text, Background (a rounded plate behind the text) or Accent bar (the bar to the left of the text) — then tap a swatch or use the color picker.
Layout
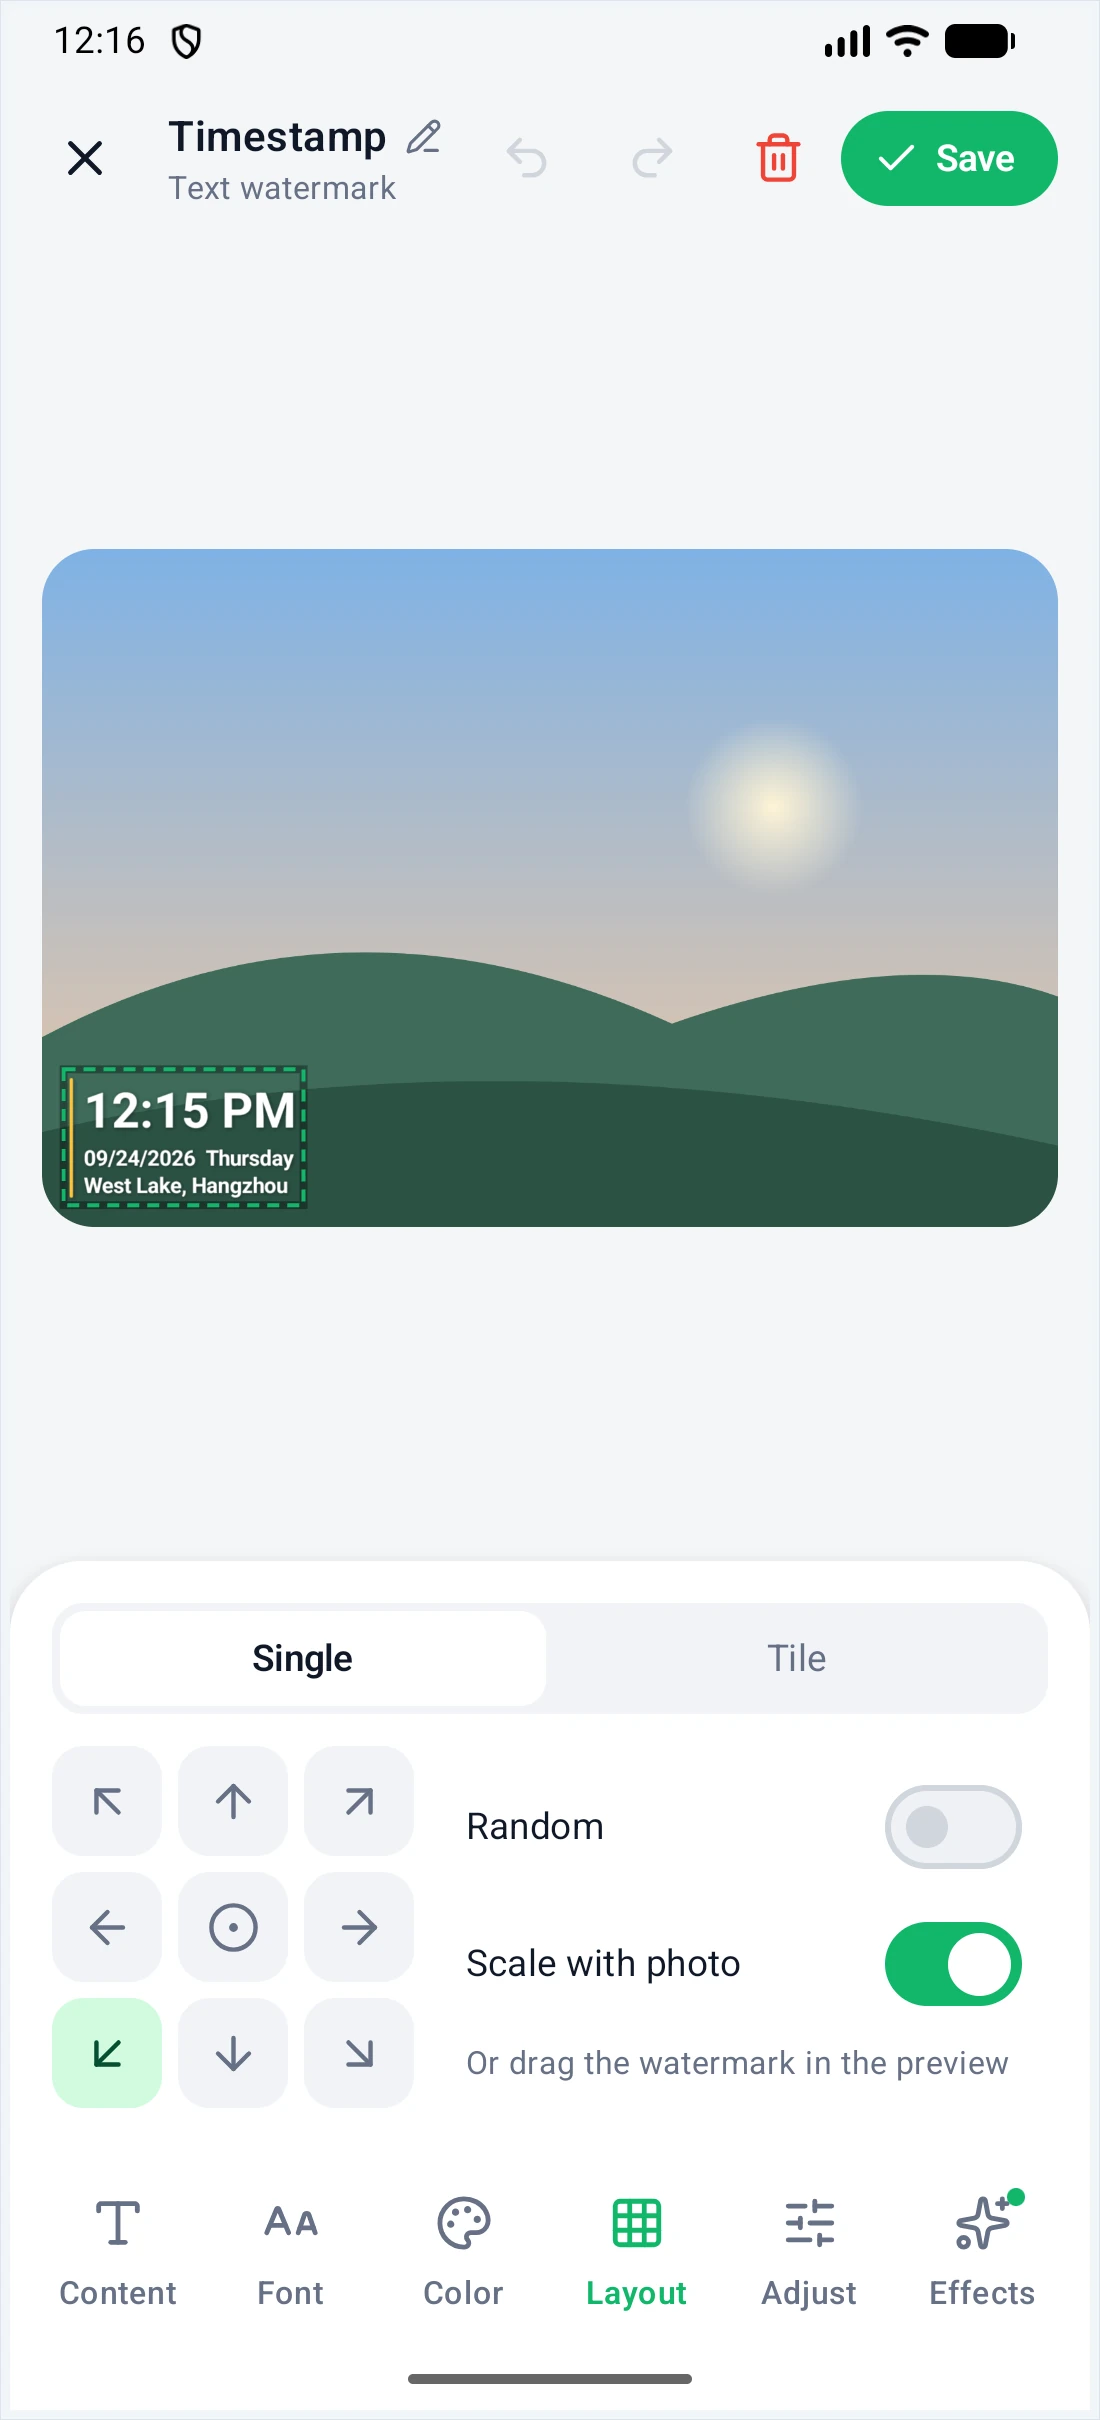
- Single: use the 3 × 3 grid to snap the watermark to a corner, an edge or the center.
- Random: a different spot on every photo, so it's harder to crop out.
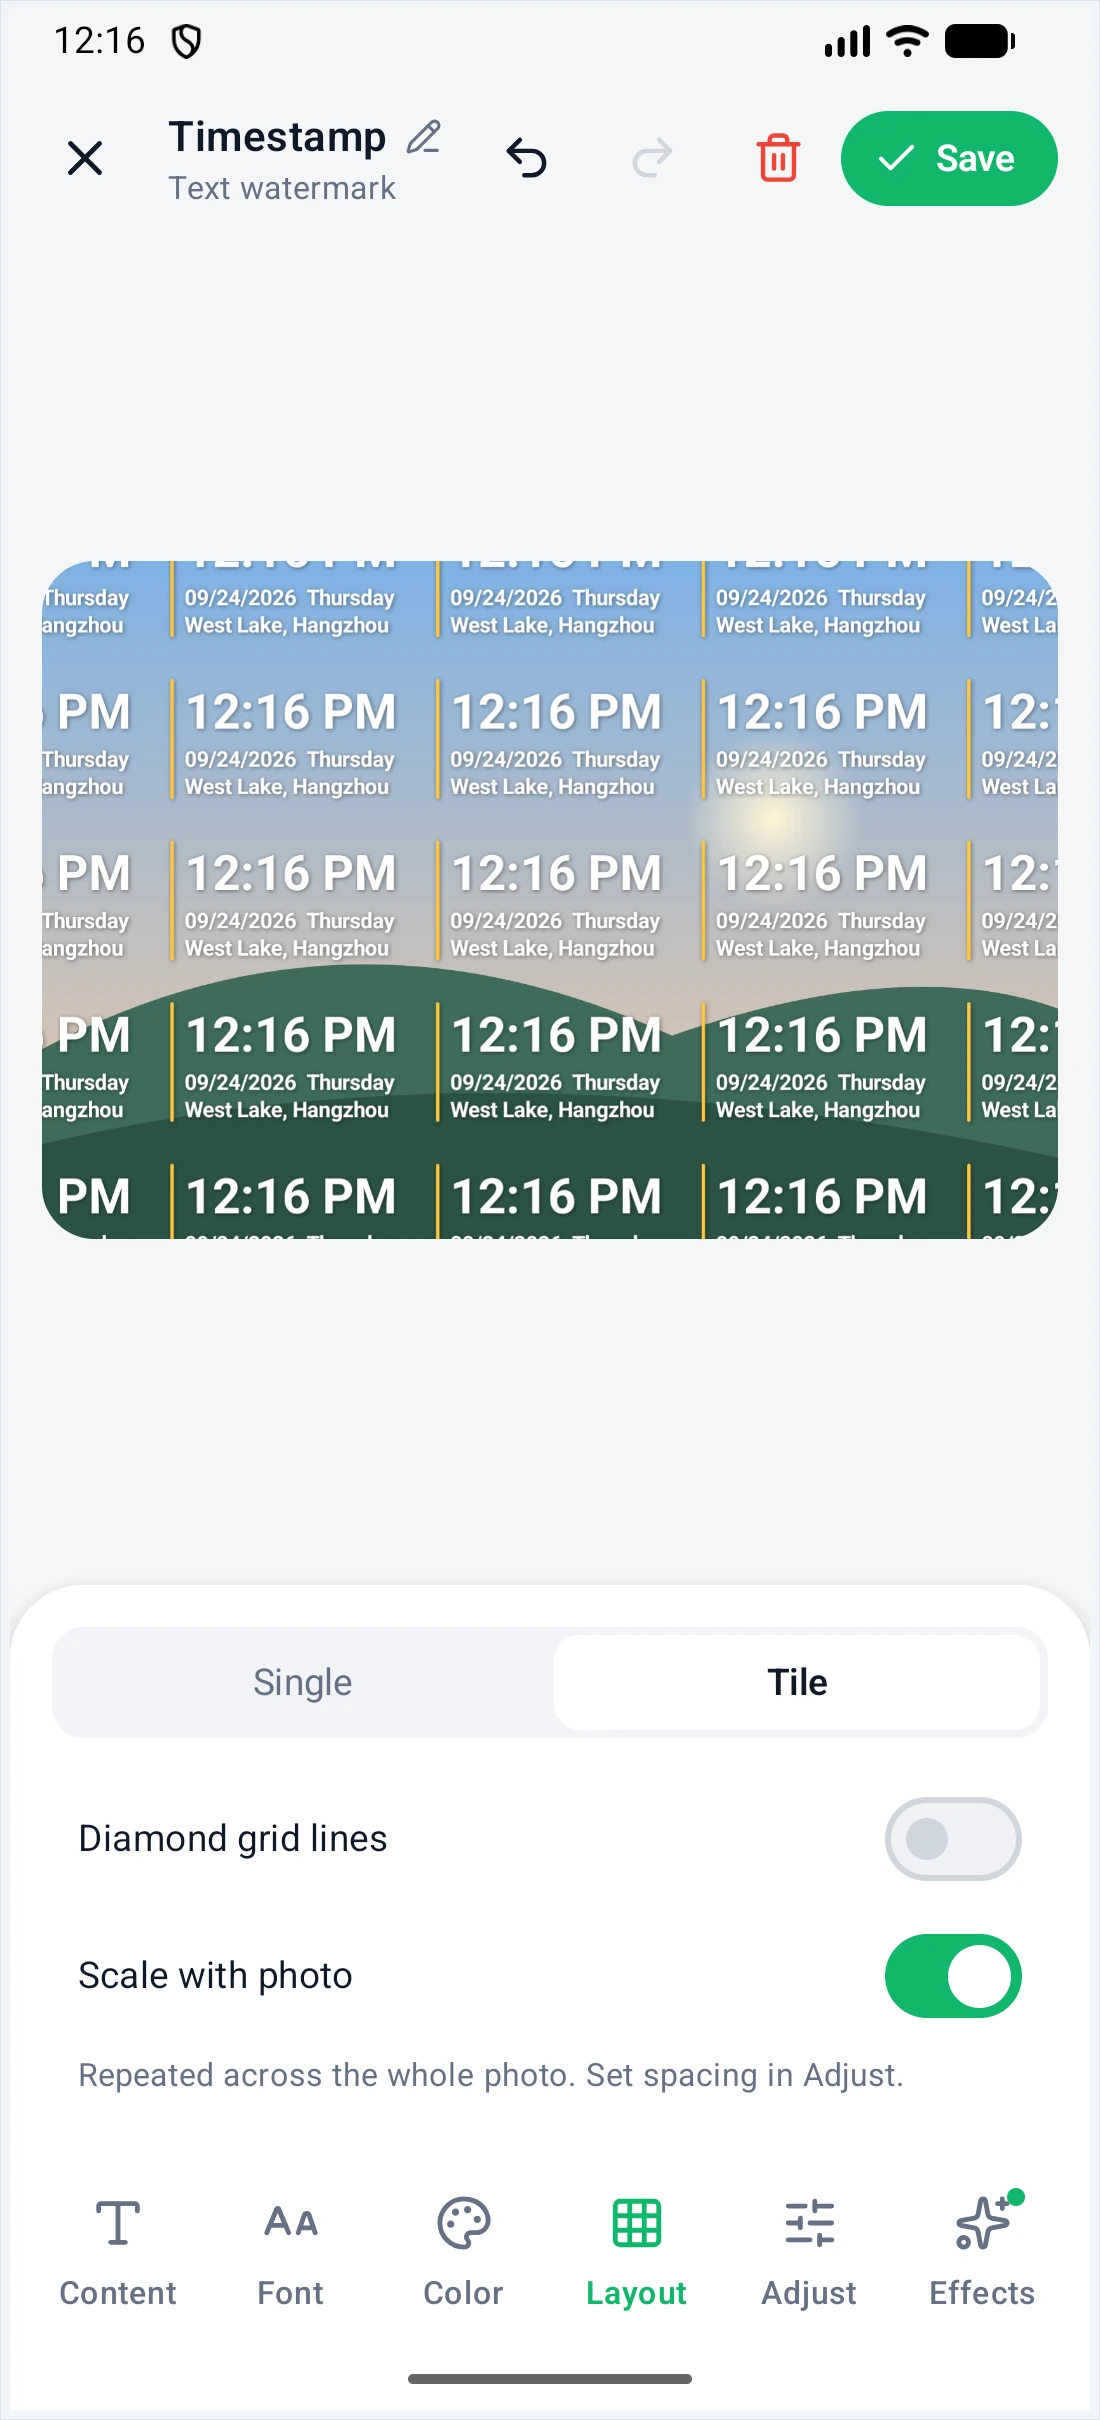
- Scale with photo: keeps the same relative size on large and small photos (best left on).
- Tile: repeats the watermark across the whole photo. You can add Diamond grid lines; set the spacing under Adjust.
Adjust
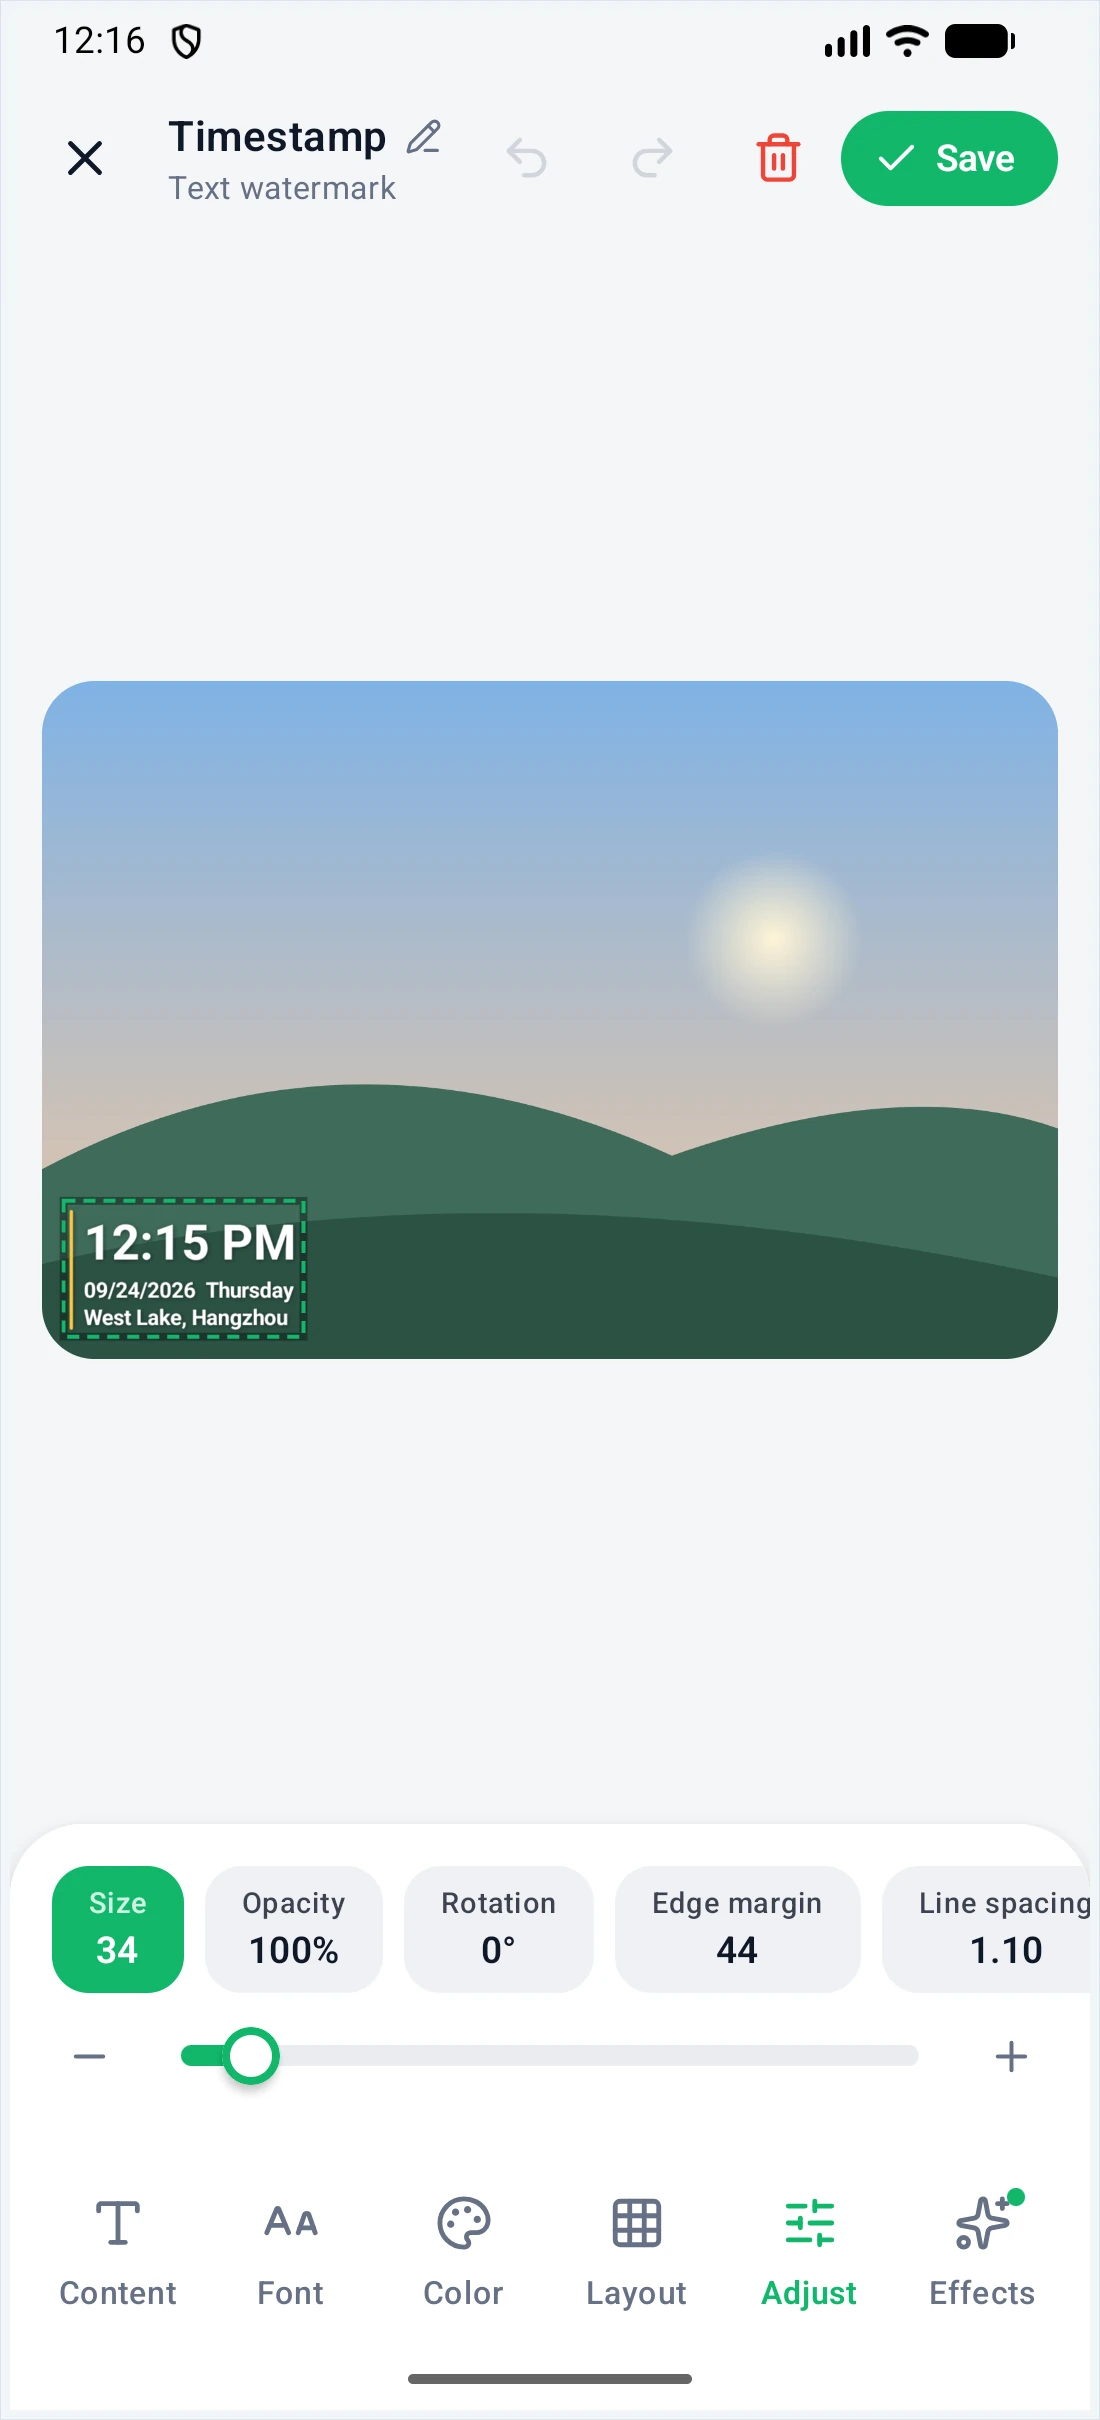
The chips along the top show every numeric setting. Tap one, then use the slider or the − / + buttons for exact steps: size, opacity, rotation, edge margin, line spacing and first line size (plus spacing when tiled).
Effects
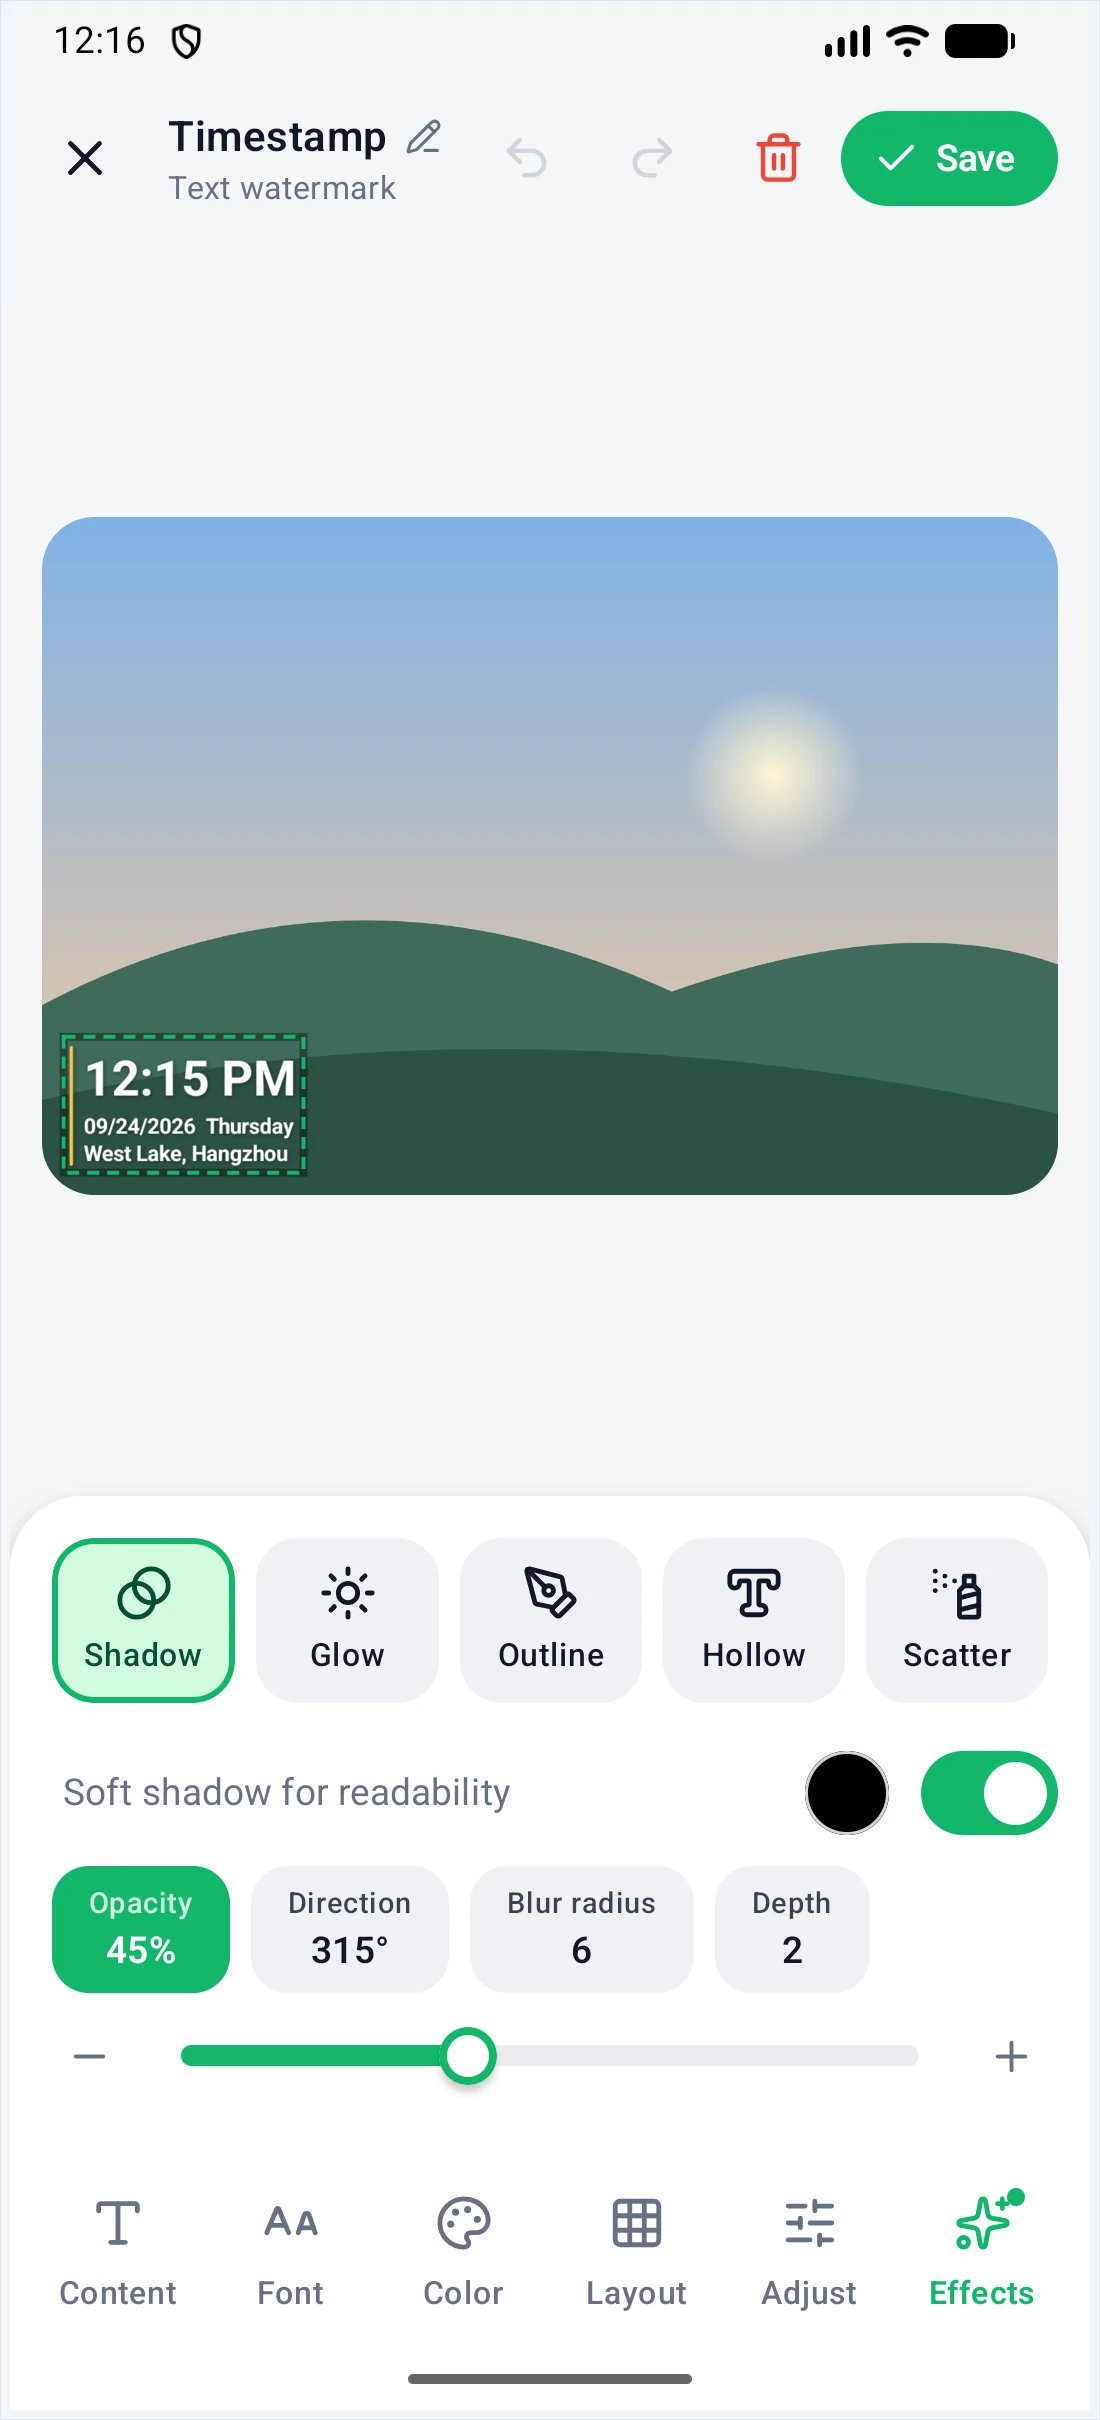
| Effect | What it does |
|---|---|
| Shadow | Soft drop shadow for readability; set opacity, direction, blur radius and depth |
| Glow | Outer glow that lifts the watermark off busy backgrounds |
| Outline | Draws a line around the letters |
| Hollow | Only the outline of the letters |
| Scatter | Worn, spray-paint look |
A small green dot on the Effects icon means at least one effect is on.
6Info frames and image watermarks
Info frame
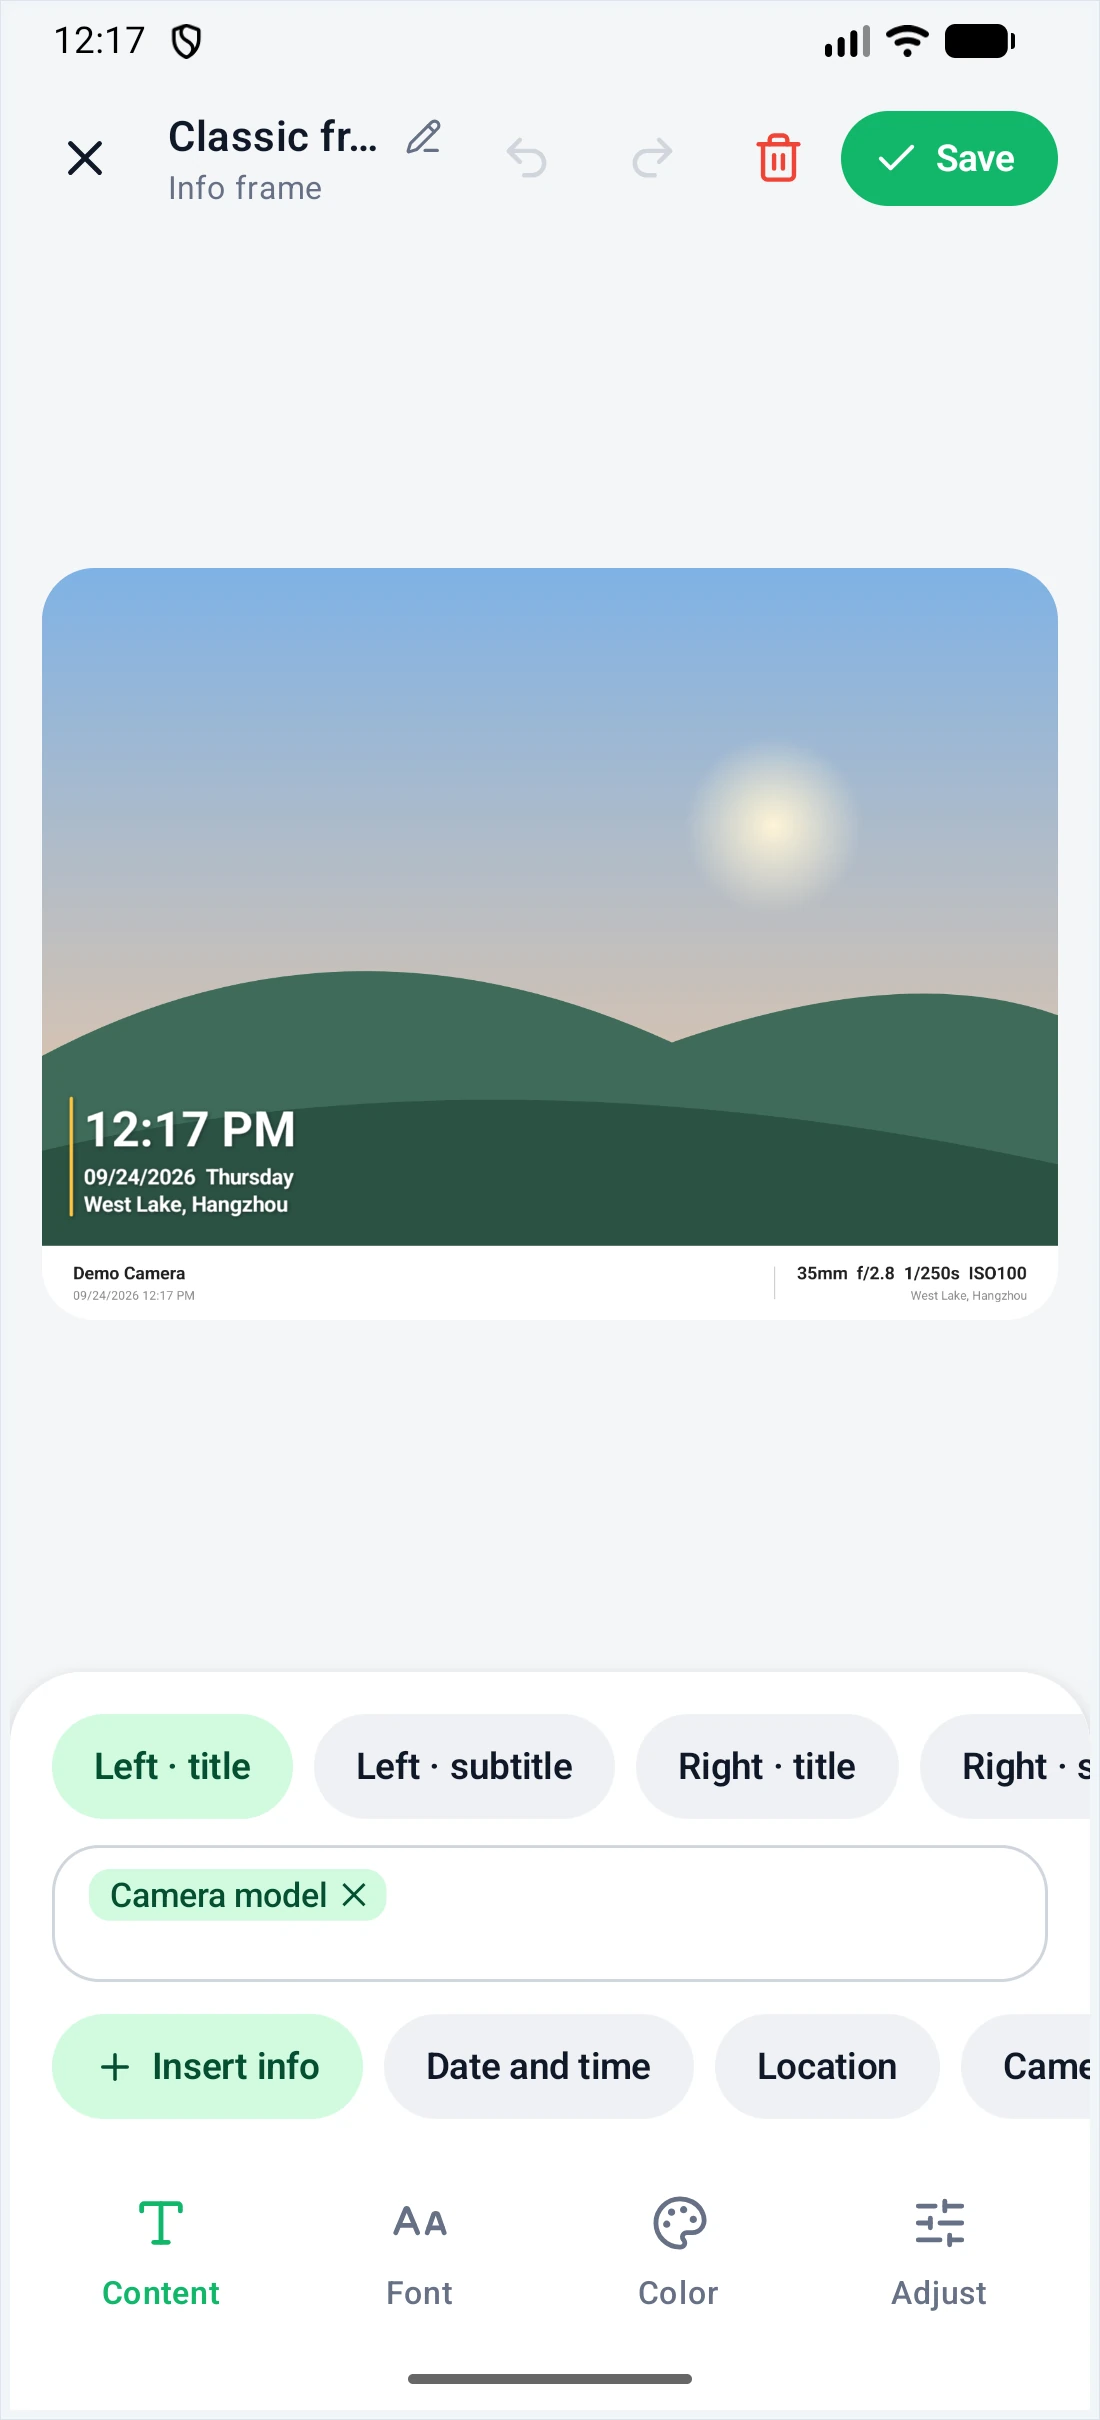
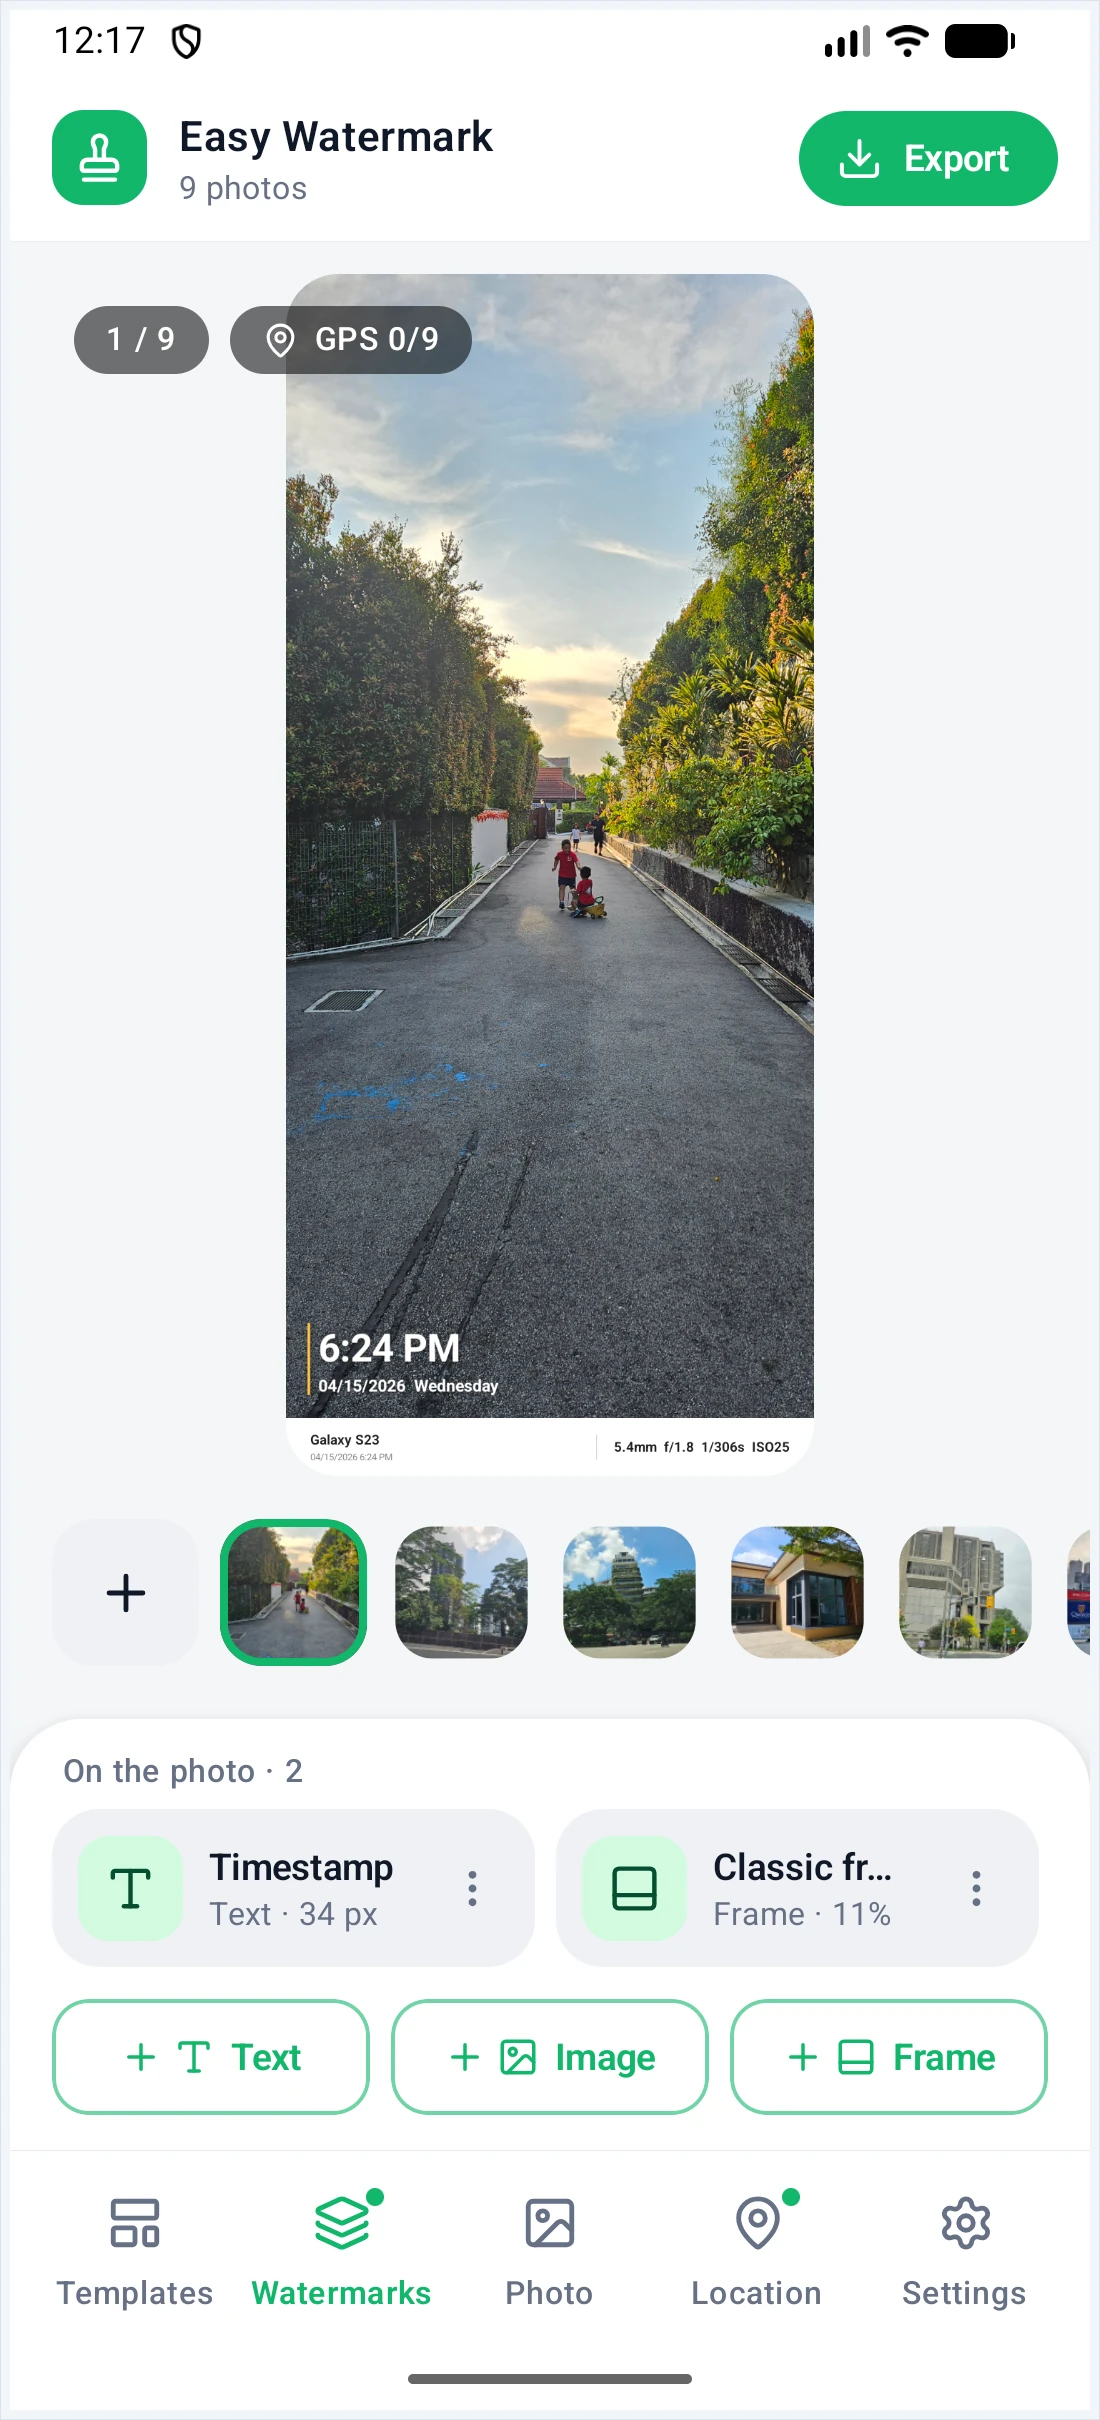
An info frame adds a bar under the photo, like the frames camera makers put on their sample shots. The bar has four slots — a title and a subtitle on the left and on the right — and each can hold info fields such as camera model, shooting parameters, date and time, or location. Color and Adjust set the background, title and subtitle colors, the bar height and the divider.
The frame is added outside the photo, so the exported image is taller than the original (or than the resize target) by the height of the bar.
Image watermark (logo)
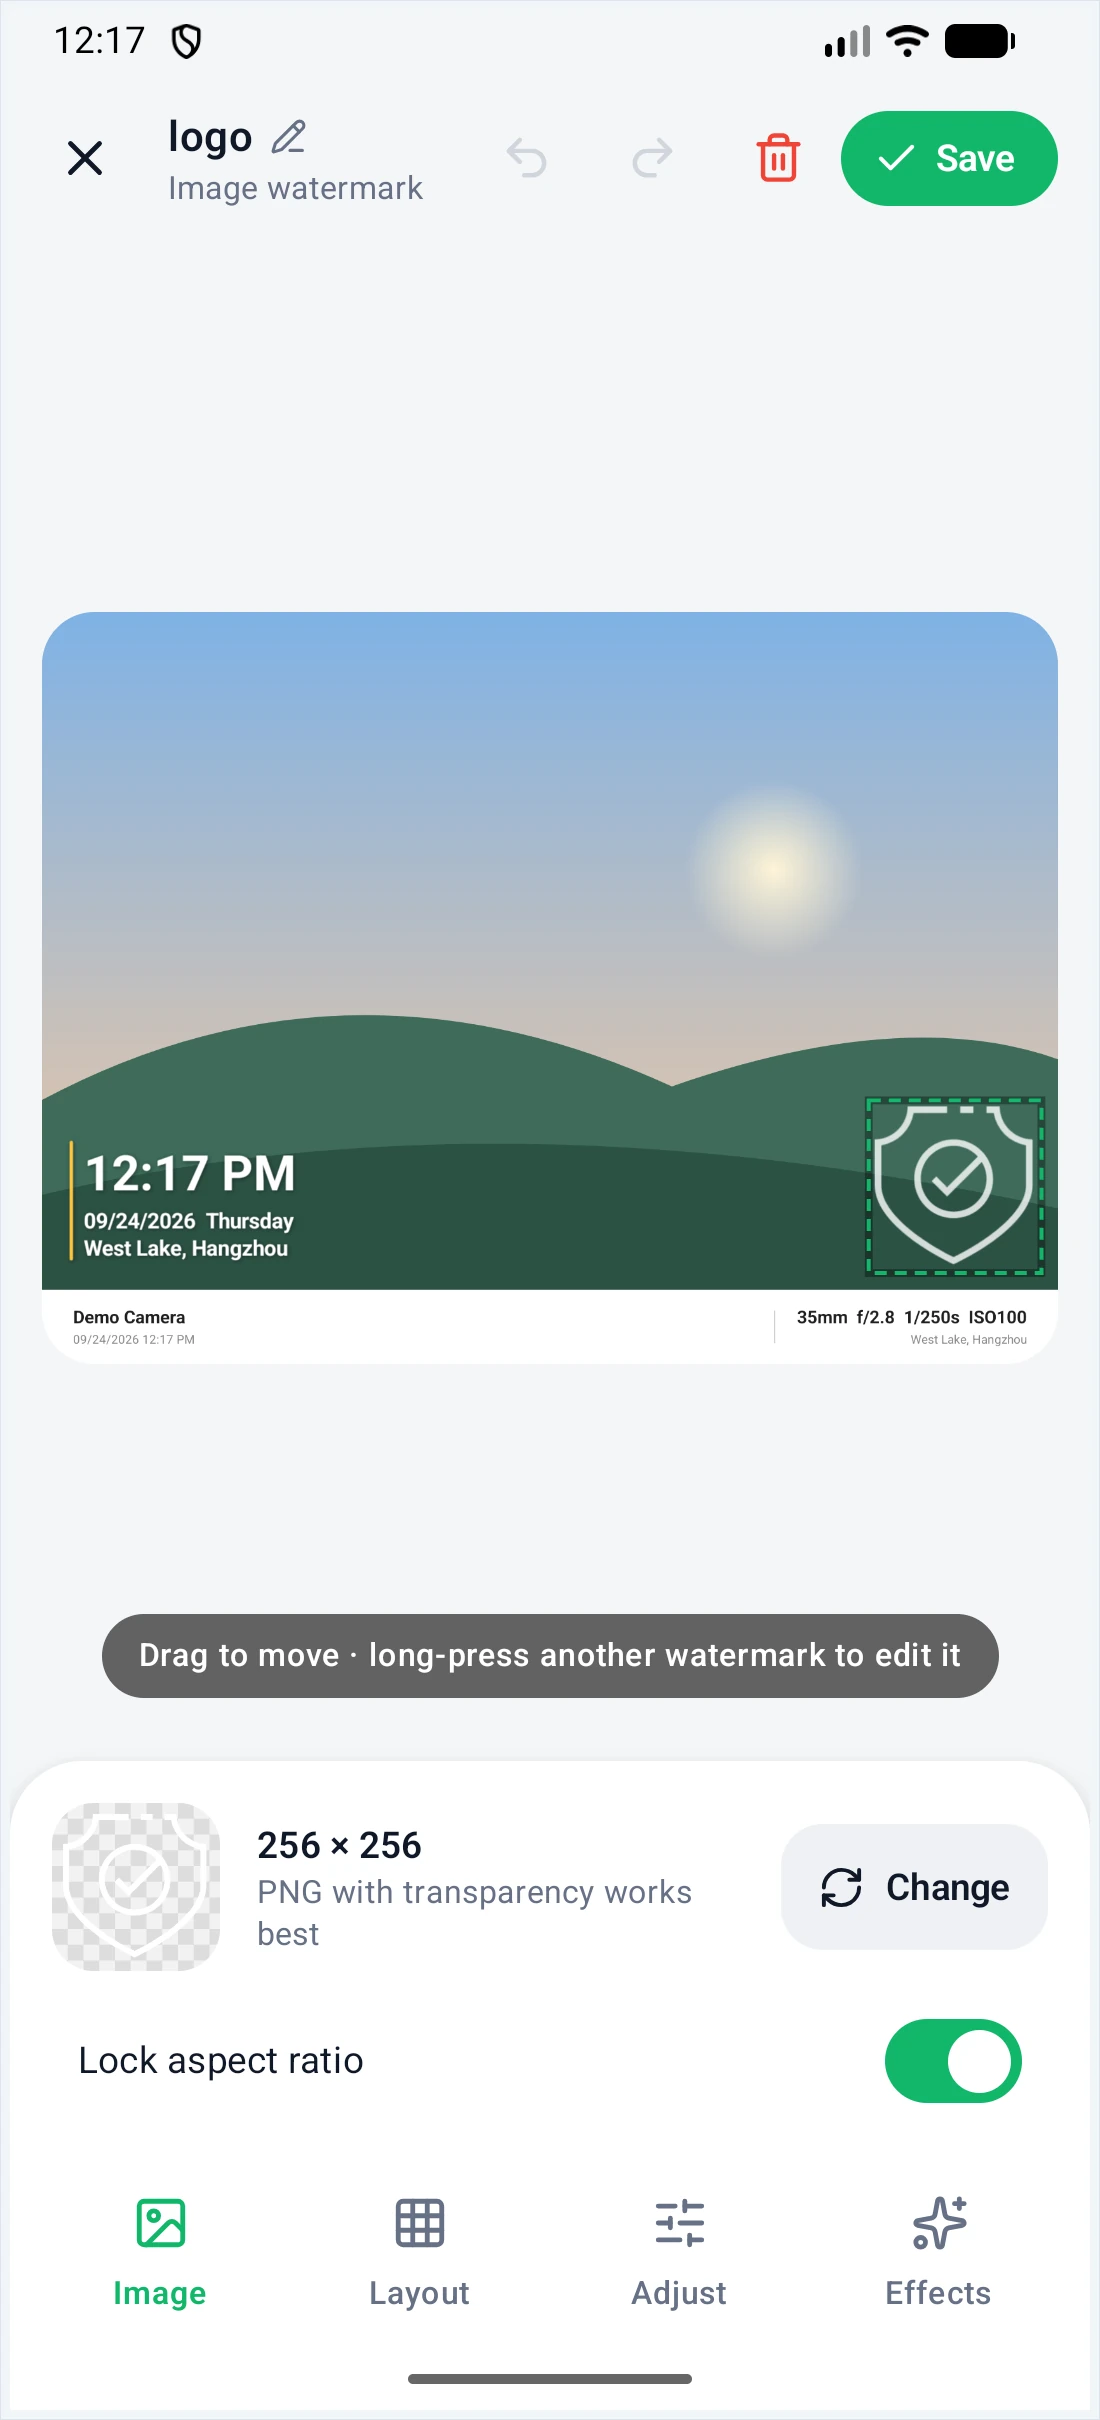
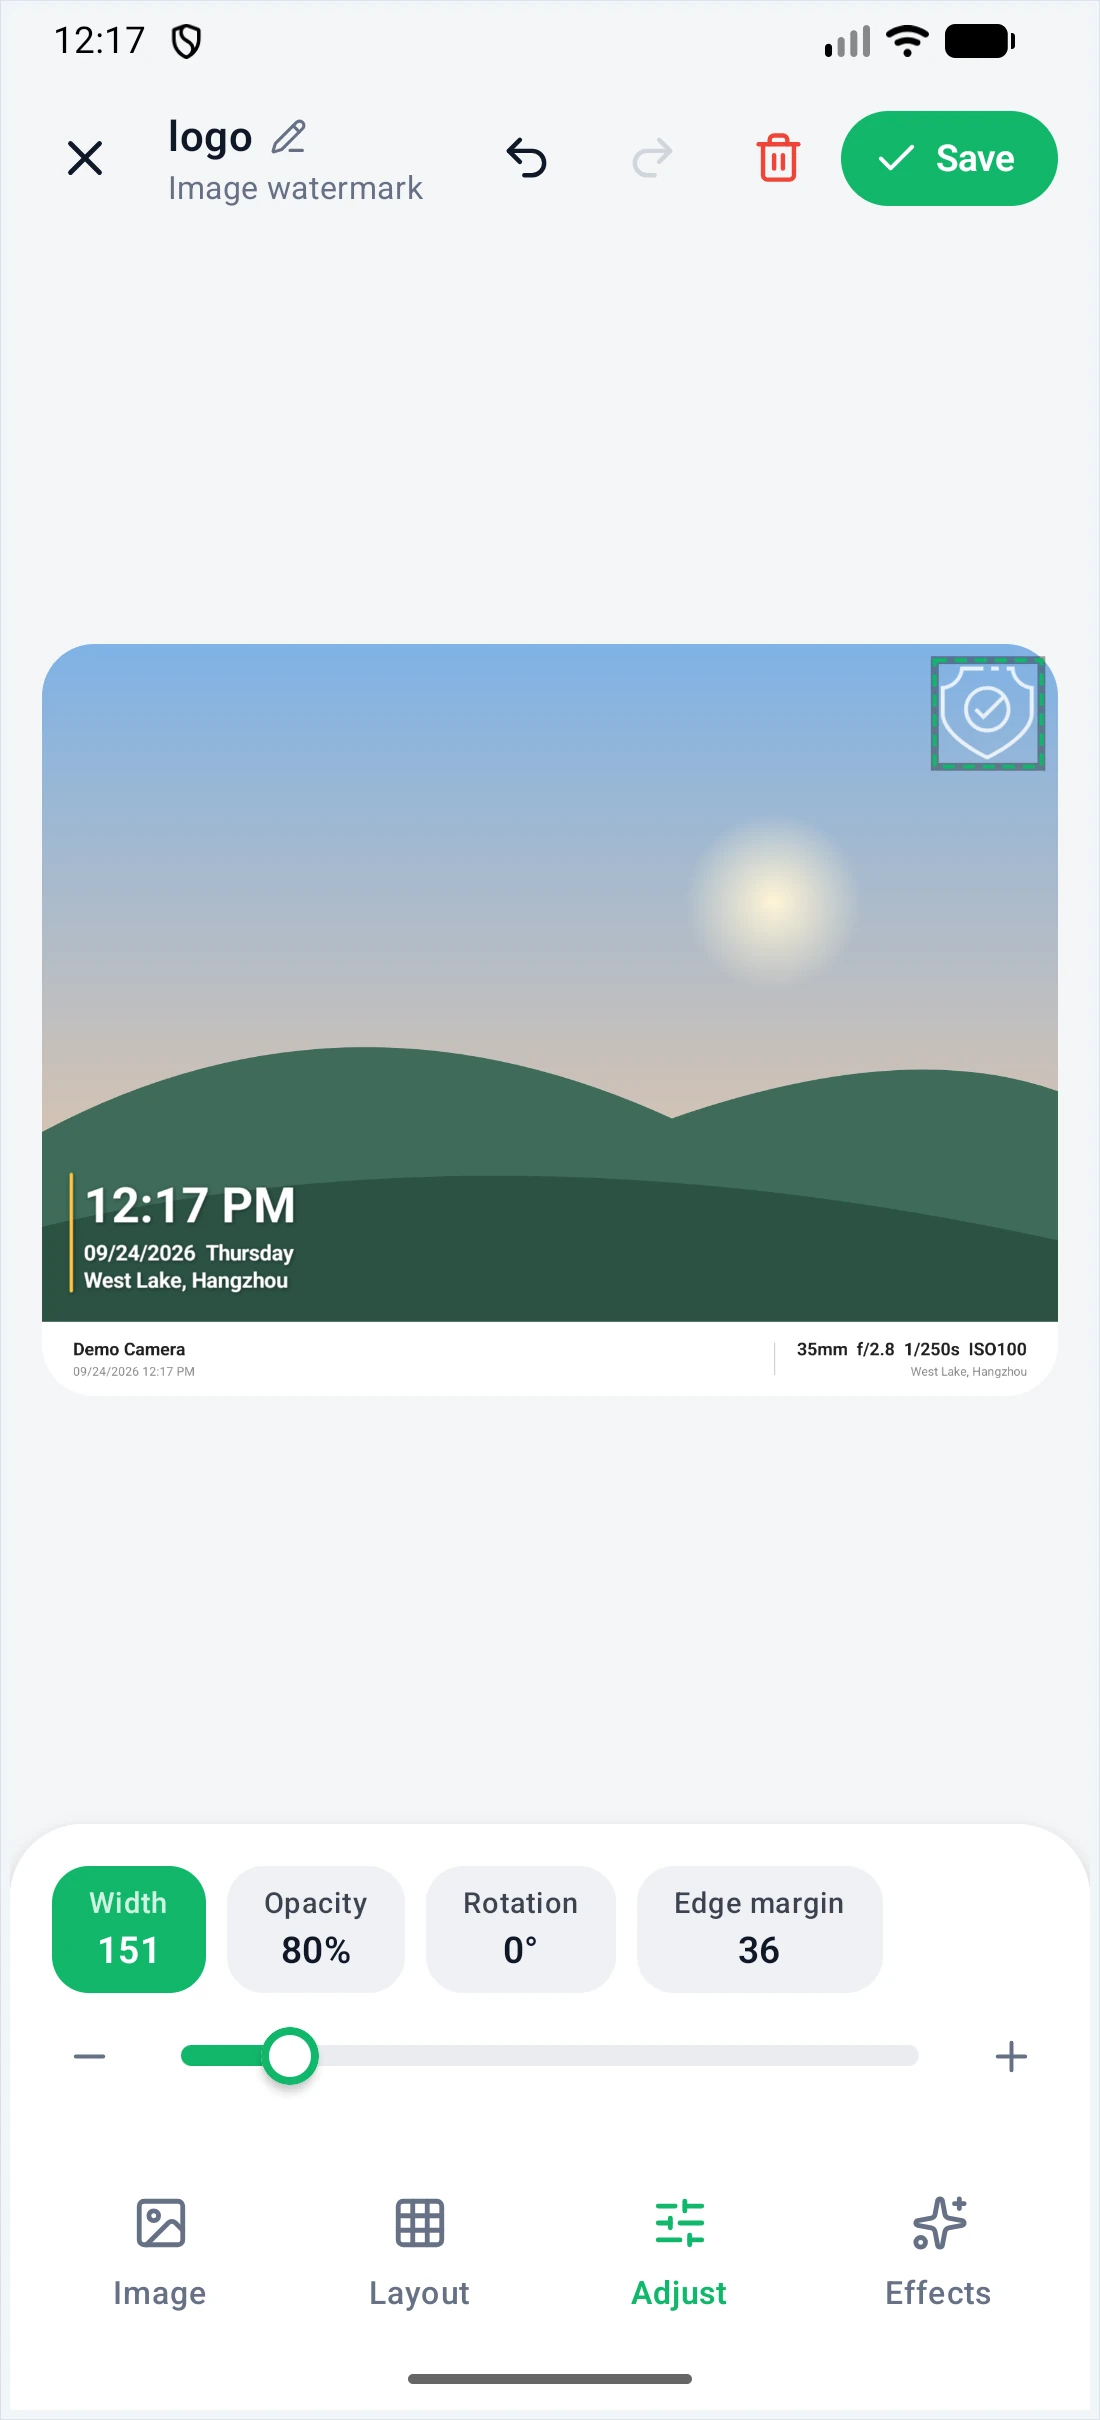
On the Watermarks page tap Image and pick a picture to use as your logo. A PNG with a transparent background works best.
- Image: shows the picture's size; tap Change to swap it, and use Lock aspect ratio.
- Layout: the same as for text — 3 × 3 grid, random or tile.
- Adjust: width (and height), opacity, rotation, edge margin.
- Effects: shadow, glow, scatter and more.
7Managing watermark layers
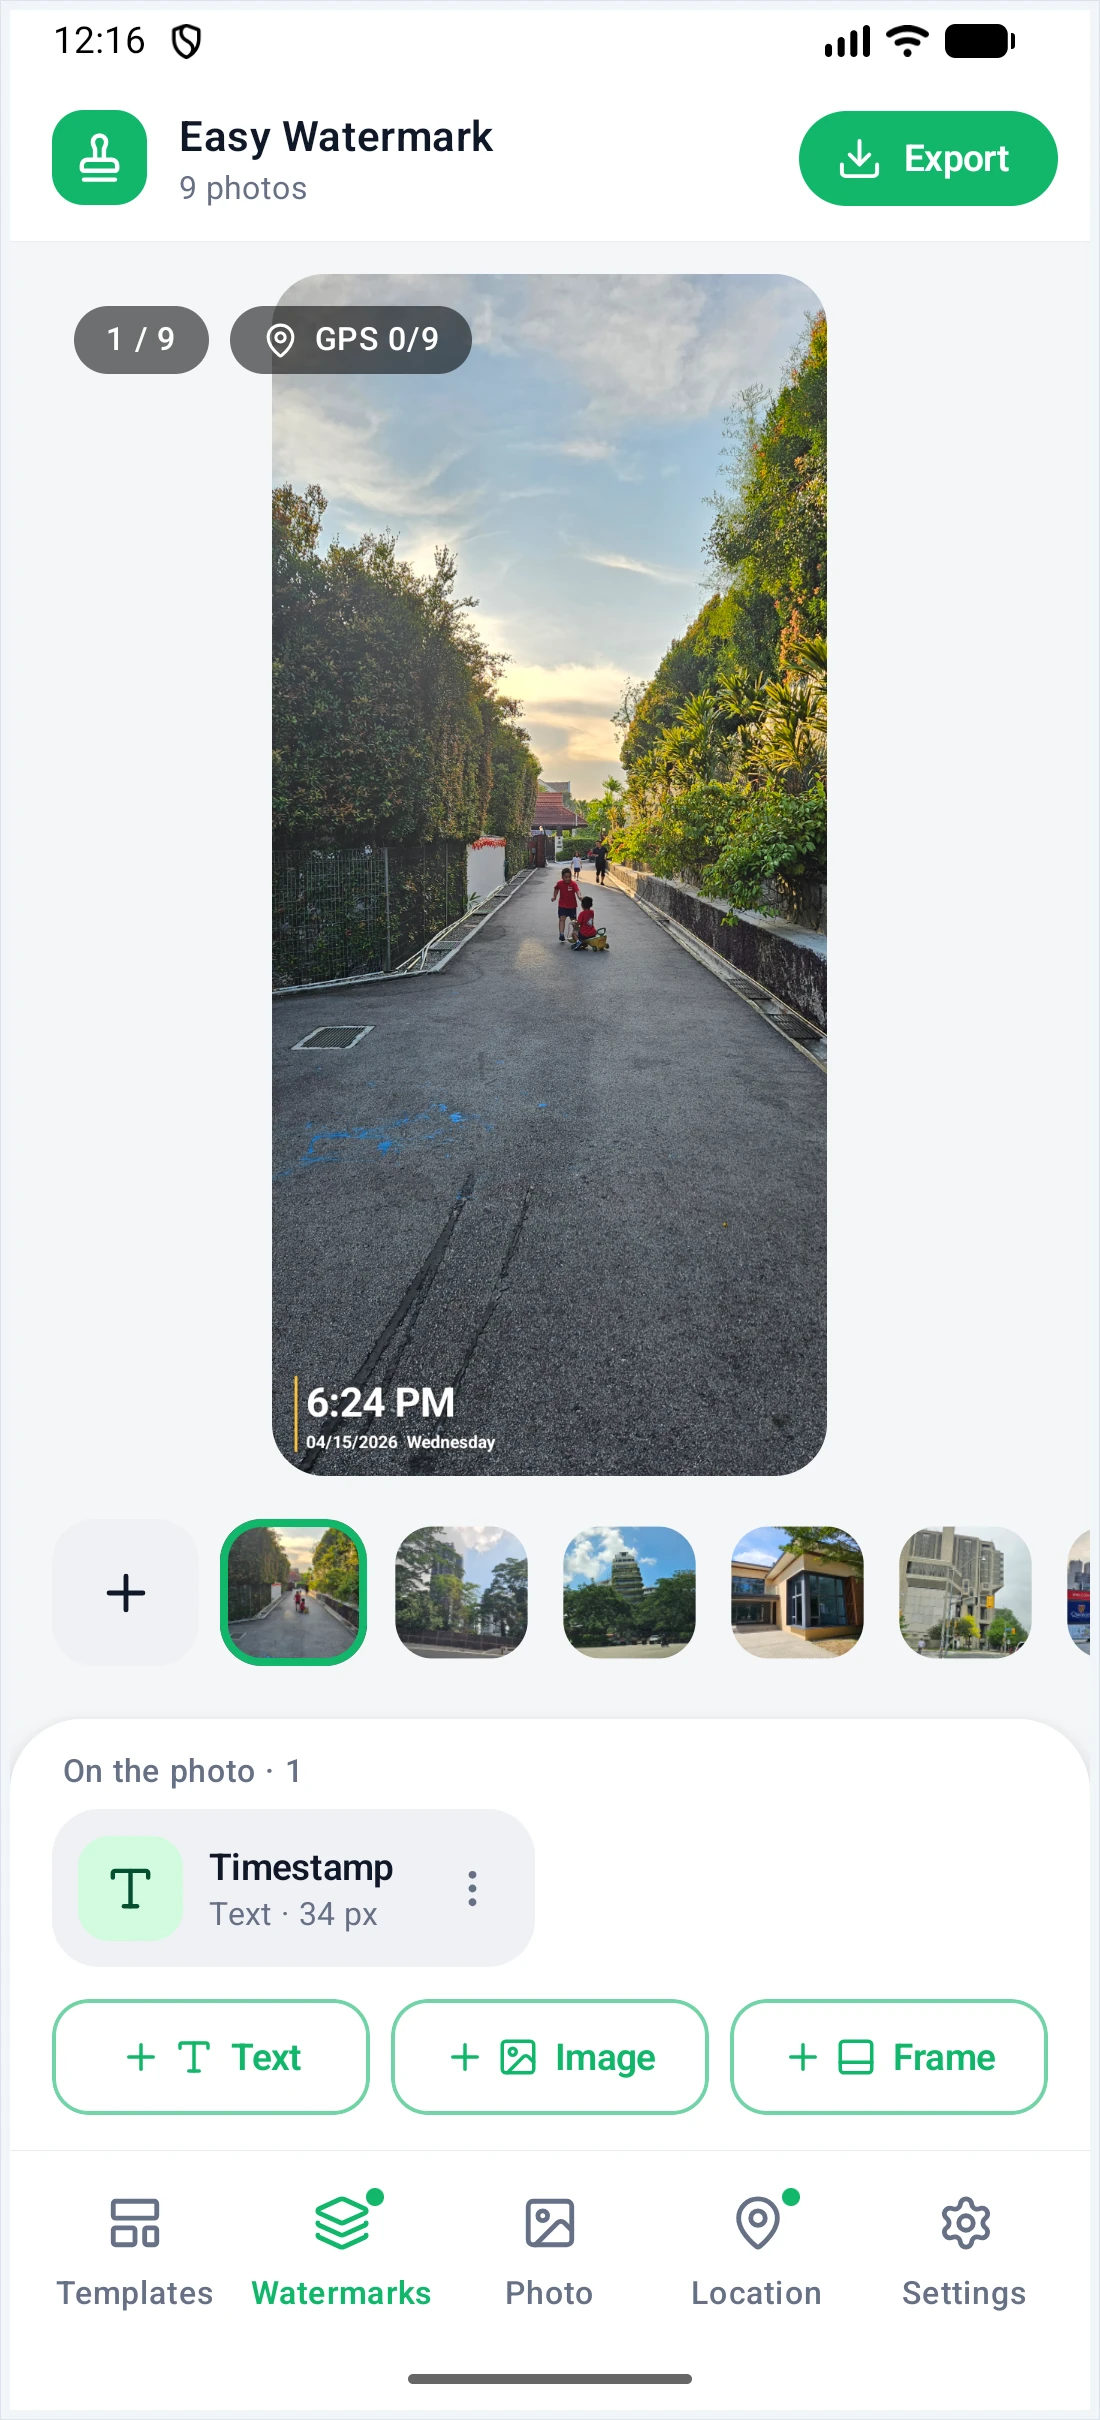
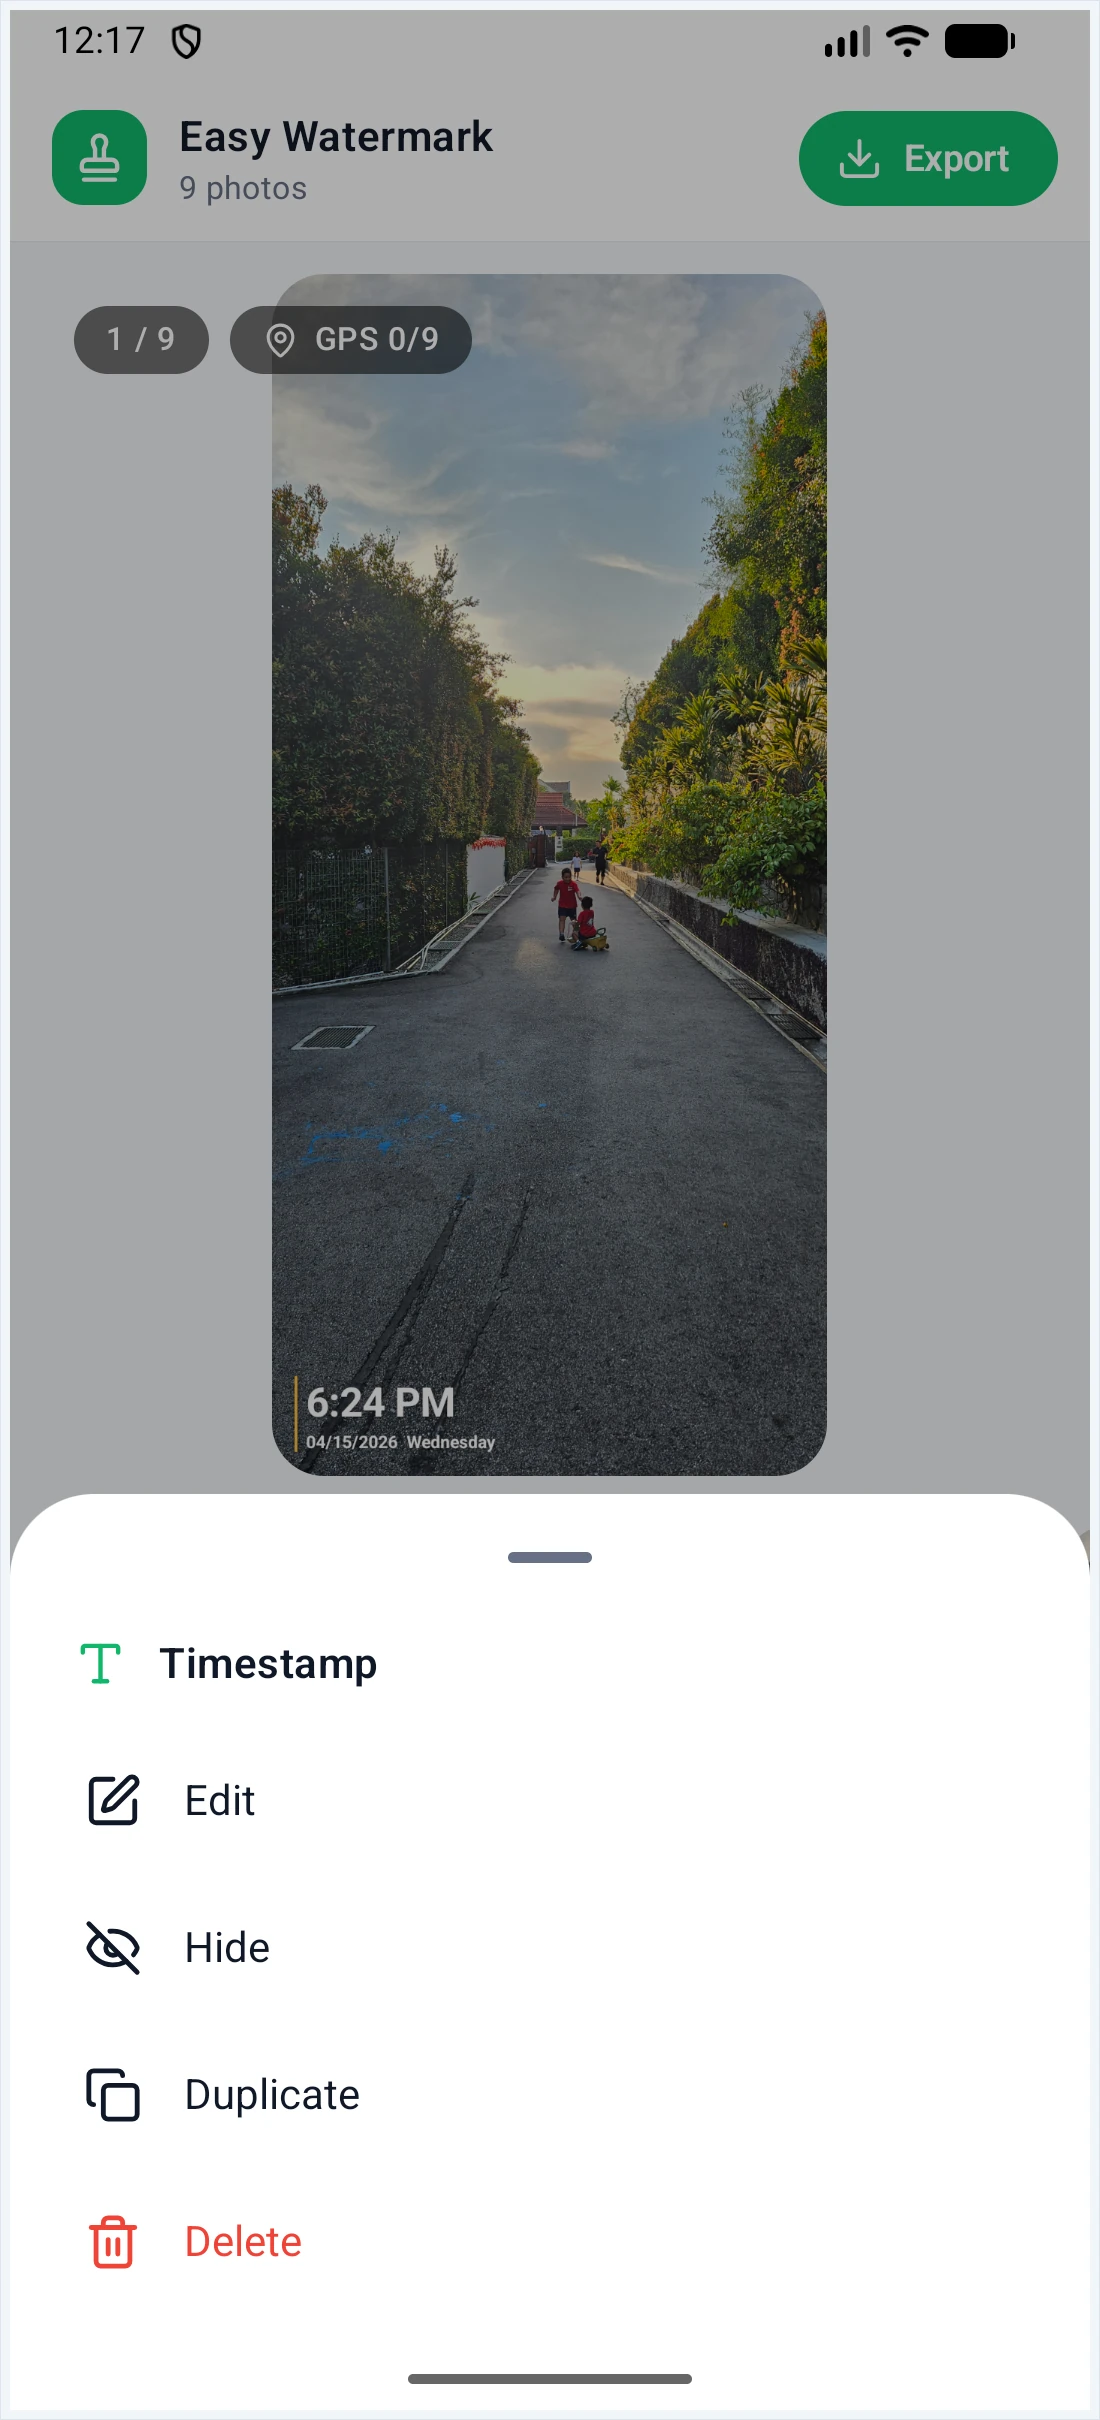
The Watermarks page lists every watermark on the photo. You can stack several, for example a time stamp, a logo and a frame.
- Tap a layer to edit it.
- Tap ⋮ next to a layer to Edit, Hide / Show, Duplicate or Delete it, or to change its order (layers higher up are drawn on top).
- The Text / Image / Frame buttons add a new, blank watermark.
Watermarks apply to every photo. On export, each photo gets its own time, place and other details.
8Photo tools
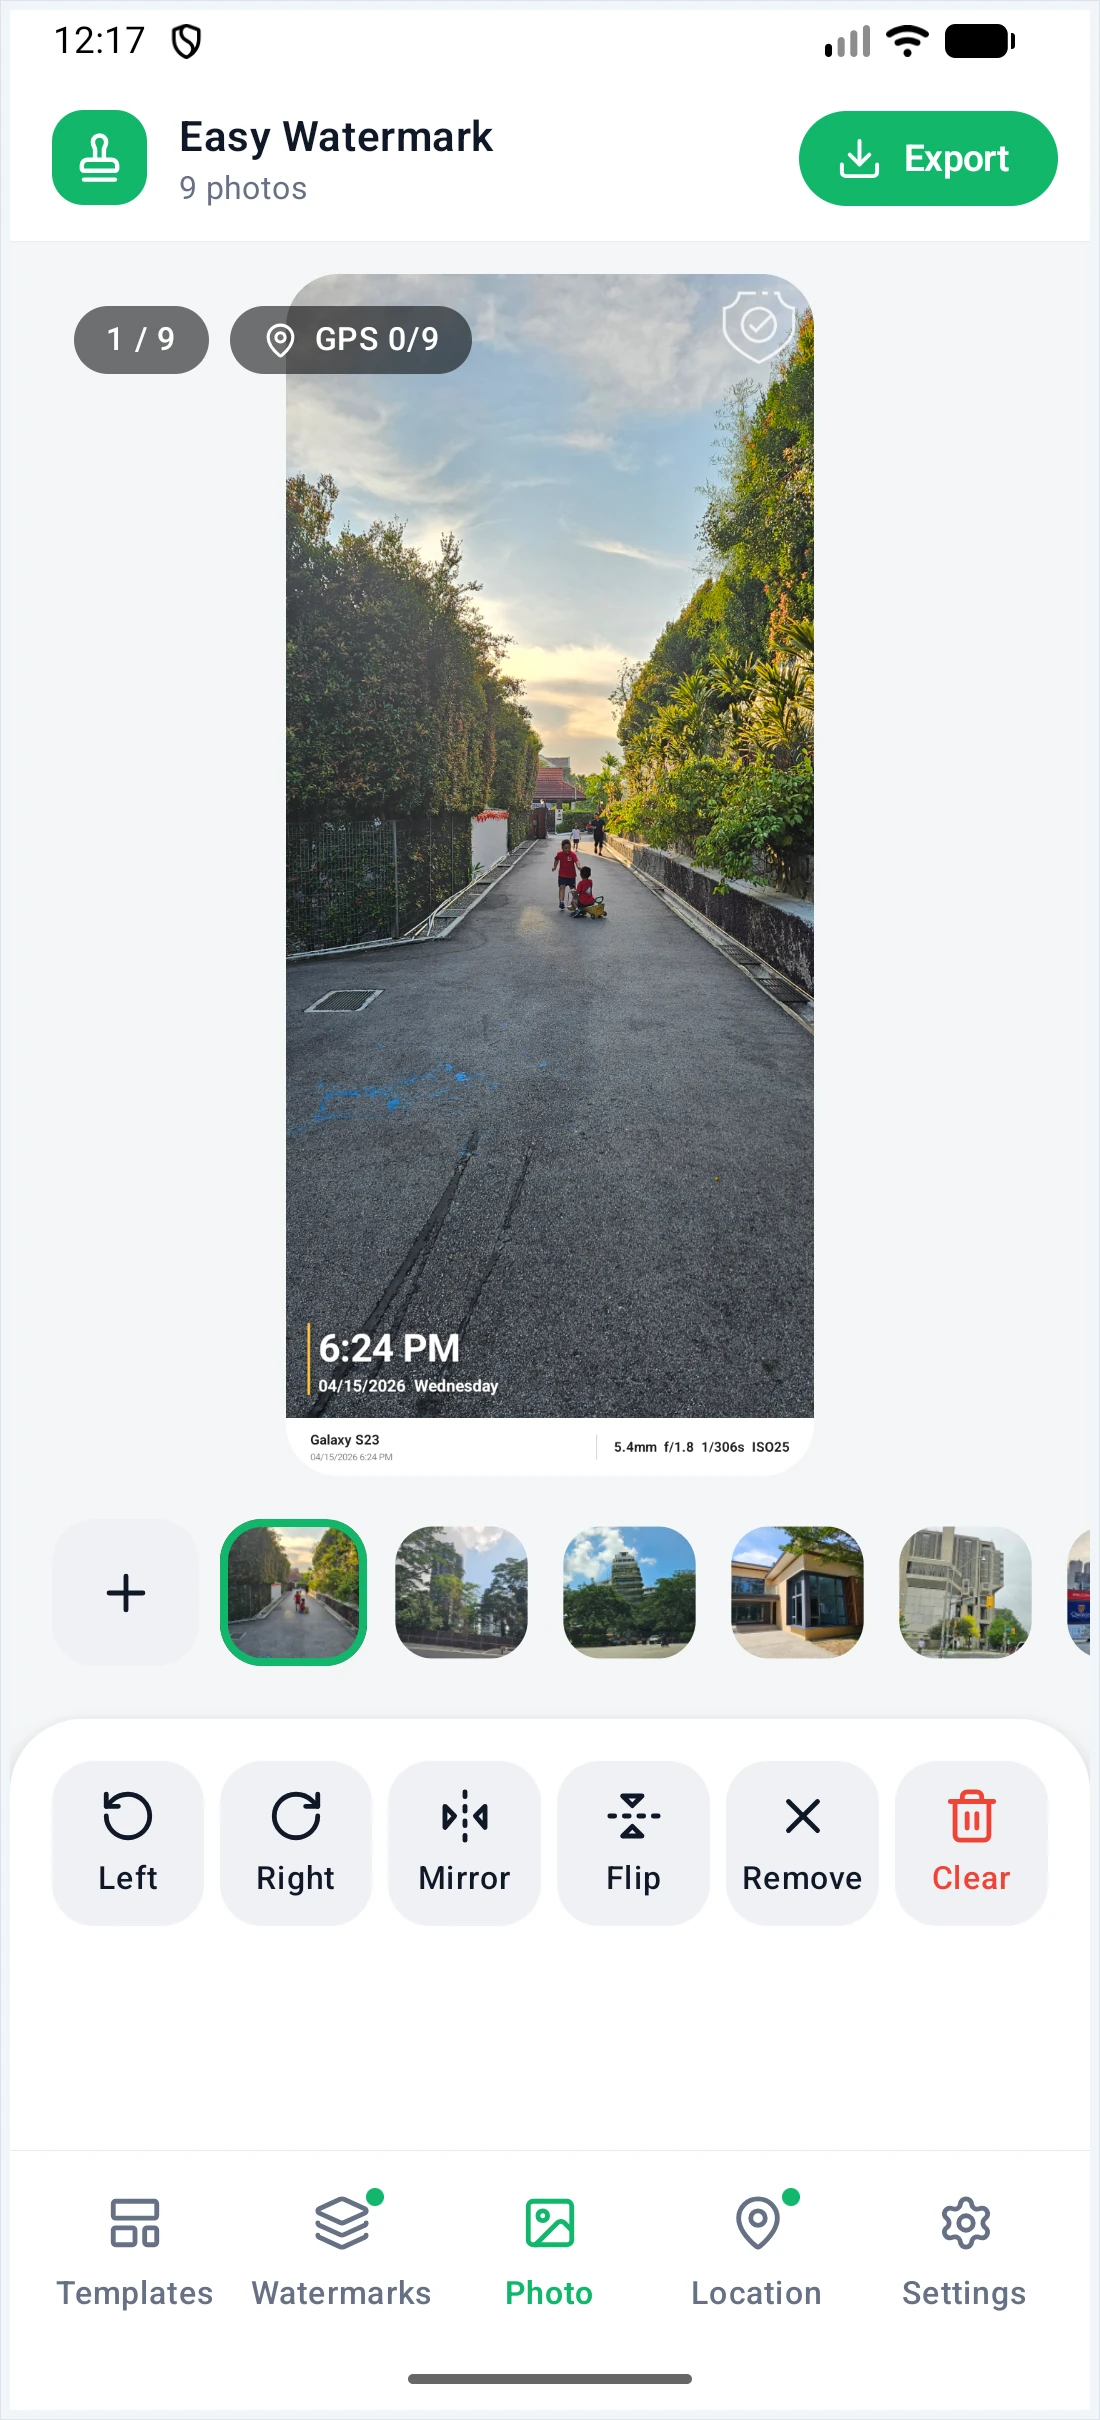
On the Photo page, for the selected photo:
- Left / Right: rotate 90°.
- Mirror / Flip: flip horizontally or vertically.
- Remove: take this photo off the list.
- Clear: take all photos off the list.
Remove and Clear only change the list. The original files on your phone are not touched.
9Location
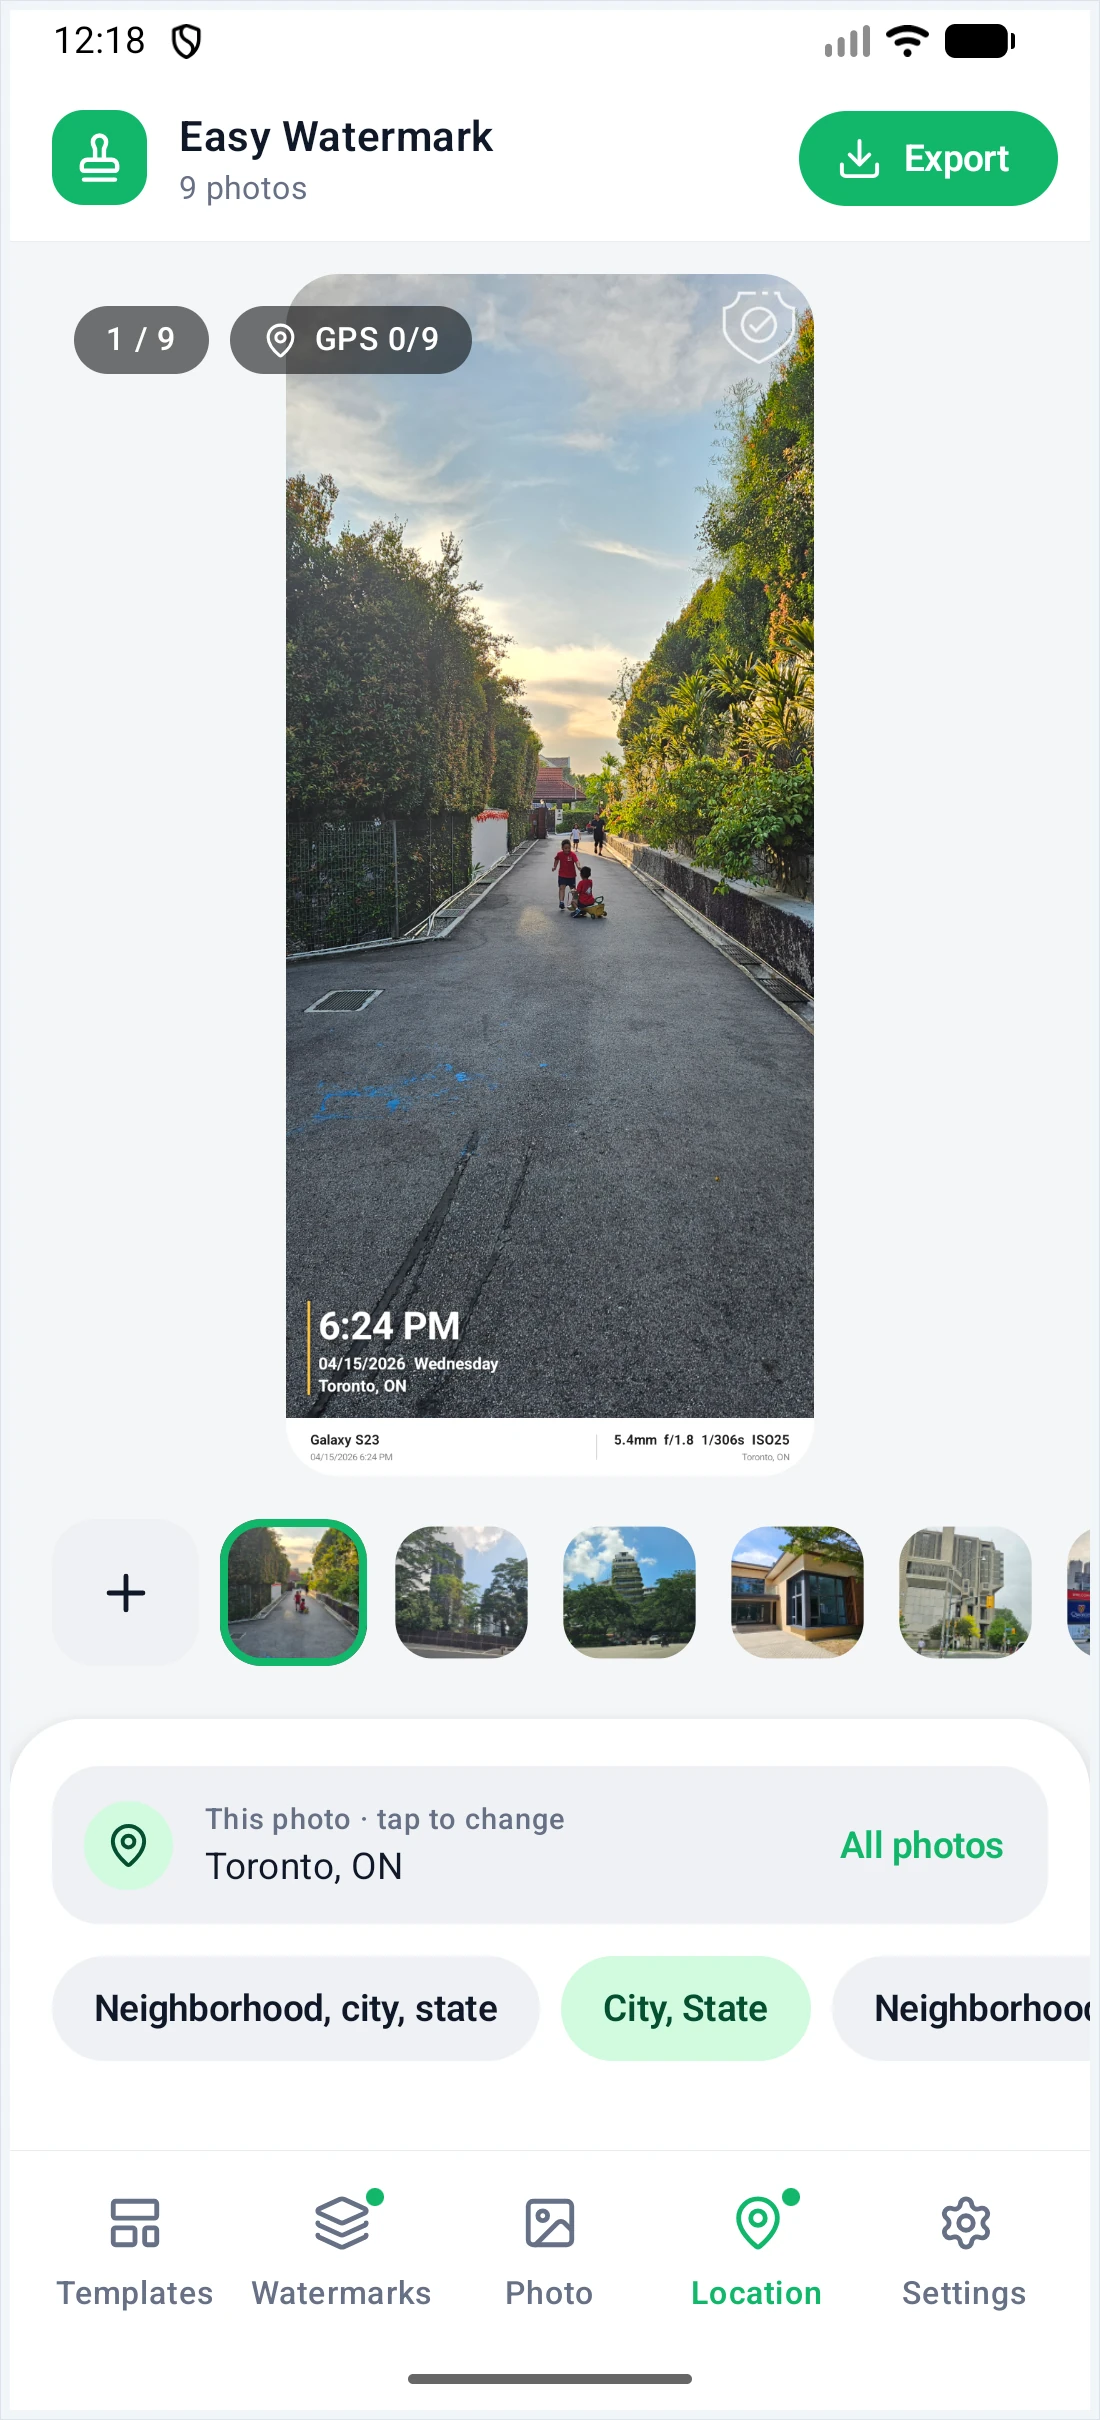
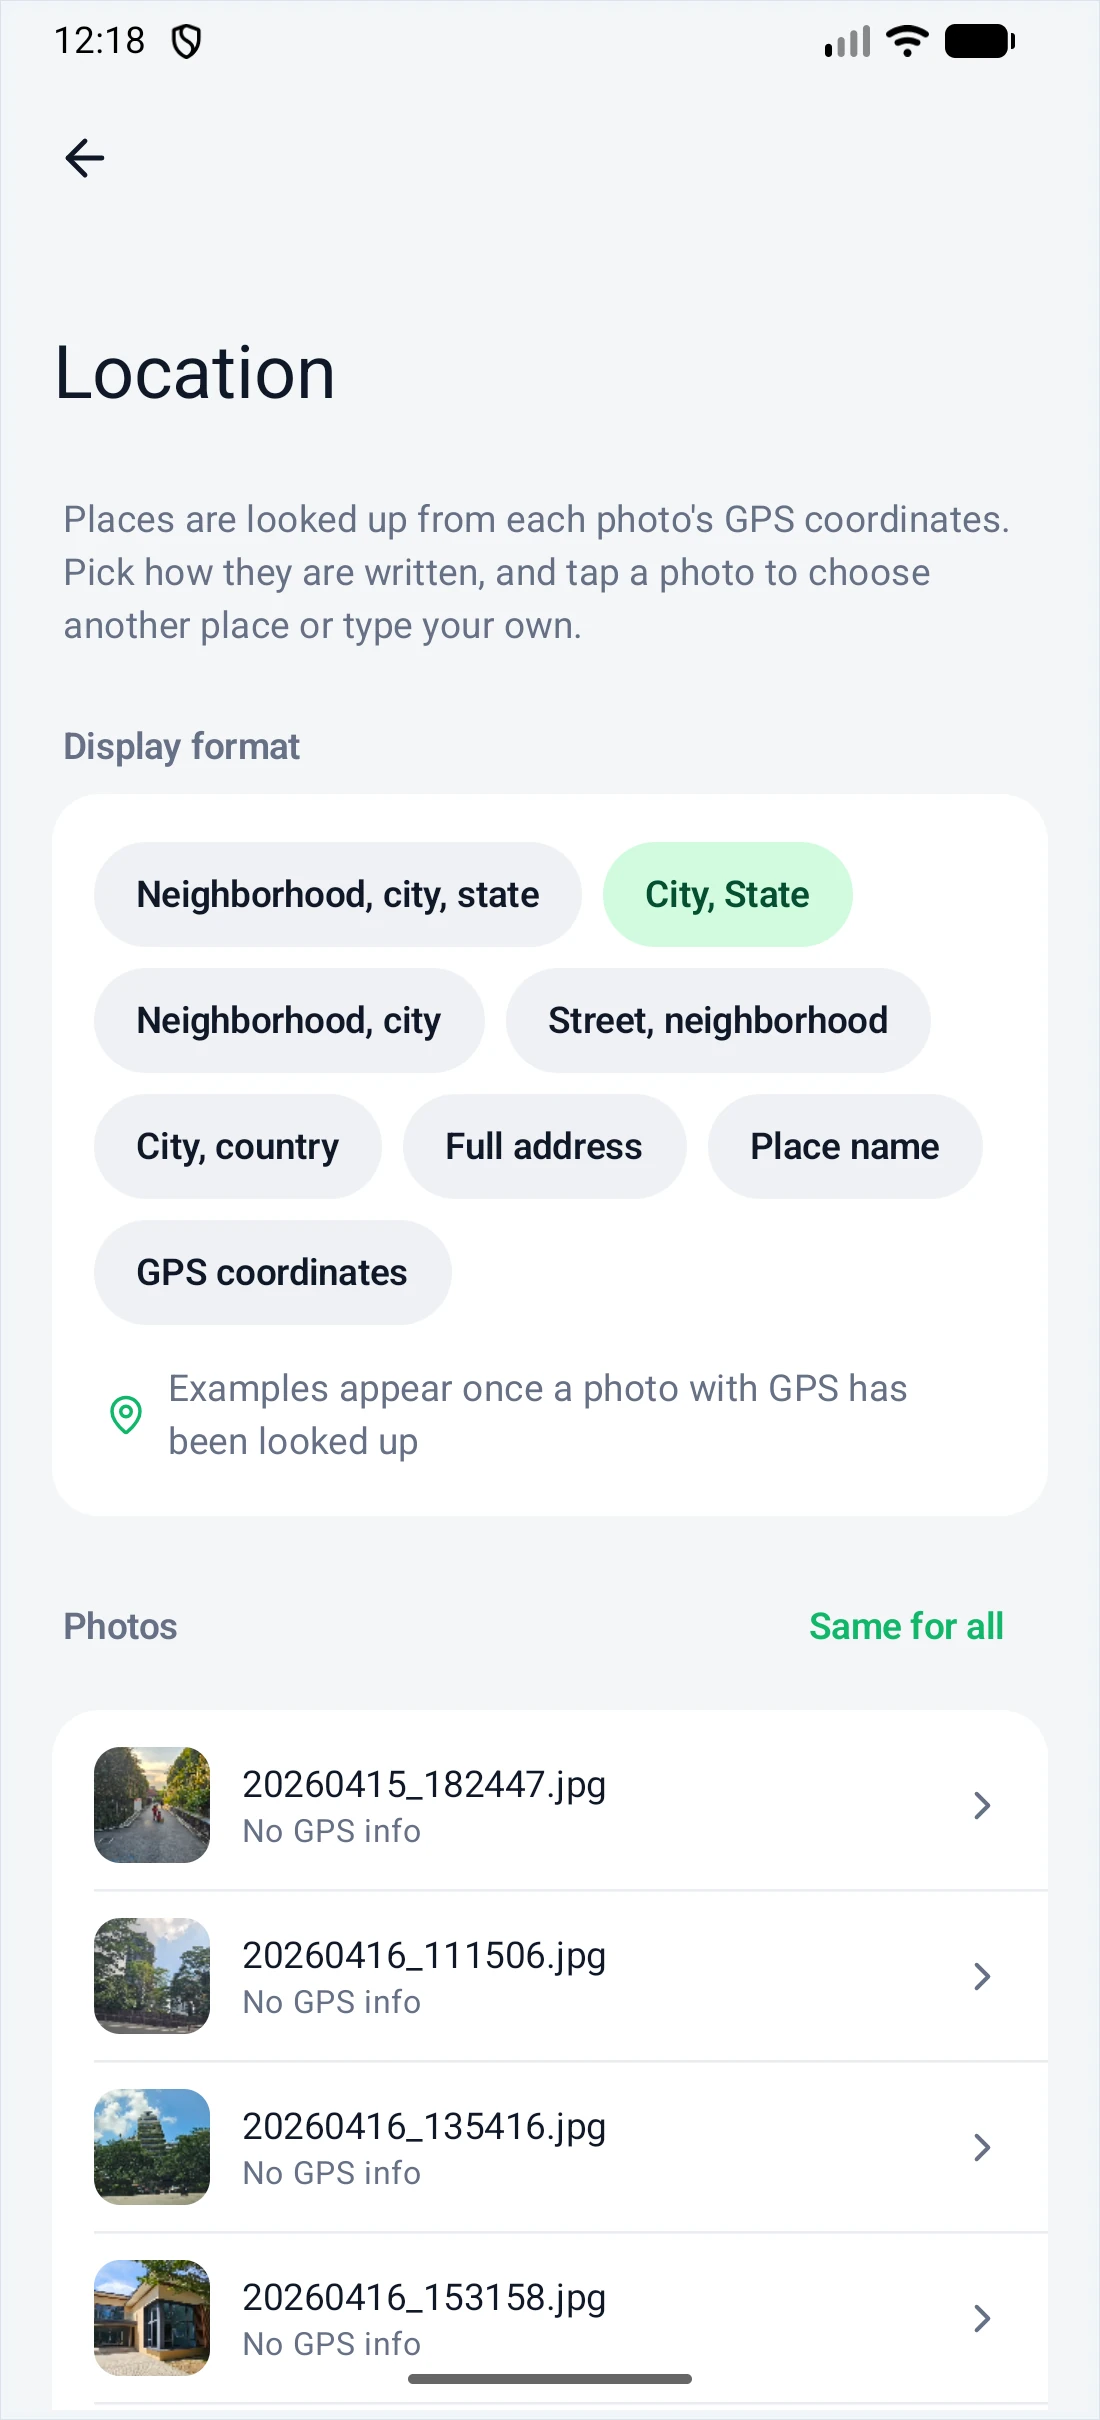
The app looks up a place name from each photo's GPS coordinates and uses it for fields such as [loc], city and street.
- The Location page shows the current photo's place. Tap it to pick a nearby place or type your own.
- The chips choose the display format: Neighborhood, city, state · City, State · Neighborhood, city · Street, neighborhood · City, country · Full address · Place name · GPS coordinates.
- Tap All photos to see and change the place for each photo.
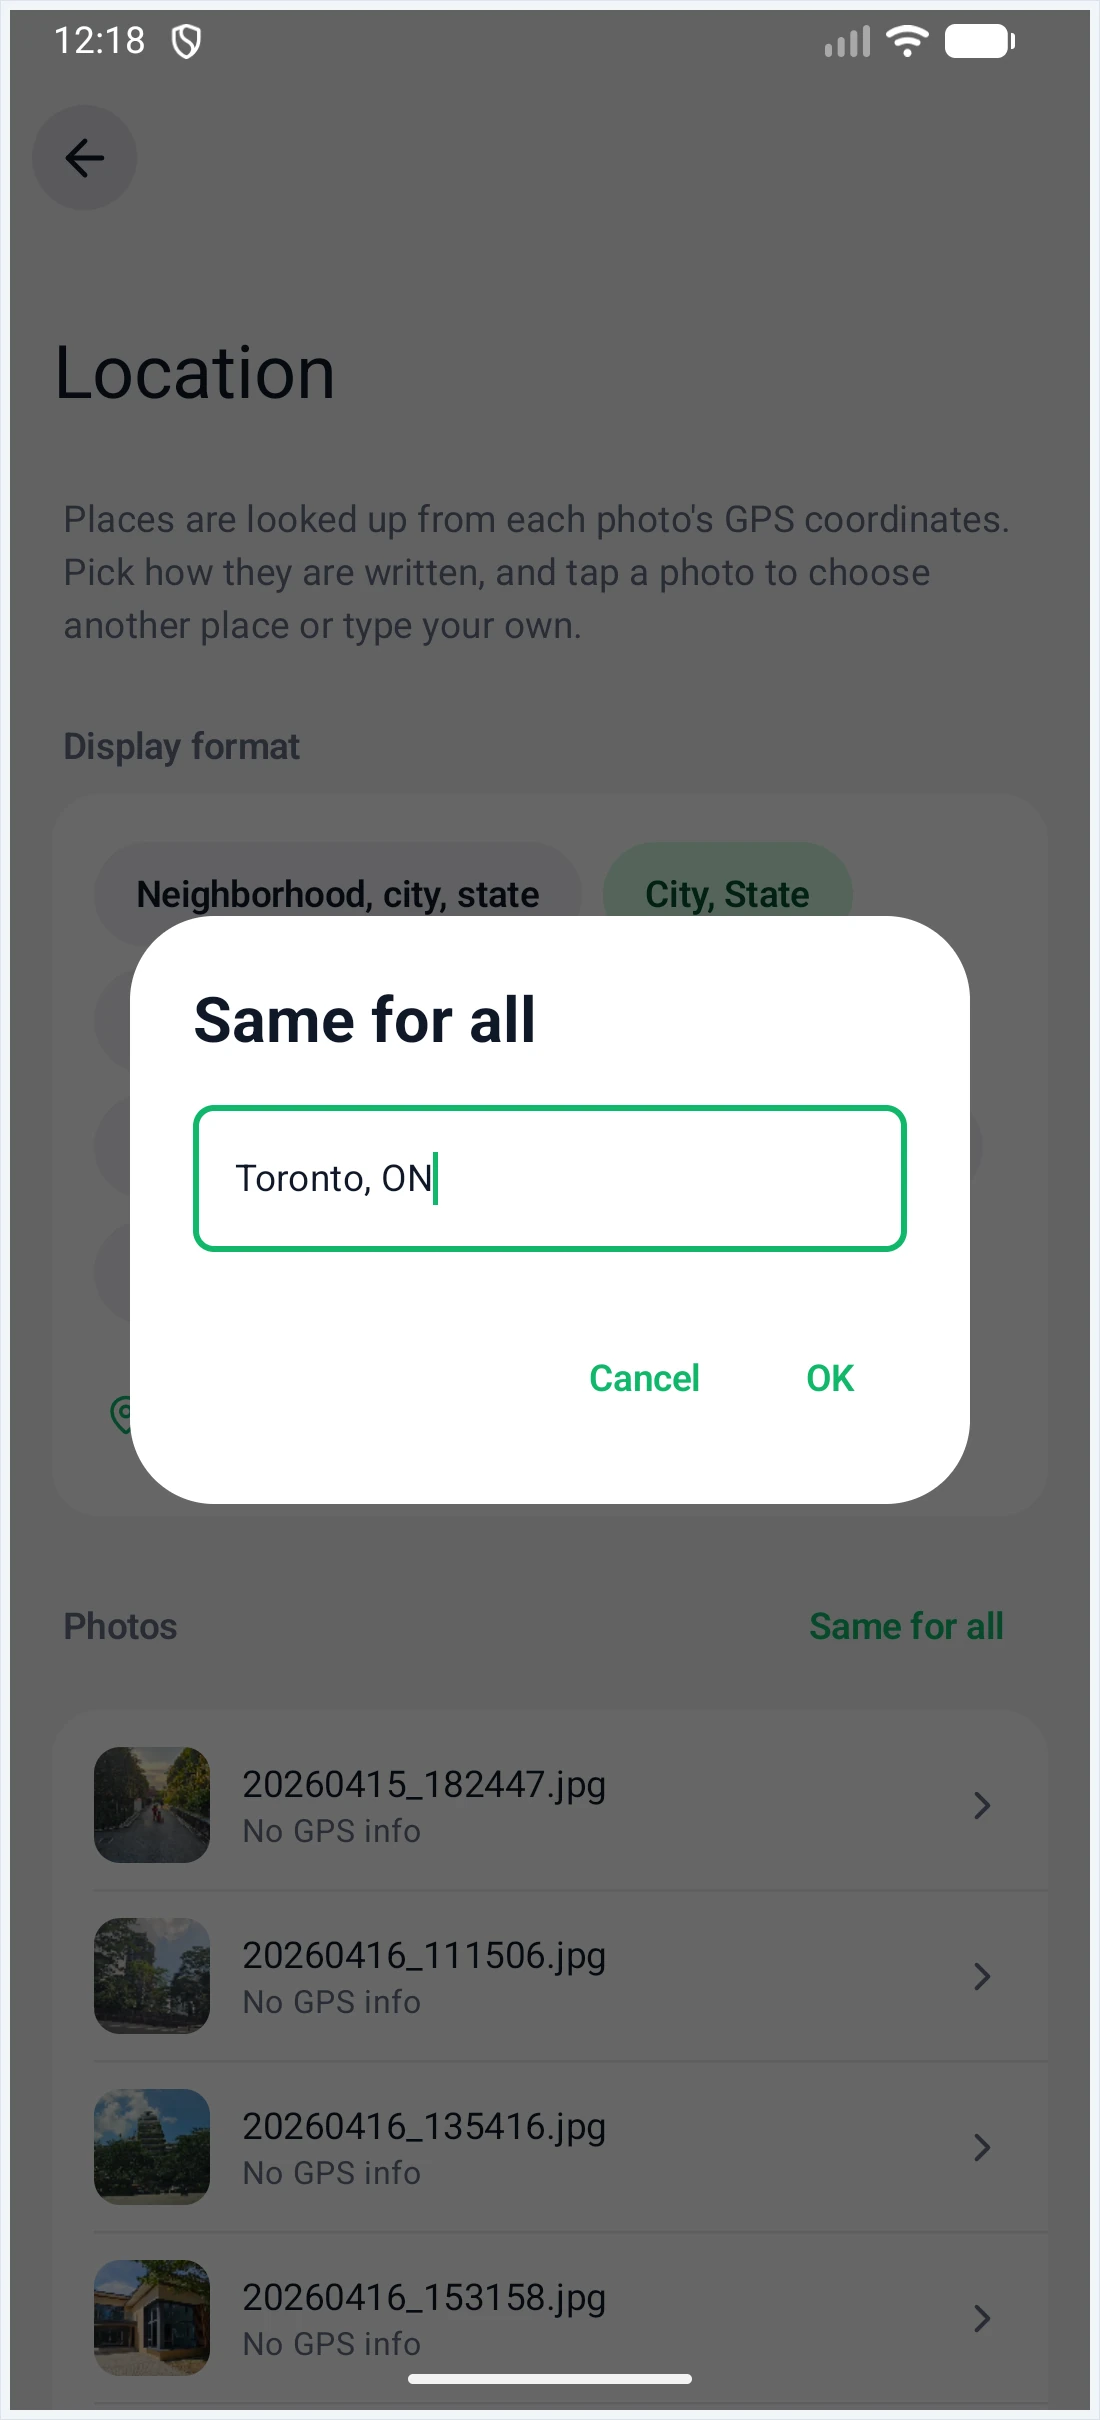
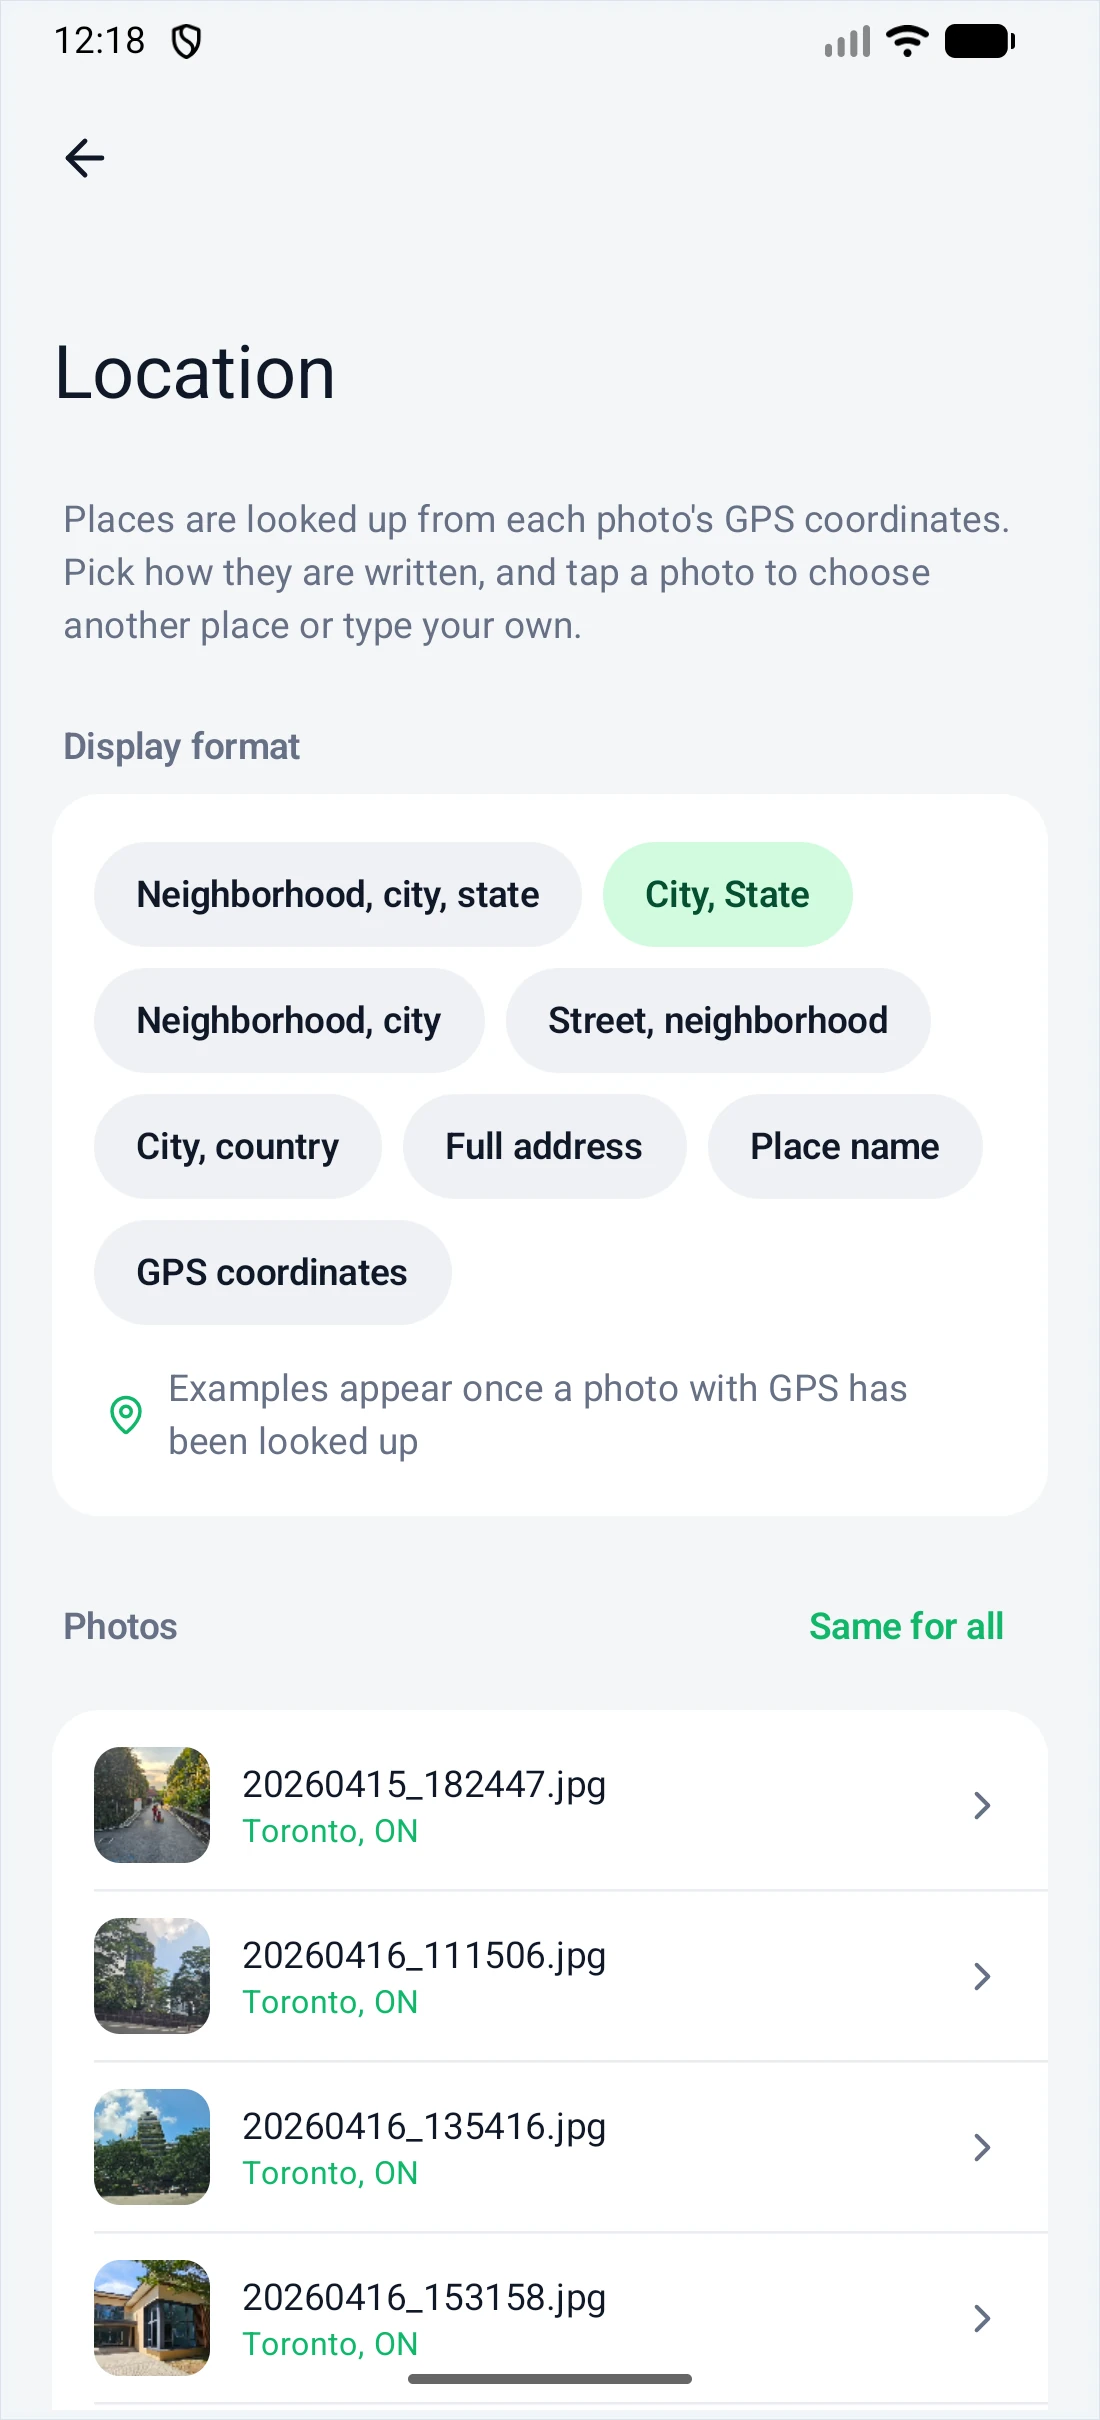
If photos have no GPS data (for example they were added From albums, or location was off when they were taken), tap Same for all to give every photo the same place, or tap one photo to type its place.
Looking up places needs a network connection and the device's geocoding service. If a lookup fails, type the place yourself or switch to GPS coordinates.
10Export
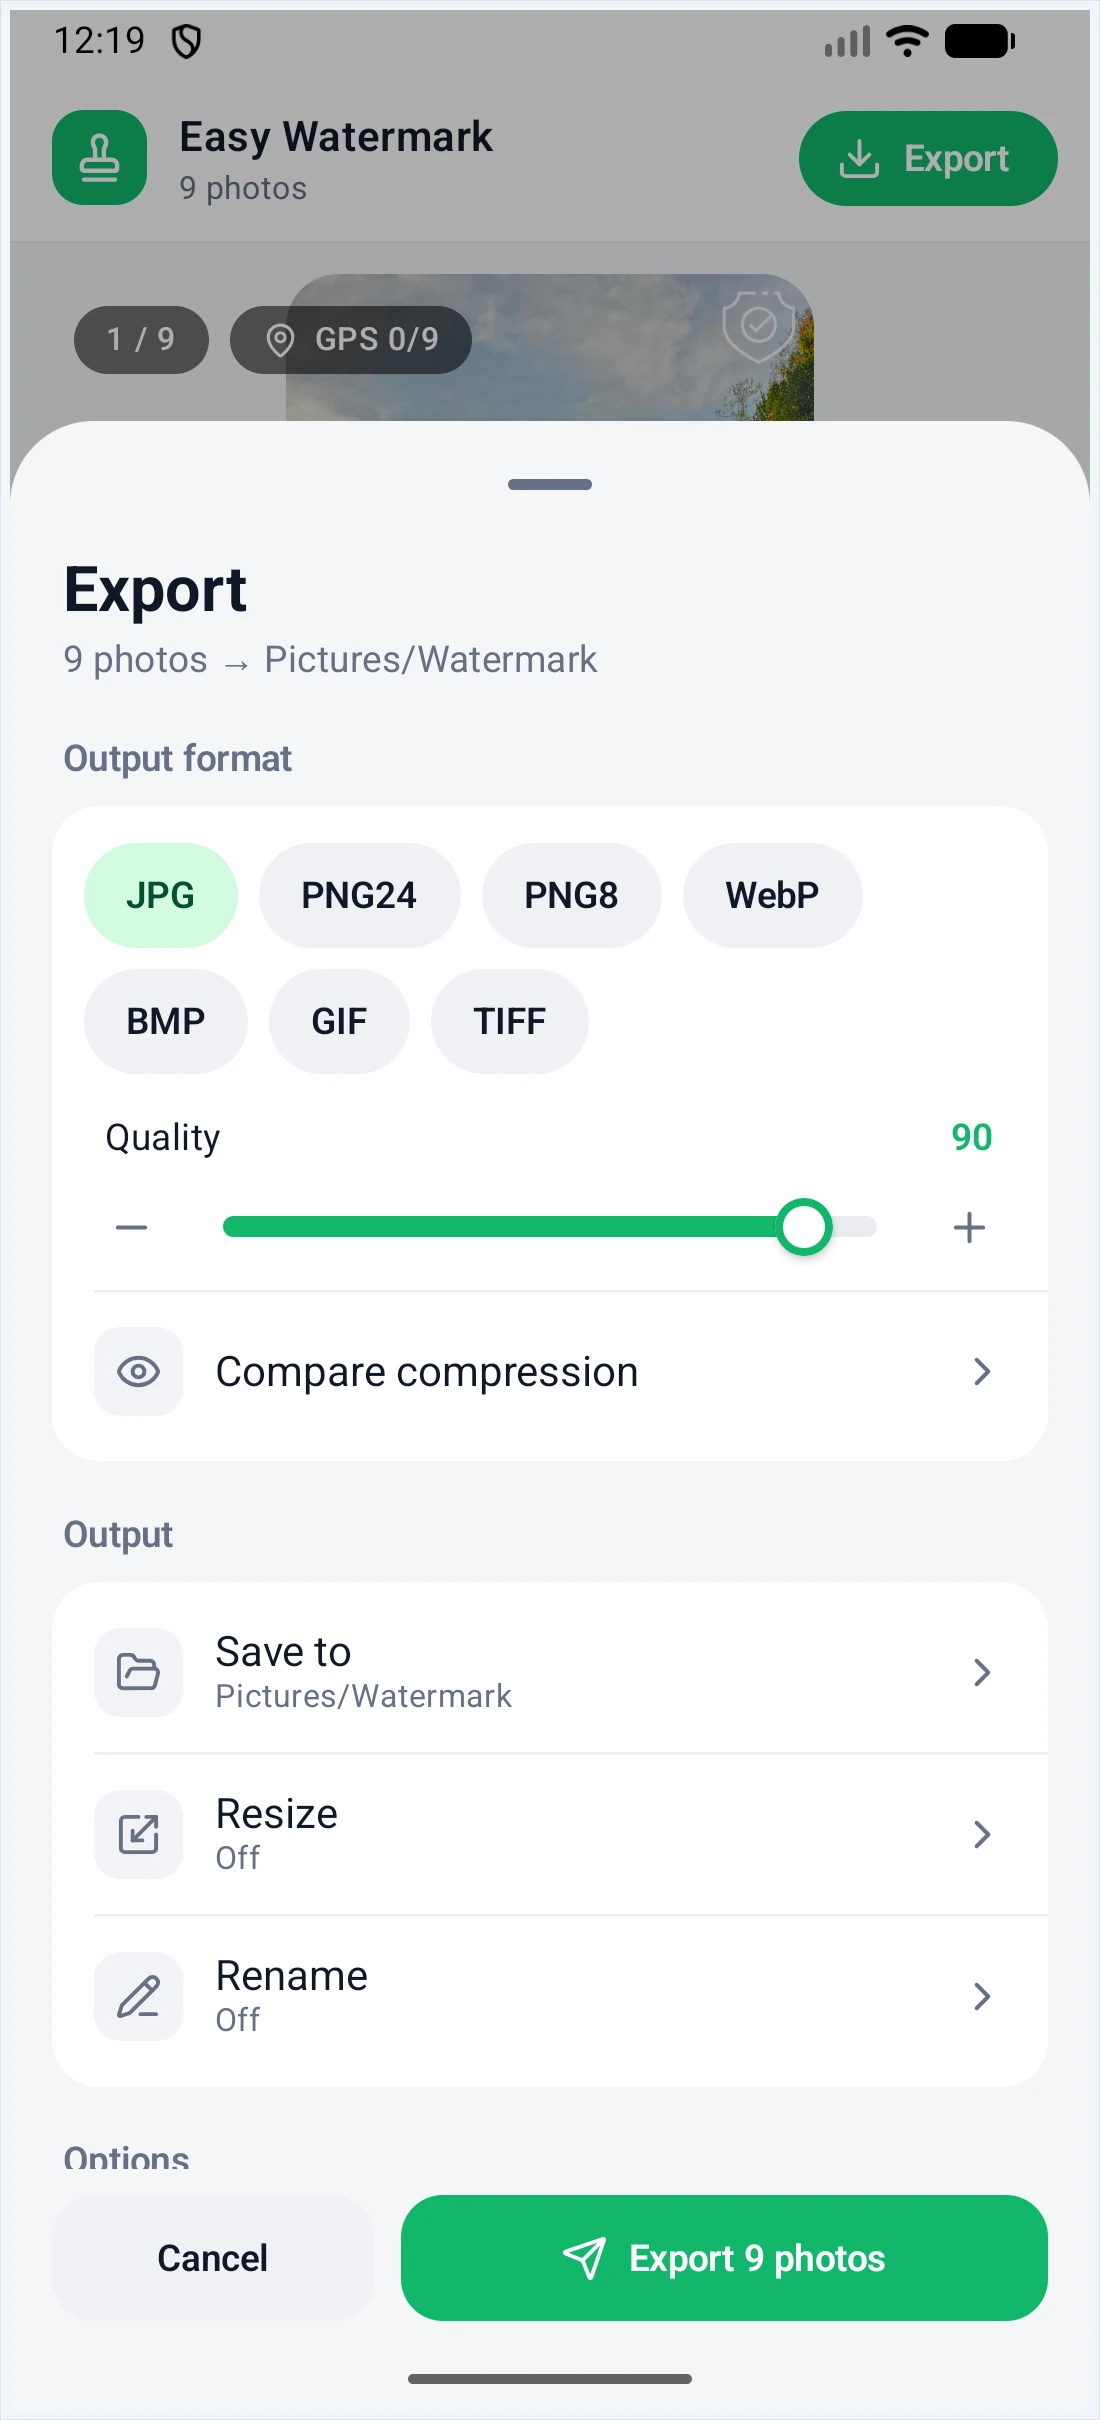
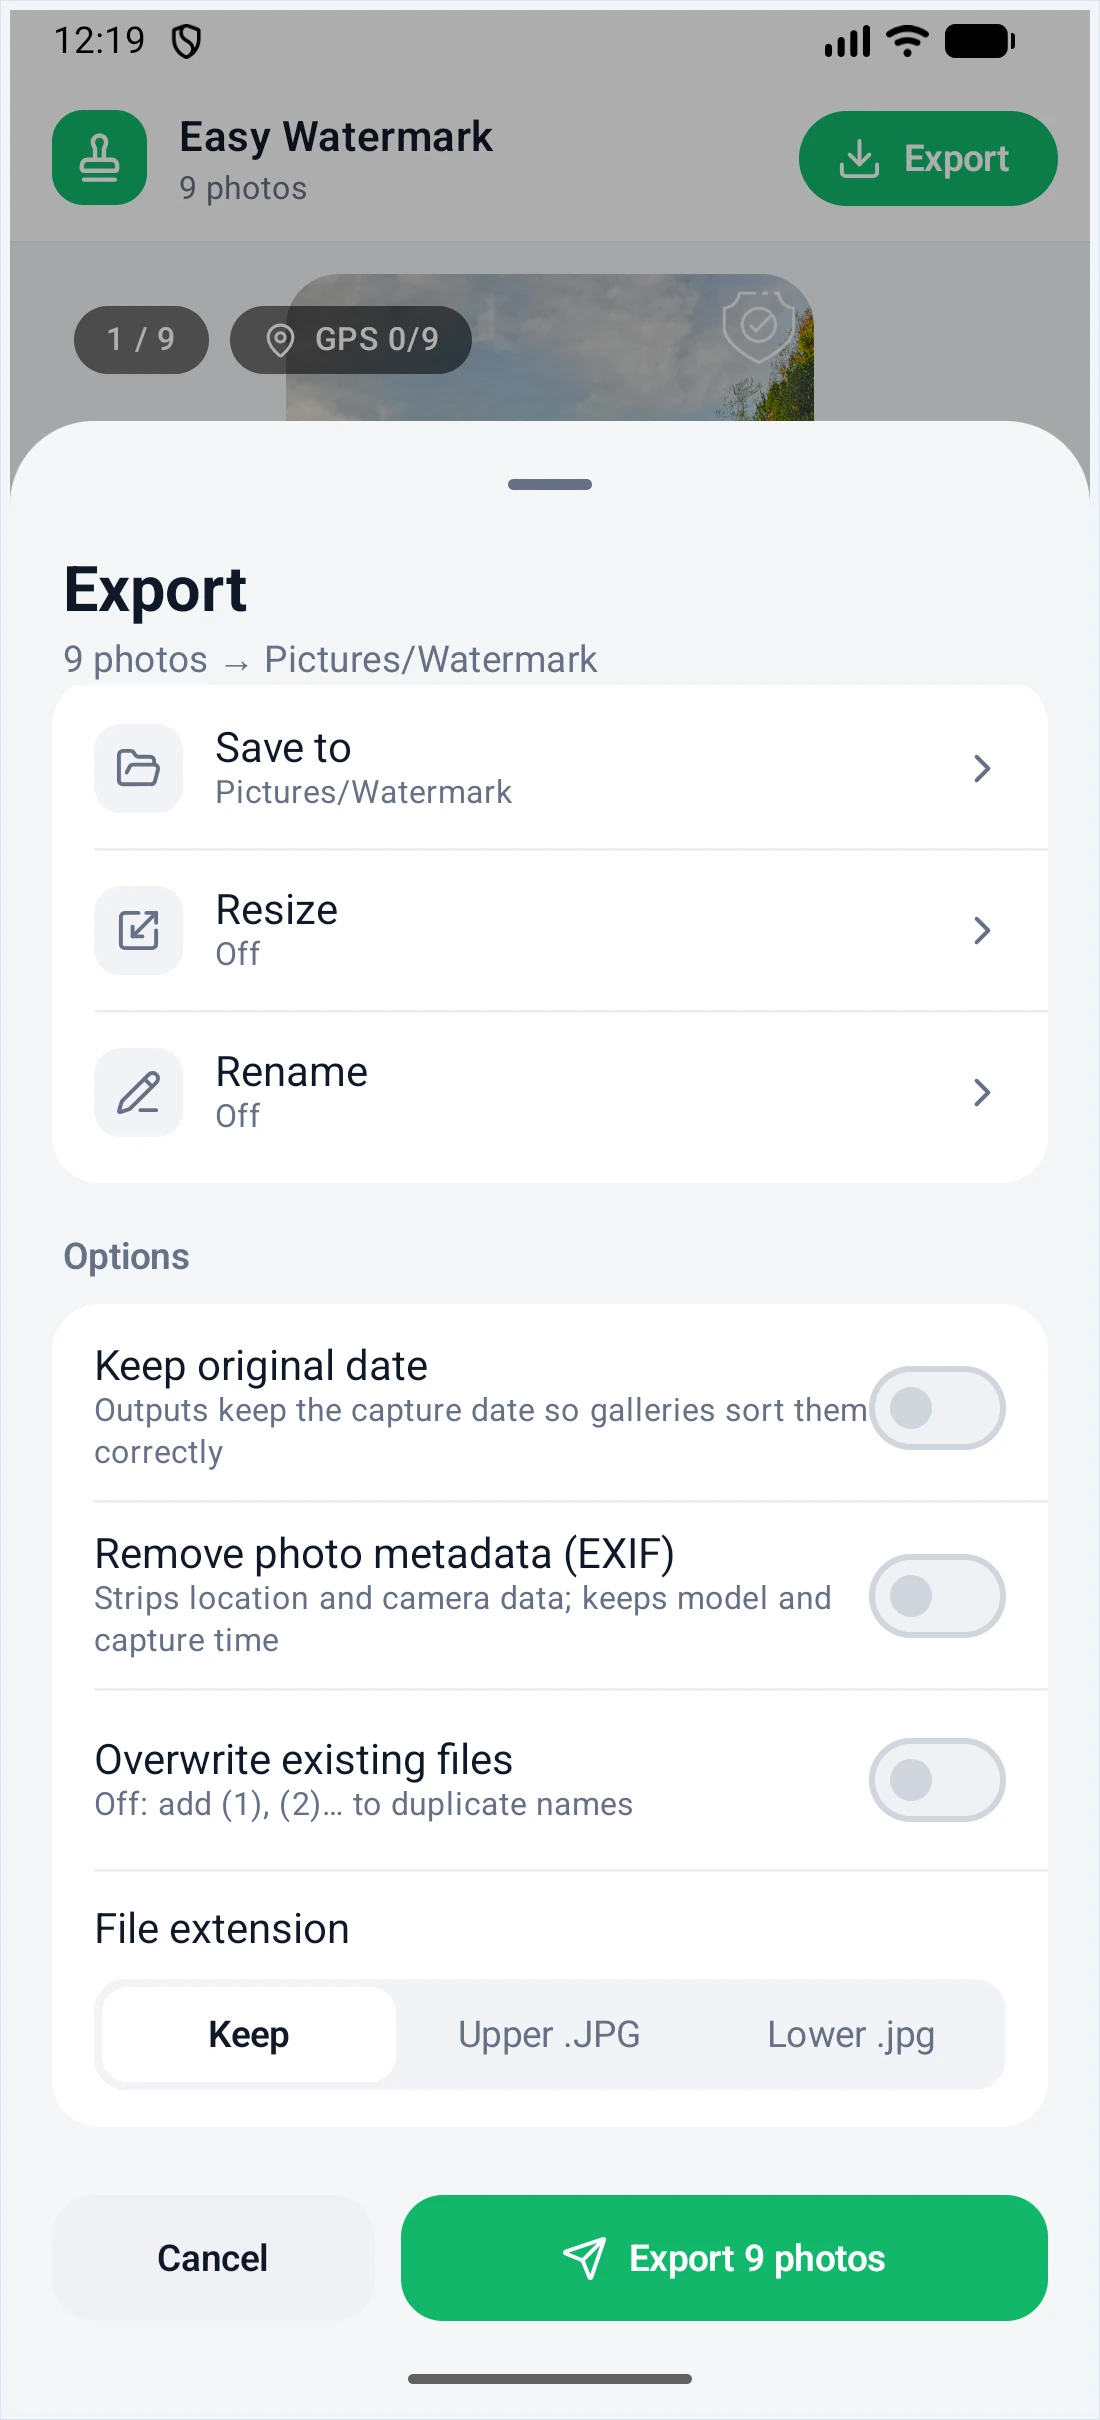
Tap Export at the top right:
- Output format: JPG, PNG24, PNG8, WebP, BMP, GIF or TIFF.
- Quality: 10–100, used by JPG and WebP. Tap Compare compression to check image quality and file size.
- Save to:
Pictures/Watermarkby default, or choose another folder. - Resize and Rename: see below.
- Keep original date: exported files keep the capture date, so galleries sort them correctly.
- Remove photo metadata (EXIF): strips location and camera data, keeping only the camera model and capture time.
- Overwrite existing files: when off, duplicate names get (1), (2)… added.
- File extension: Keep, Upper .JPG or Lower .jpg.
Resize
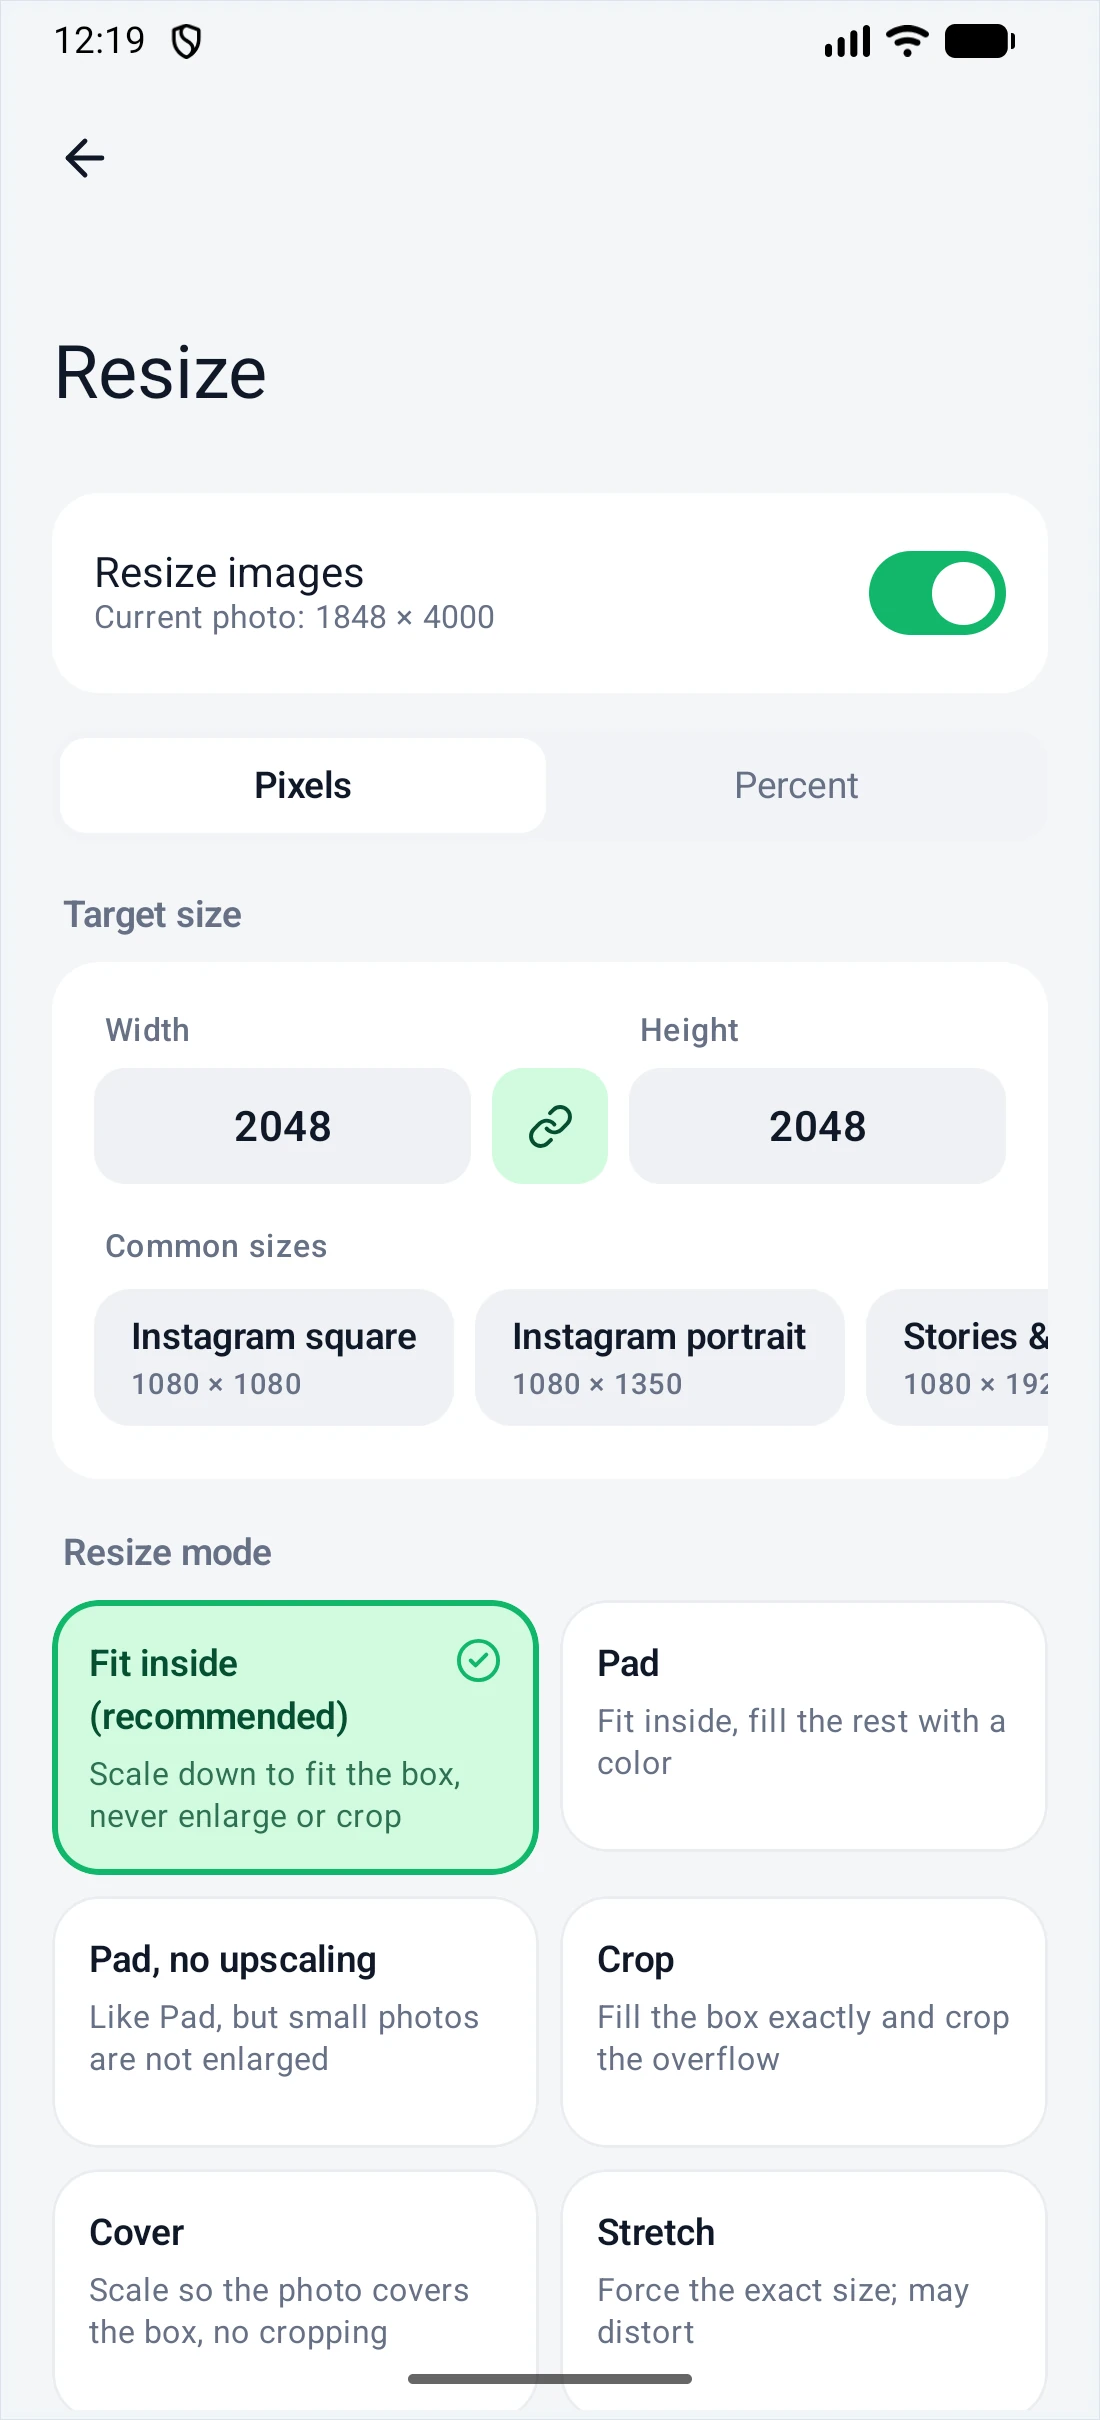
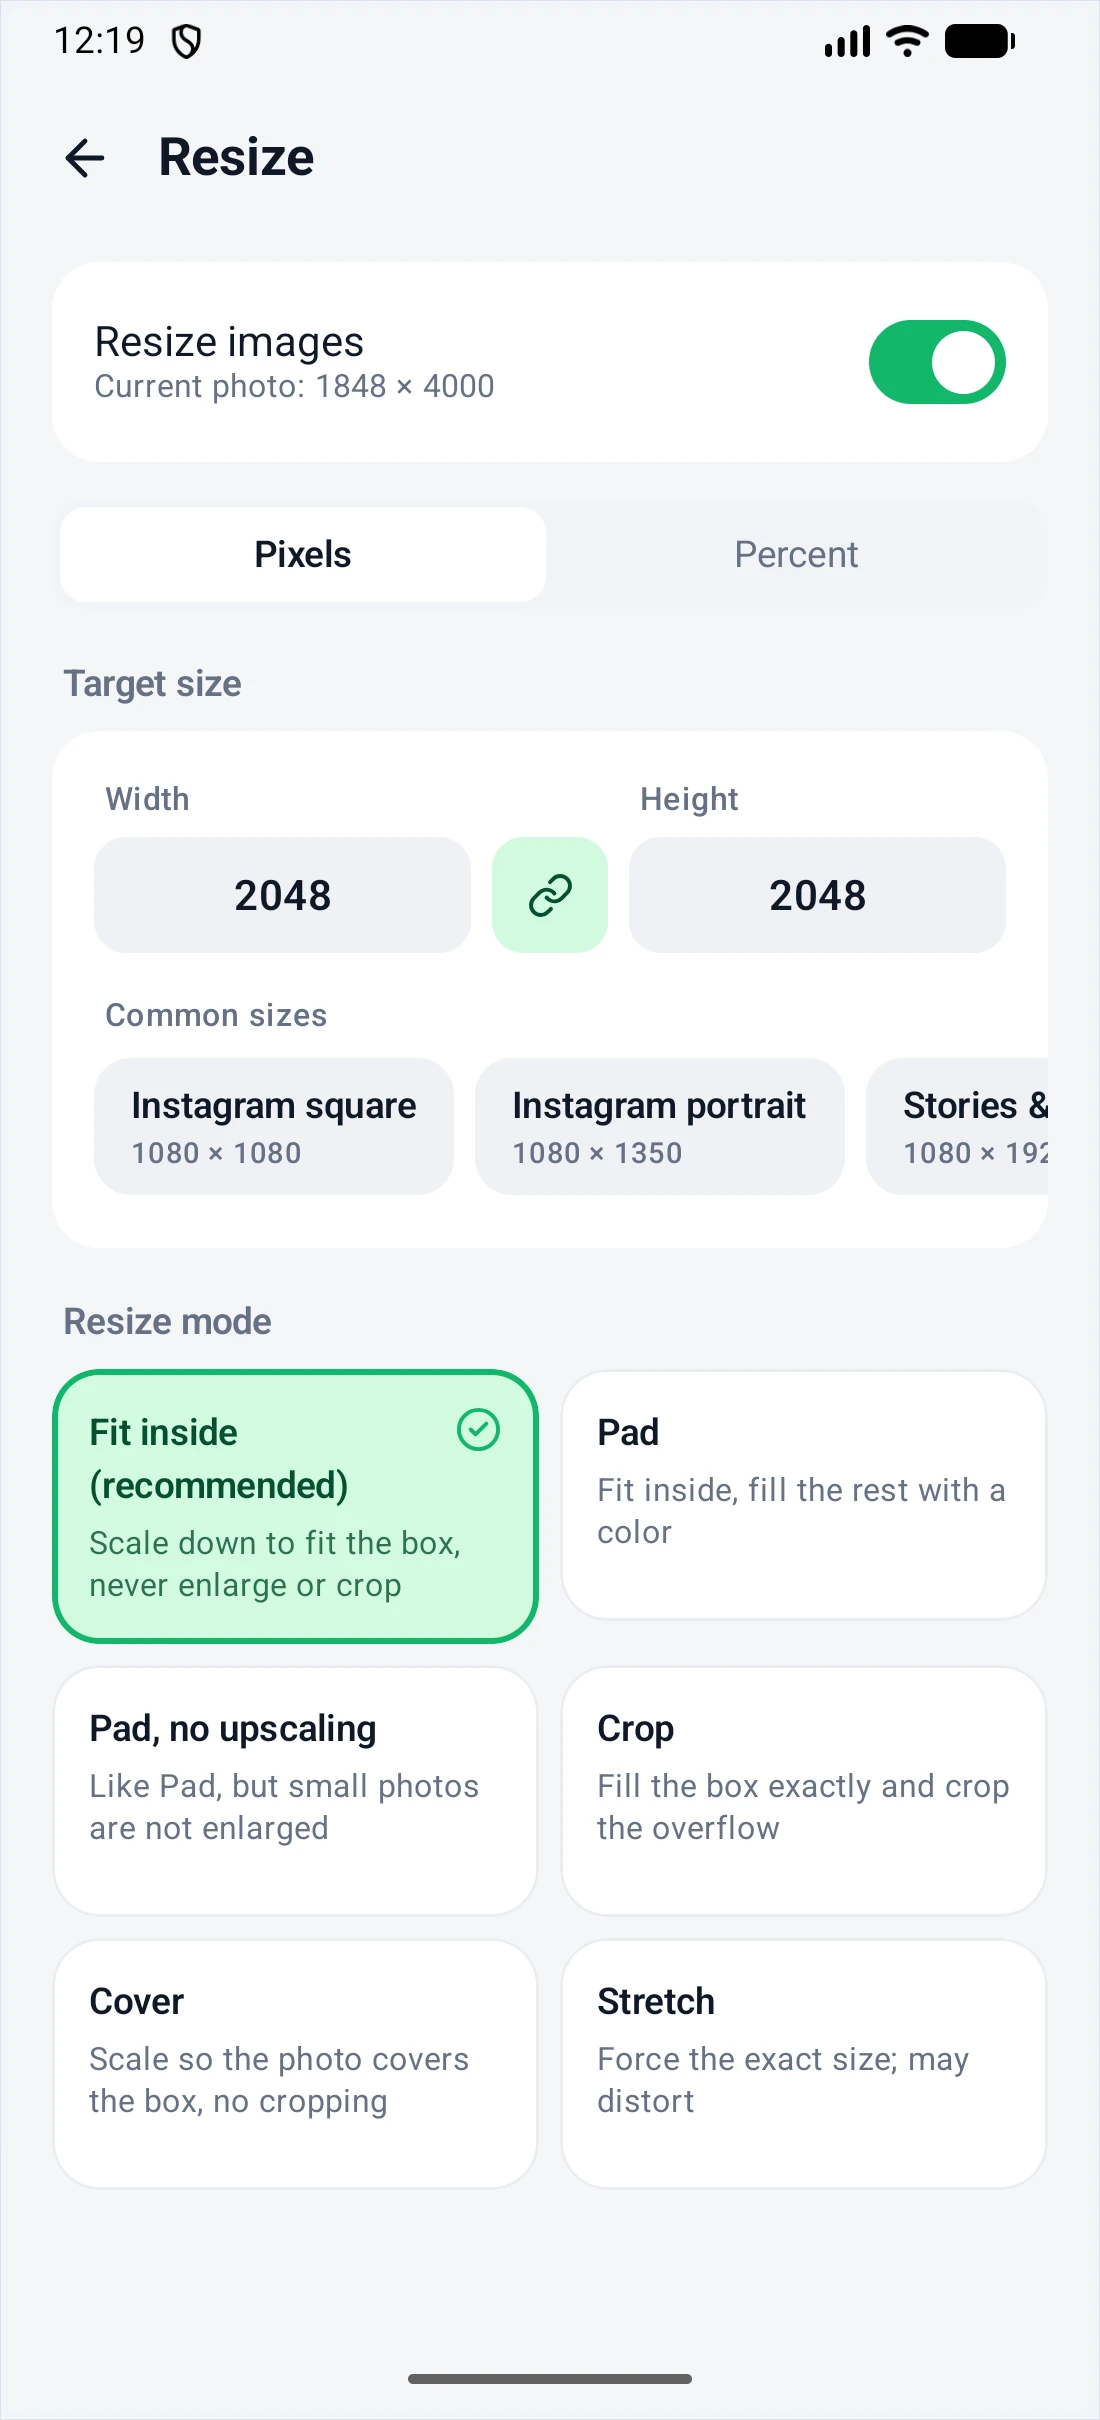
Turn on Resize images, then set the target size in Pixels or Percent, or tap one of the Common sizes (Instagram square and portrait, Stories & Reels, Facebook, X, eBay and Etsy listings, Full HD, 4K and more).
| Mode | What it does |
|---|---|
| Fit inside (recommended) | Scale down to fit the box; never enlarge or crop |
| Pad | Fit inside and fill the rest with a color |
| Pad, no upscaling | Like Pad, but small photos are not enlarged |
| Crop | Fill the box exactly and crop the overflow |
| Cover | Scale so the photo covers the box, no cropping |
| Stretch | Force the exact size; may distort |
Photos are resized first and watermarked afterwards, so watermarks stay sharp and in proportion at any output size.
Rename
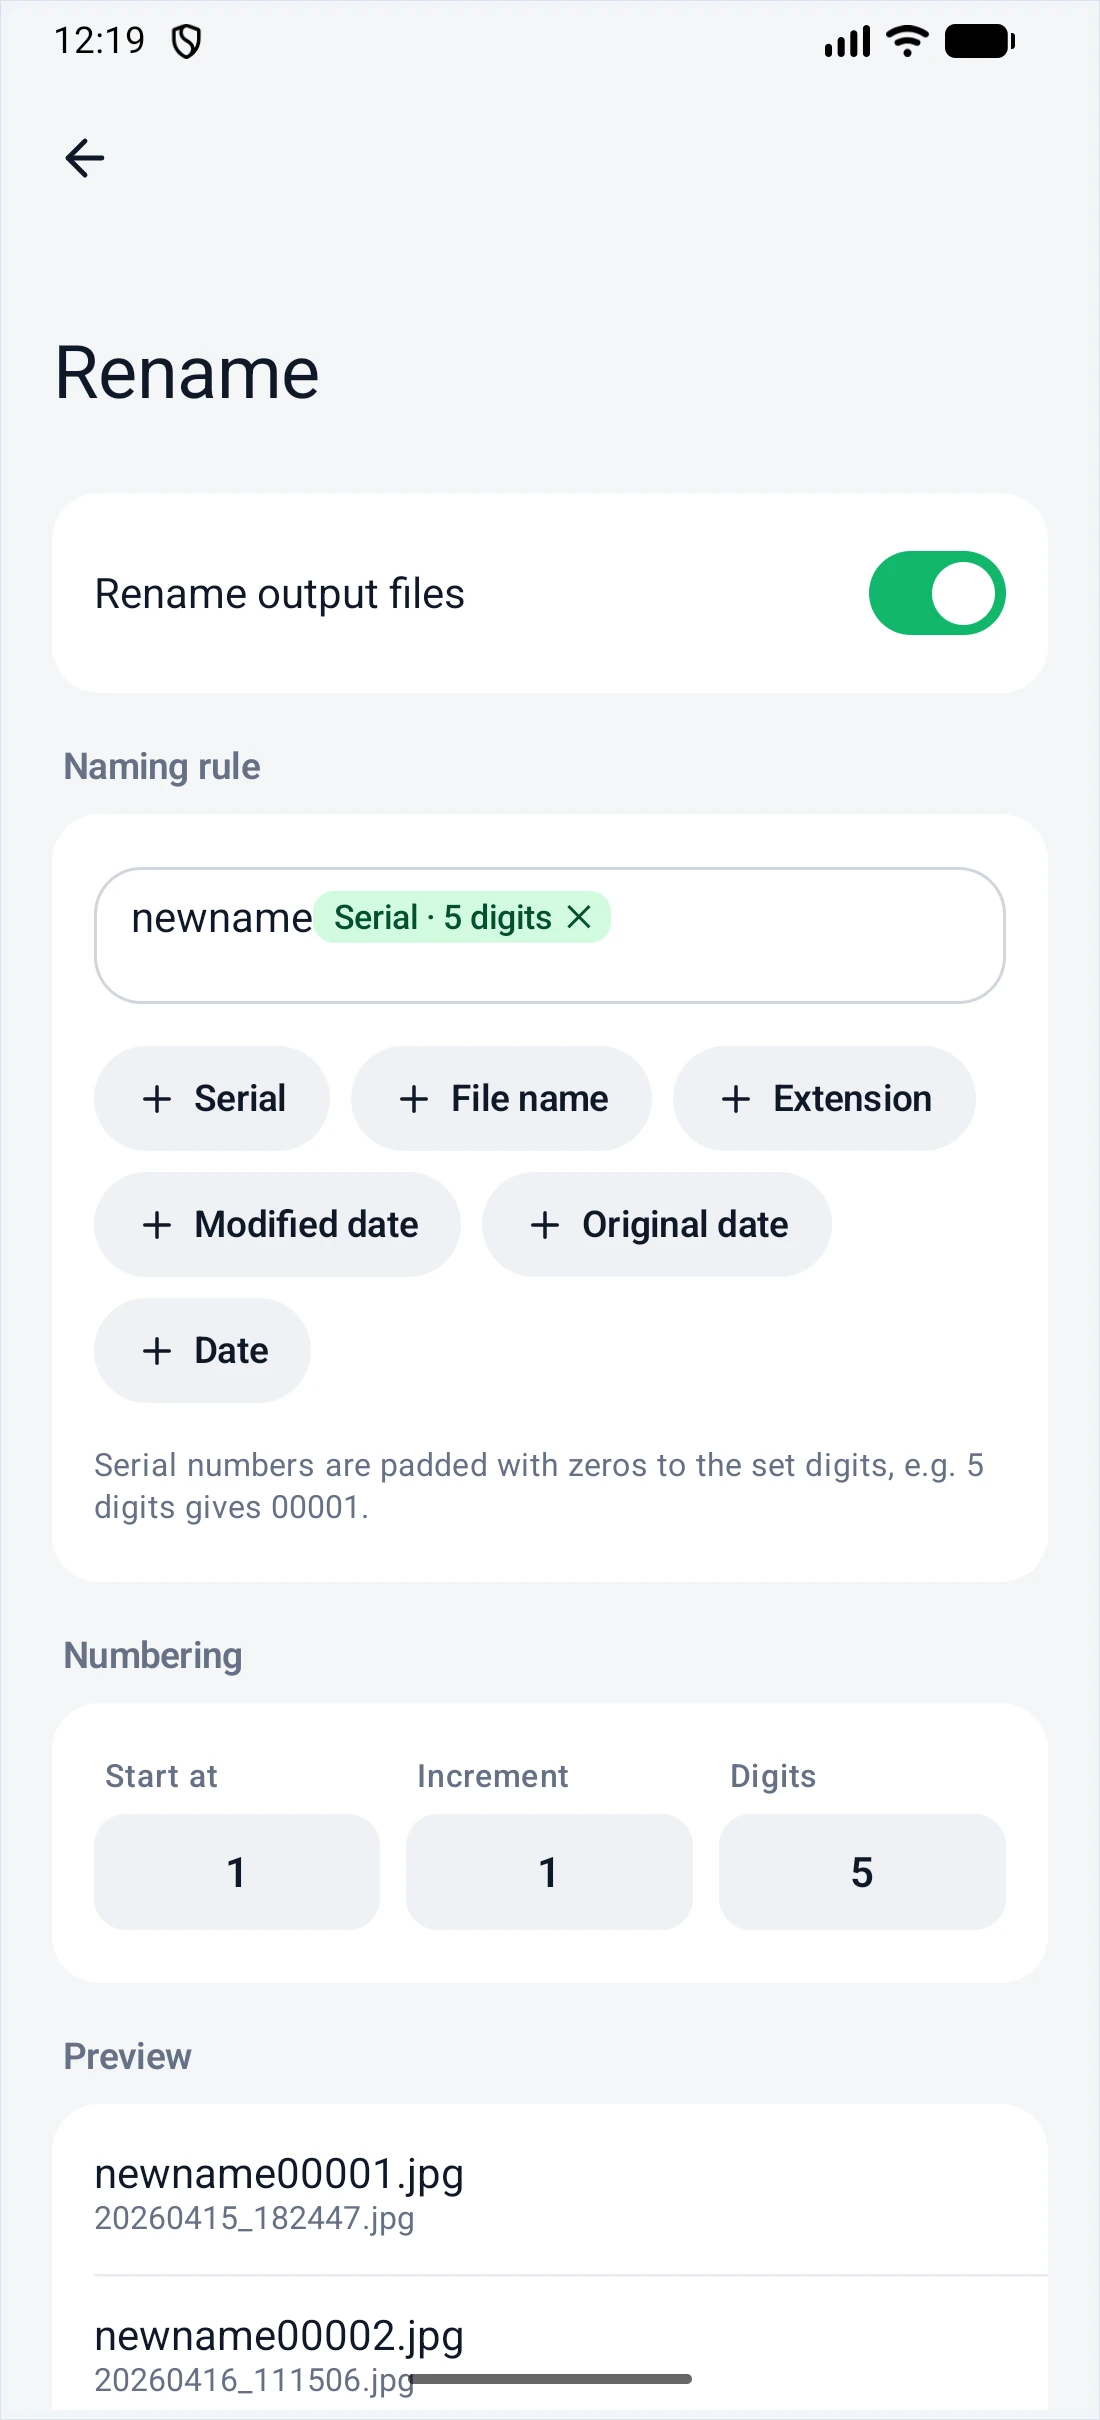
Turn on Rename output files and edit the Naming rule. You can insert Serial, File name, Extension, Modified date, Original date and Date (capture date). Under Numbering, set where the count starts, the increment and the number of digits (5 digits gives 00001). Preview shows the new names of the first few photos.
Compare compression
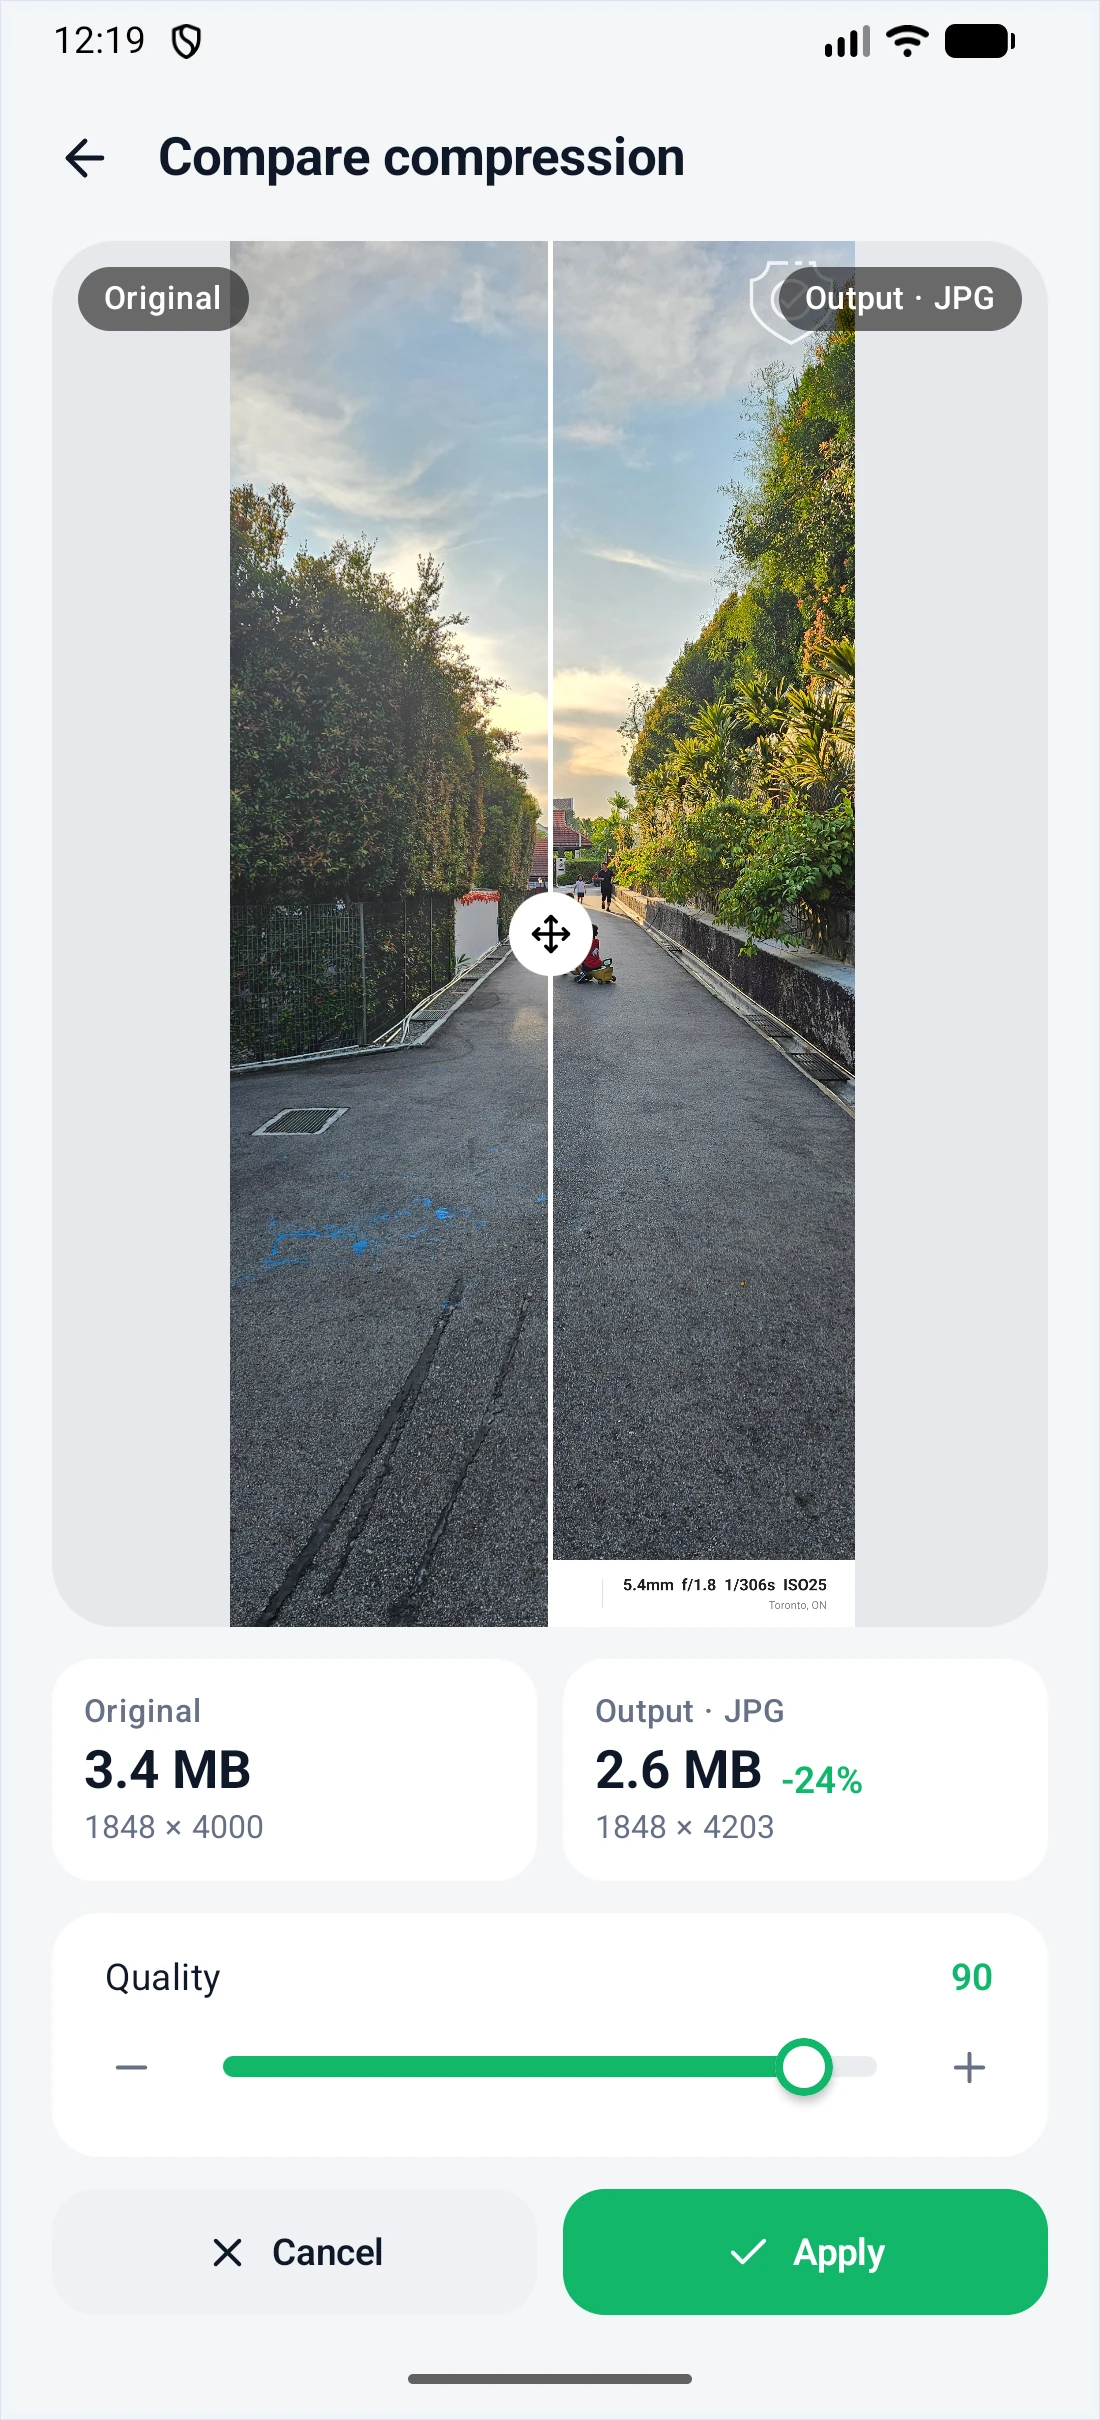
Shows the original and the exported result side by side, with their file sizes, dimensions and how much smaller the output is, so you can pick a format and quality.
Processing
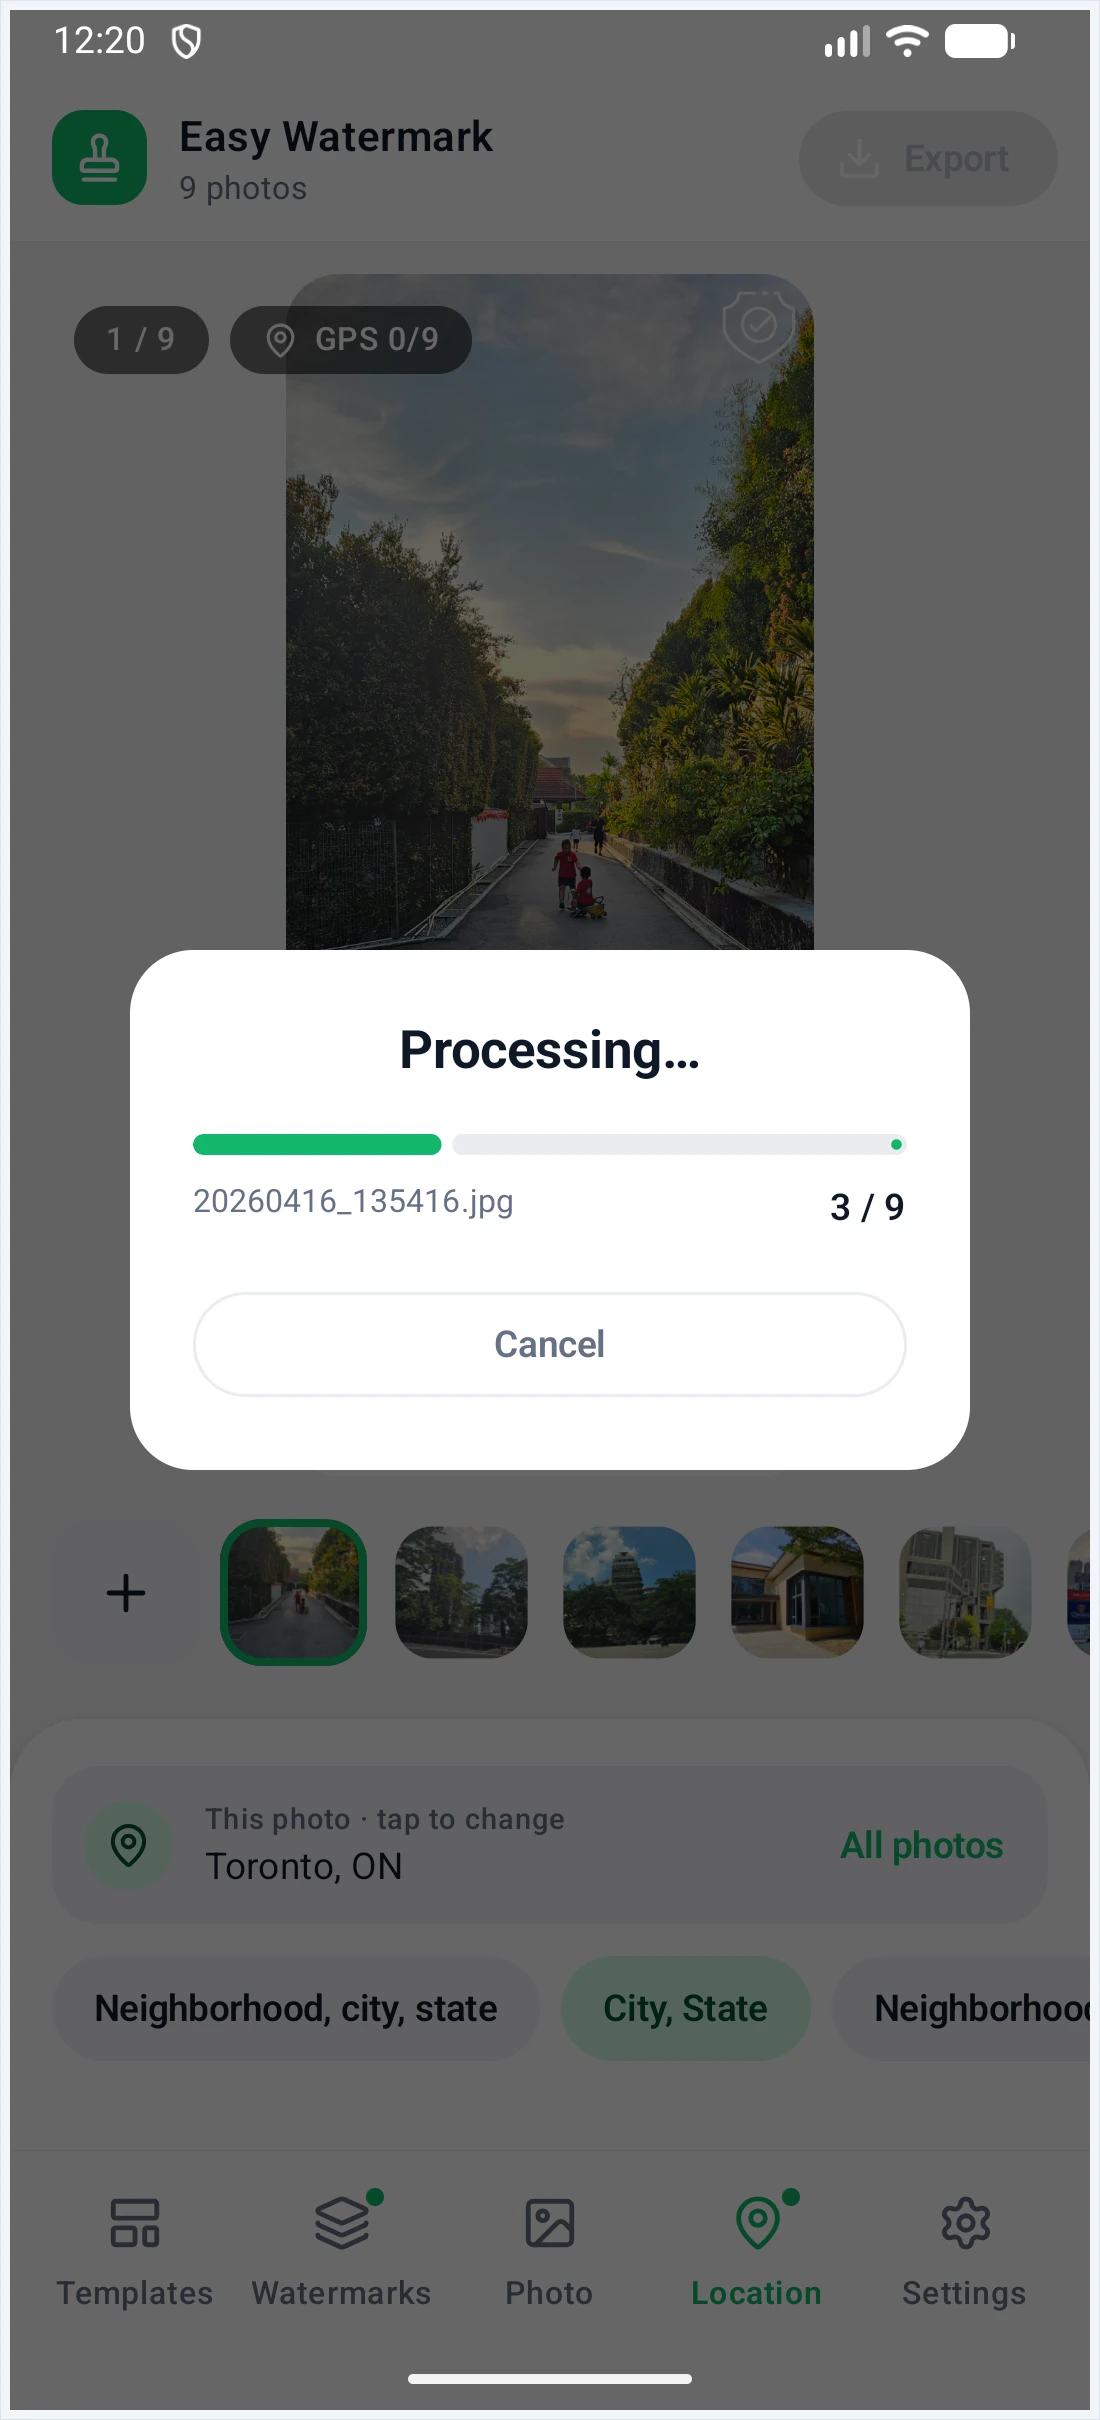
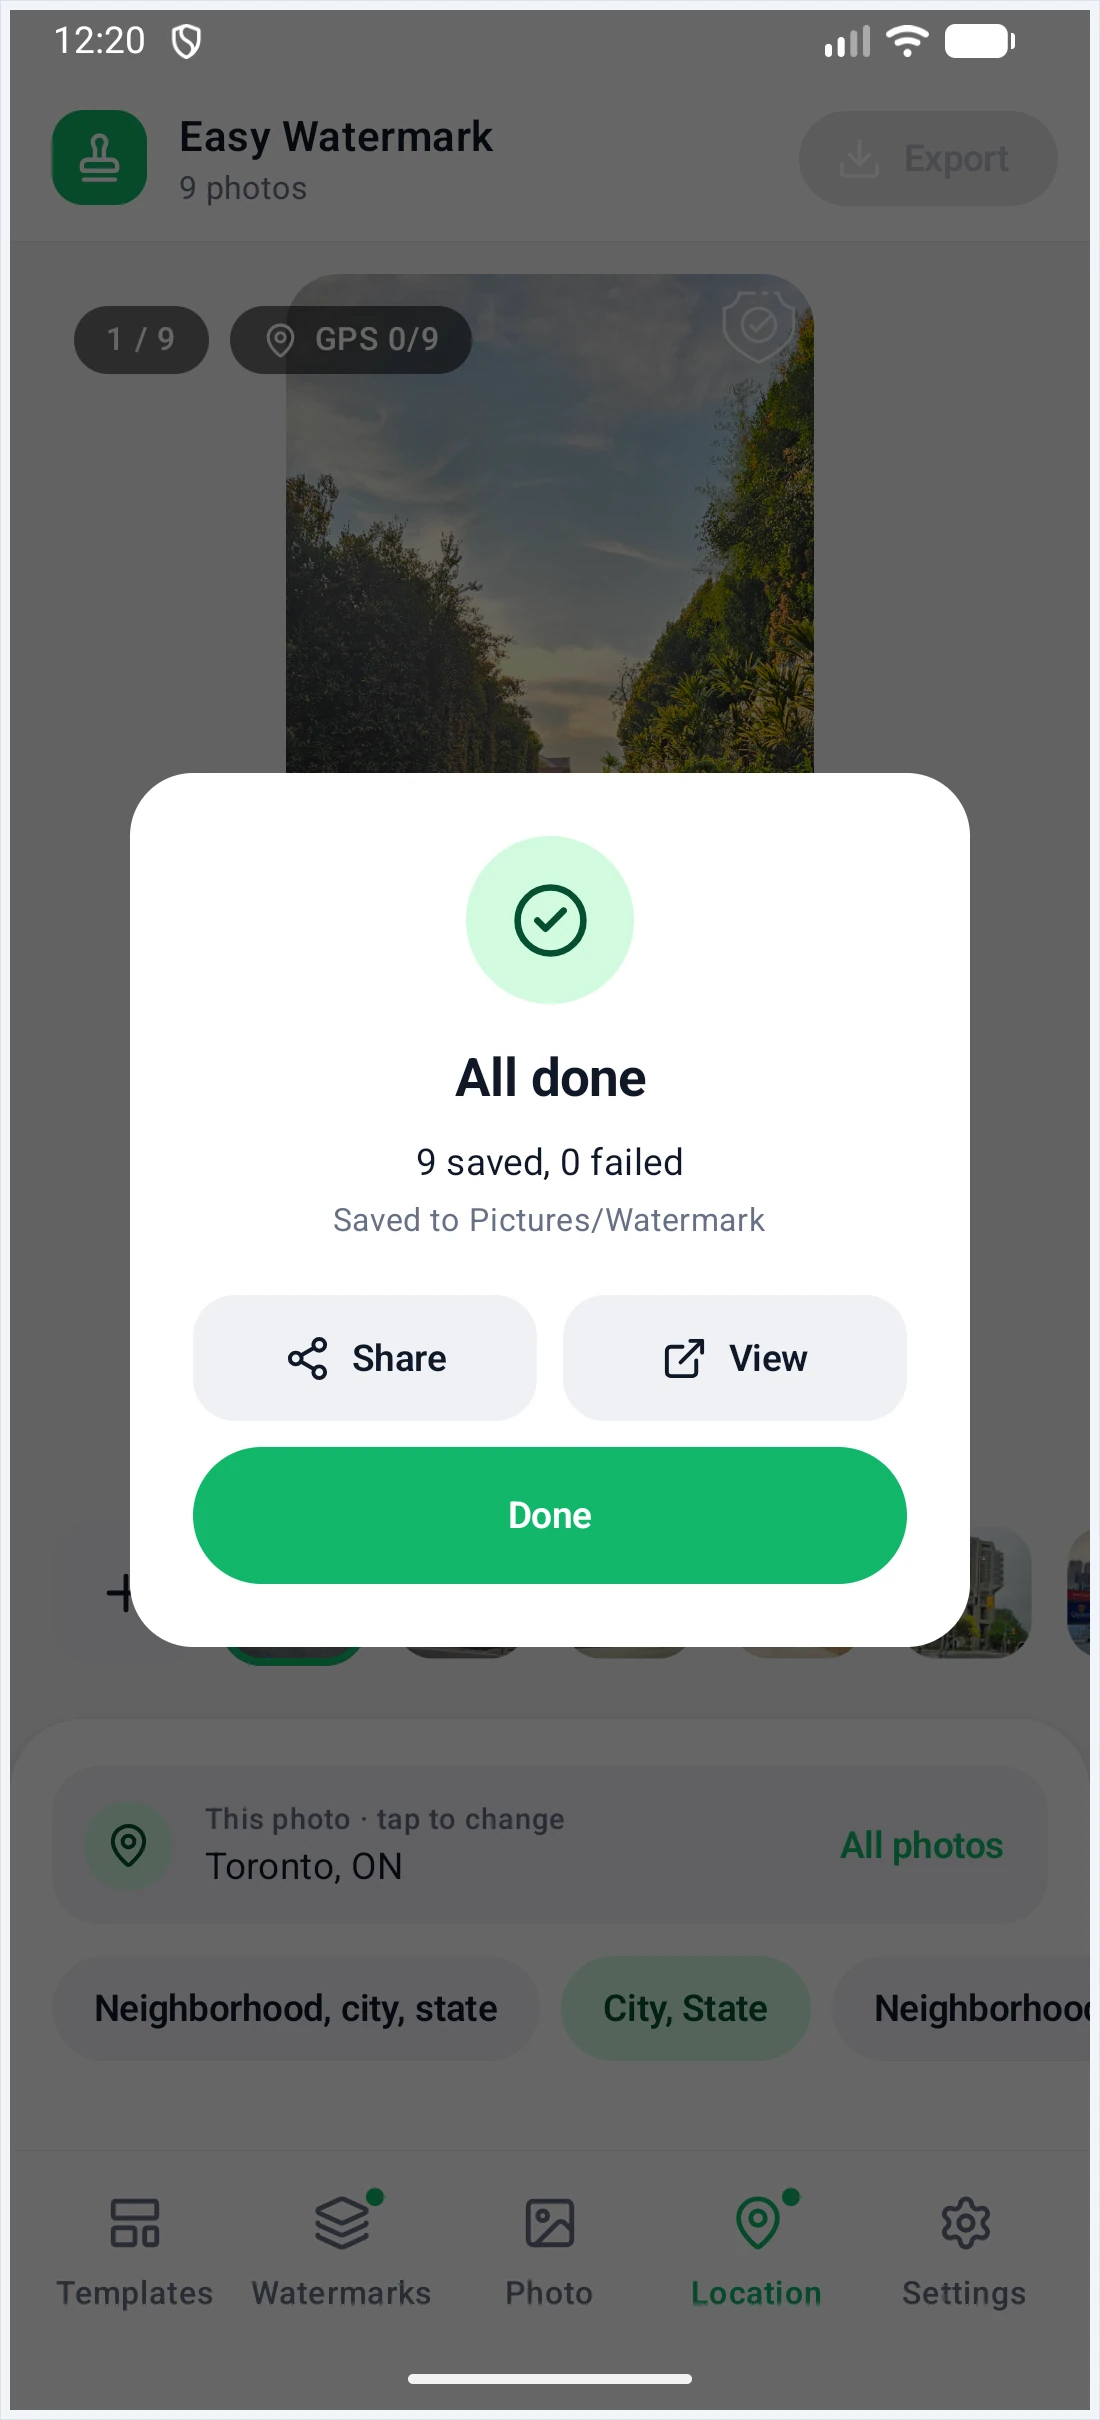
Tap Export N photos to start. The progress box shows the current file; tap Cancel at any time. One bad file never stops the batch. When it finishes you see how many were saved or failed, and can Share or View the results.
11Settings and recent exports
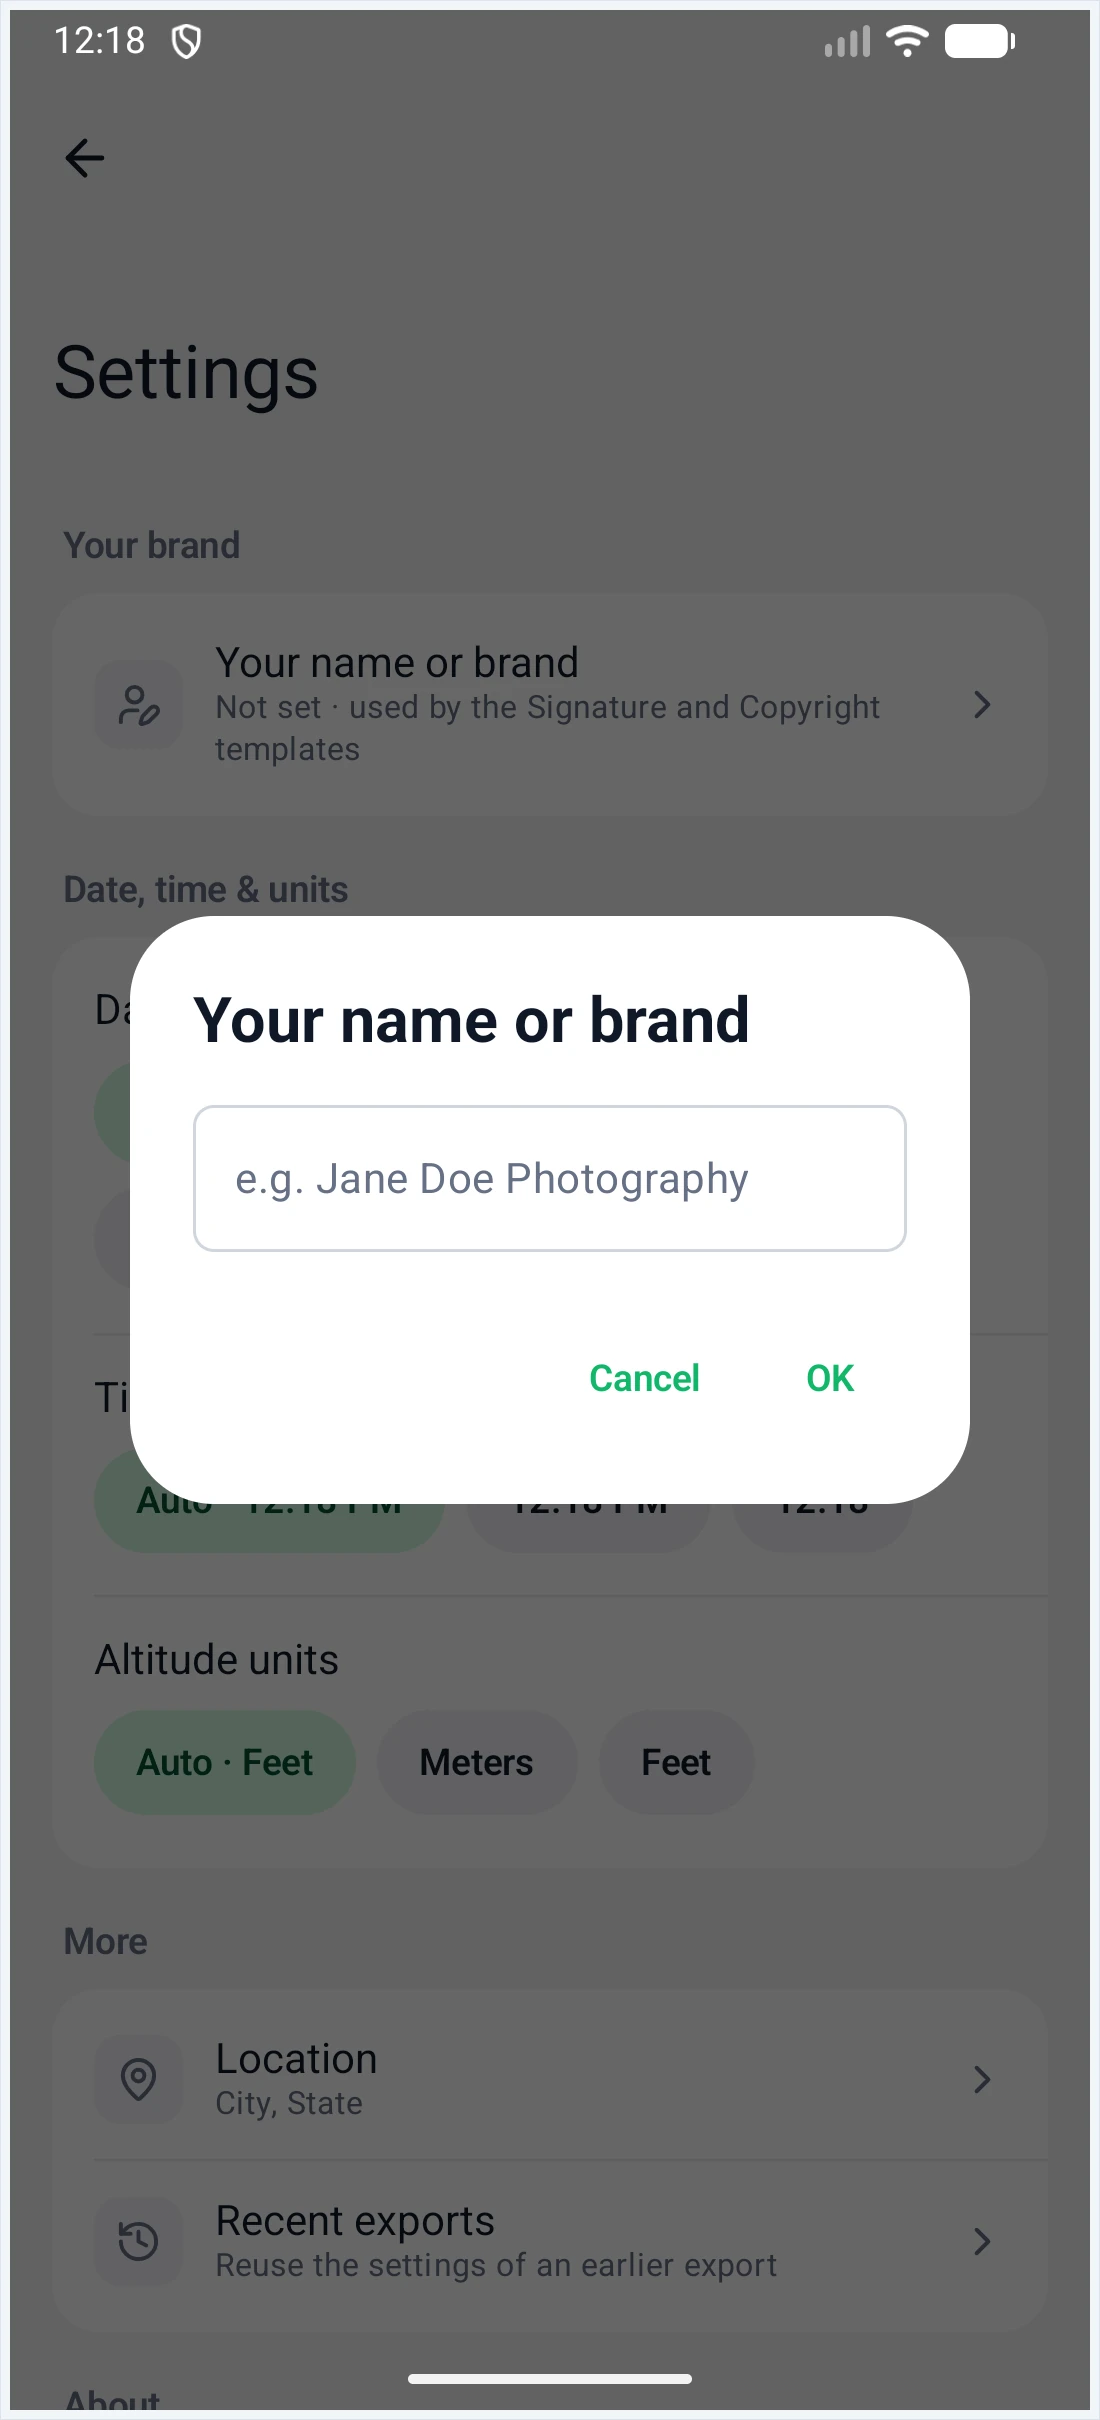
- Your name or brand: used by the
[signature]field and by the Signature and Copyright tile templates.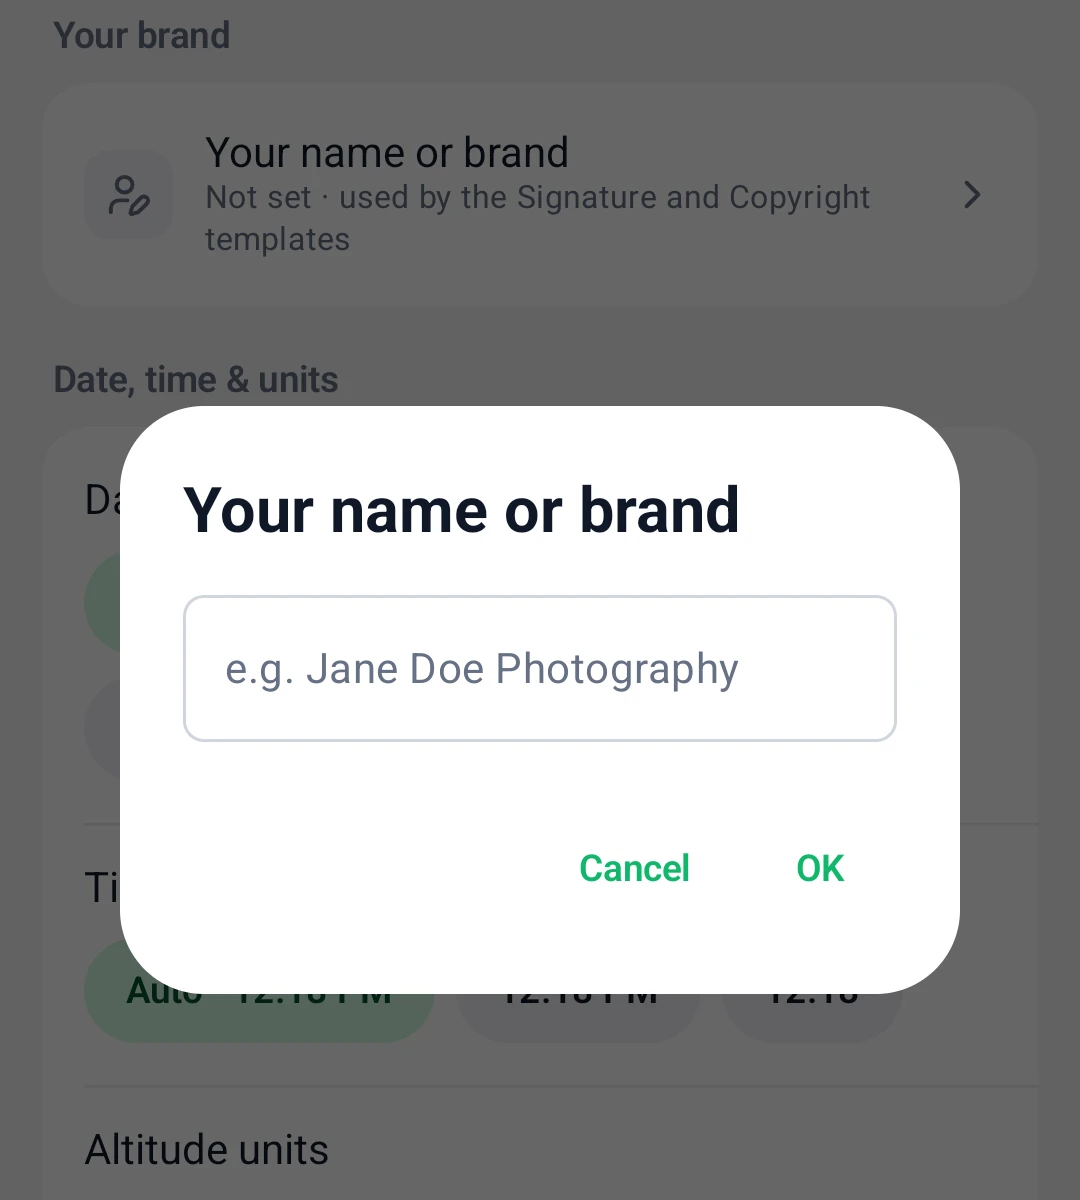
Your name or brand - Date format / Time format / Altitude units: follow your region automatically, or pick one yourself (for example 09/24/2026, 24/09/2026 or 2026-09-24; 12- or 24-hour time; feet or meters).
- Location: the same as the Location page in the bottom bar.
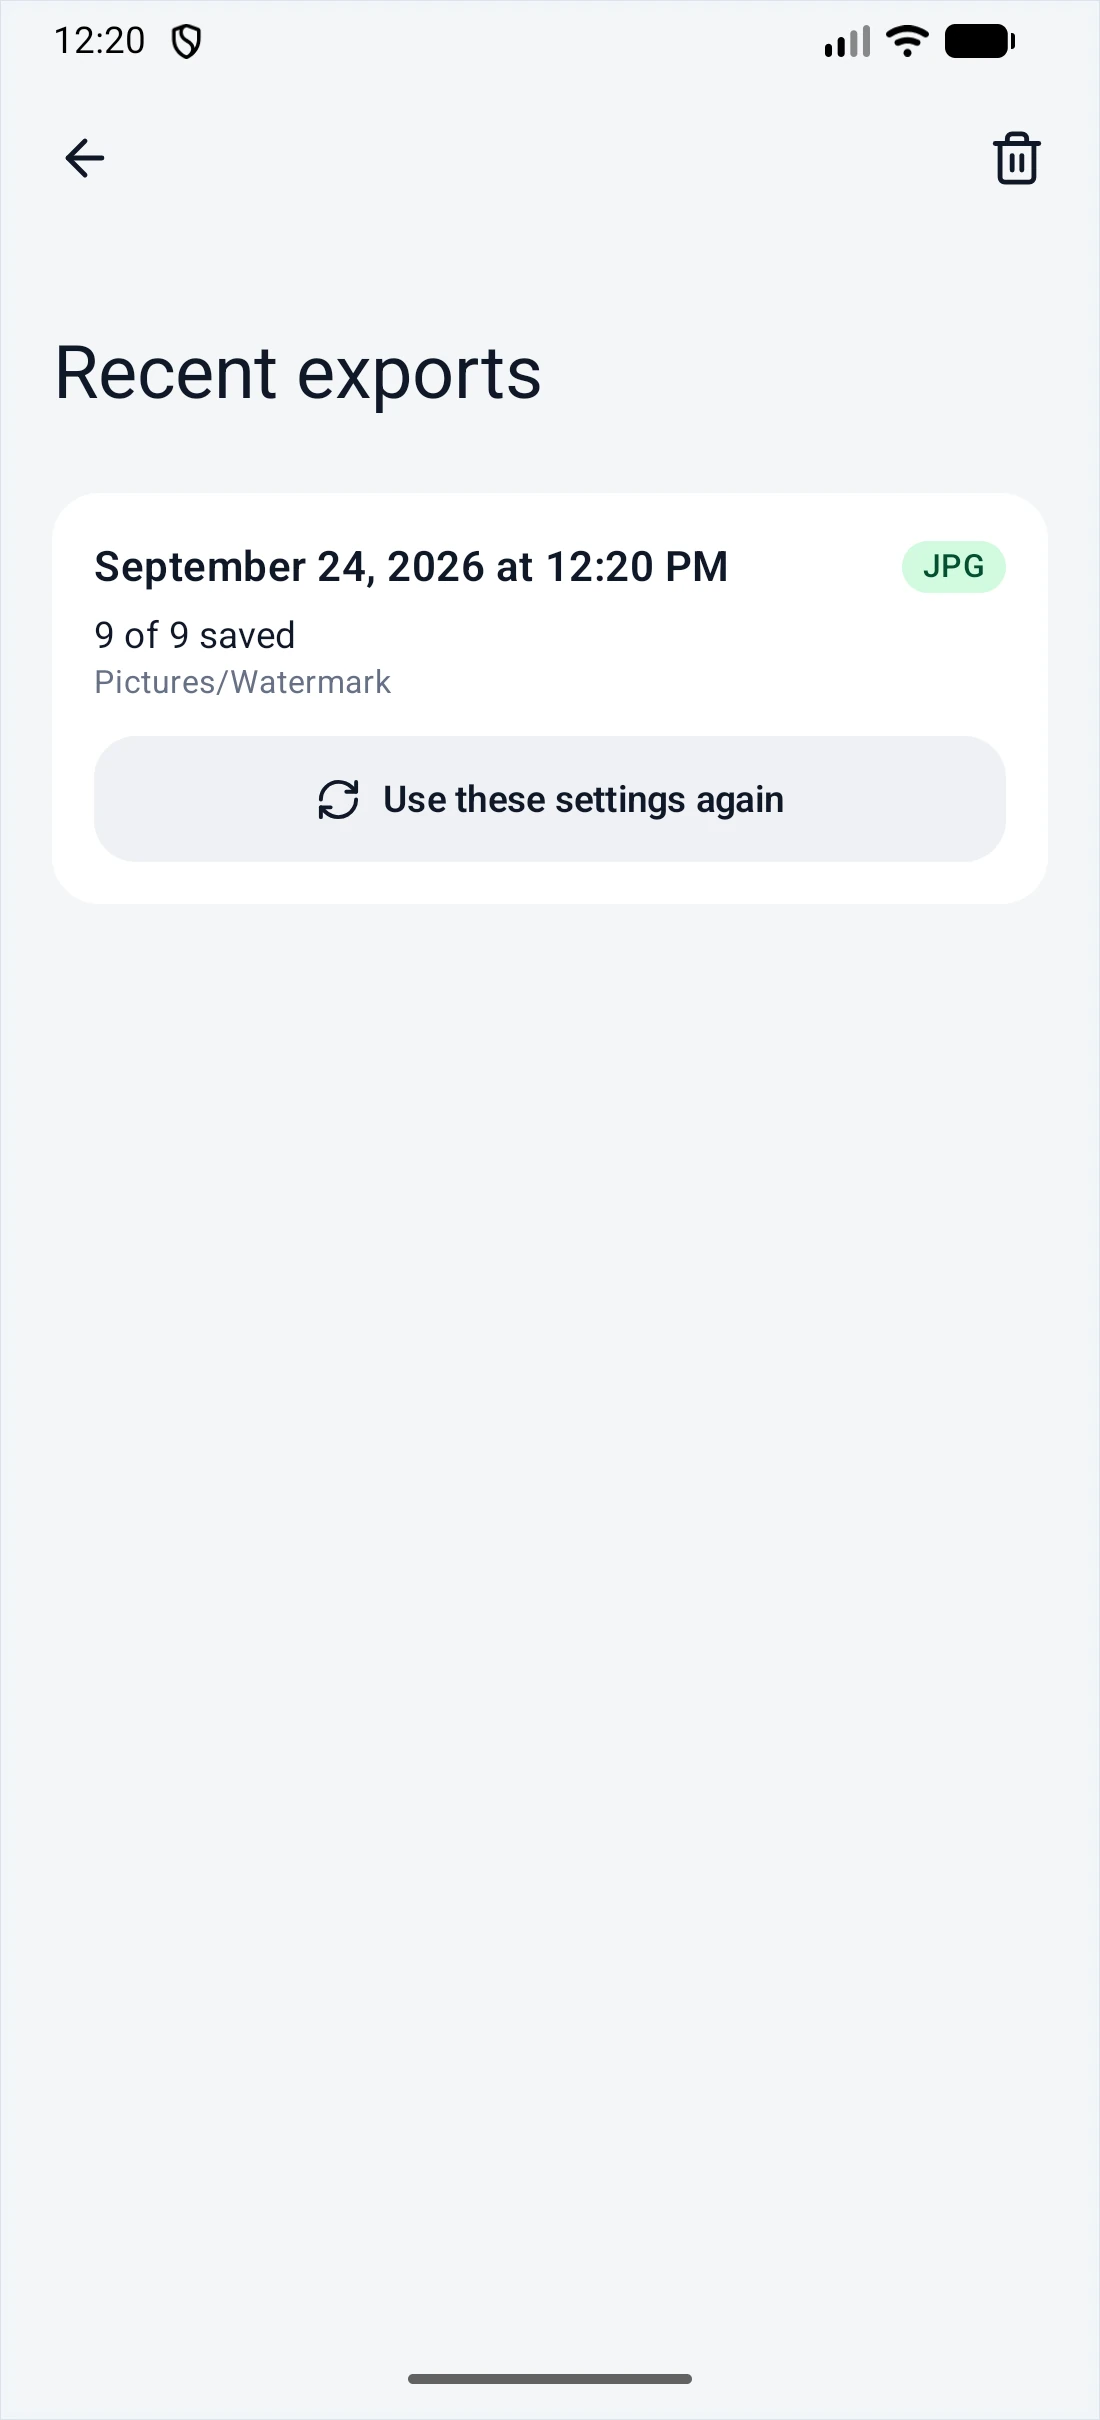
- Recent exports: earlier exports with their time, format, number saved and folder. Tap Use these settings again to bring back the watermarks and export settings you used.
- About: the version number (free, no ads, no sign-up).
12FAQ
Why is the place in my watermark empty? The photo has no GPS data. Add photos From files, or type the place under Location → All photos → Same for all.
The watermark looks bigger on some photos than others. Turn on Scale with photo under the watermark's Layout. The watermark then scales with the photo's short side.
The exported photo is taller than the size I set. An info frame is added under the photo, so the output is taller by the height of the bar.
Are my original photos changed? No. Every export is a new file and the originals stay as they are. A file can only be replaced if Overwrite existing files is on and a file with the same name already exists in the output folder.
Where are my exported photos? In the Pictures/Watermark album by default. You can also tap View when processing finishes.
Click any screenshot to see it in full.